Okay, so you’ve built your website with ClickFunnels 2.0 and you have a blog. But there’s this blog post that you, for one reason or another, really want to delete. How can you do that?
The good news is that deleting a blog post in ClickFunnels is easier to do than you probably think. And we’ve written this tutorial to show you exactly how it’s done, step by step and with screenshots so you can follow along. Ready?
Deleting a Blog Post in ClickFunnels
Step 1: Fire up your browser, go to myclickfunnels.com, and sign in with your ClickFunnels 2.0 account.
Step 2: Open your site’s workspace, then head to the “Site & Funnels” tab from the left sidebar.
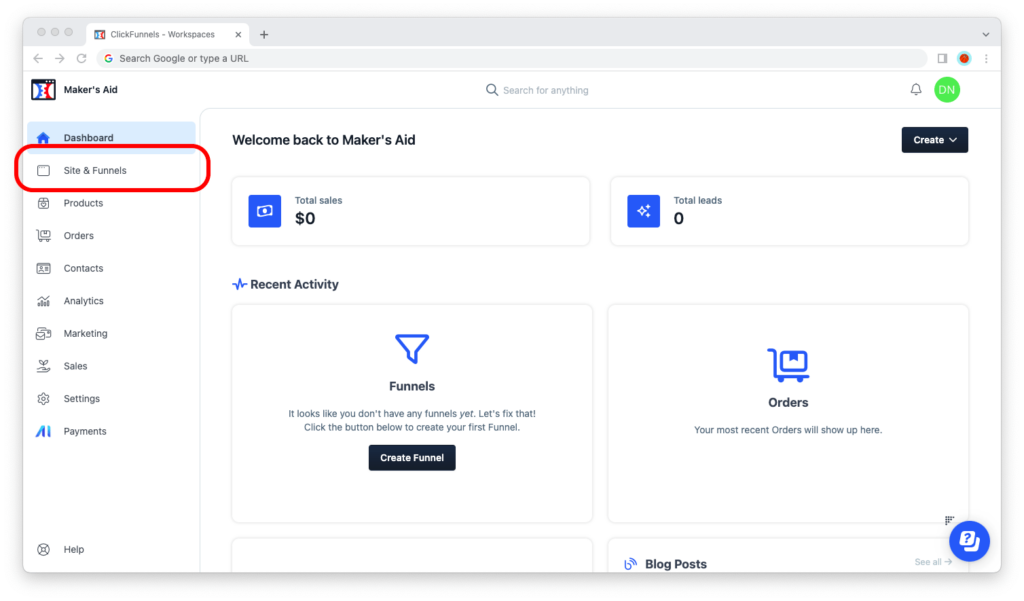
Step 3: Now go to the “Blog” tab.
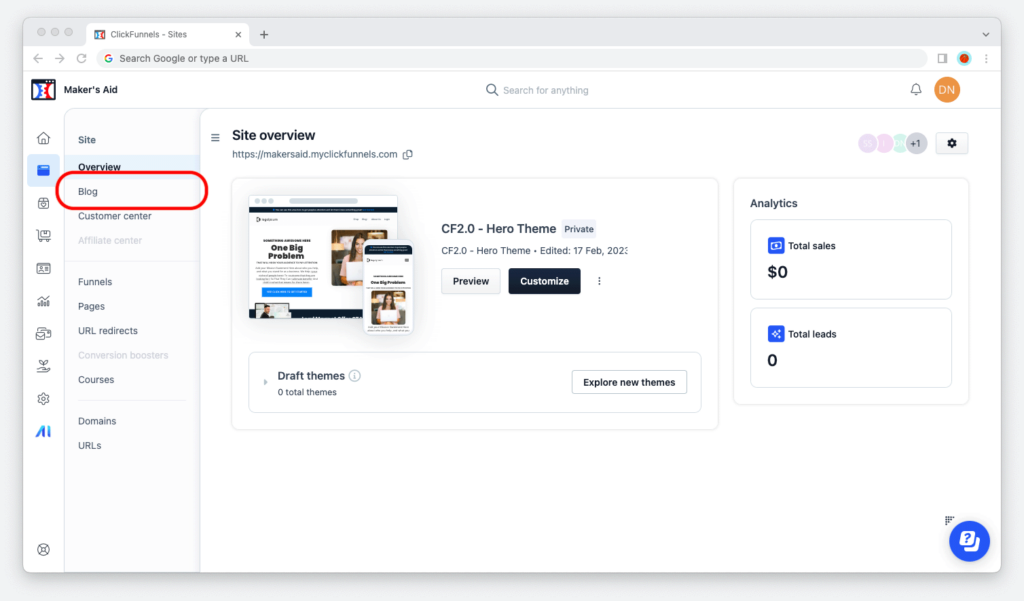
Step 4: Find the blog post you want to delete and click on the little gear icon on the right side of the screen; the one that says, “Edit post” when you hover your mouse’s cursor over it.
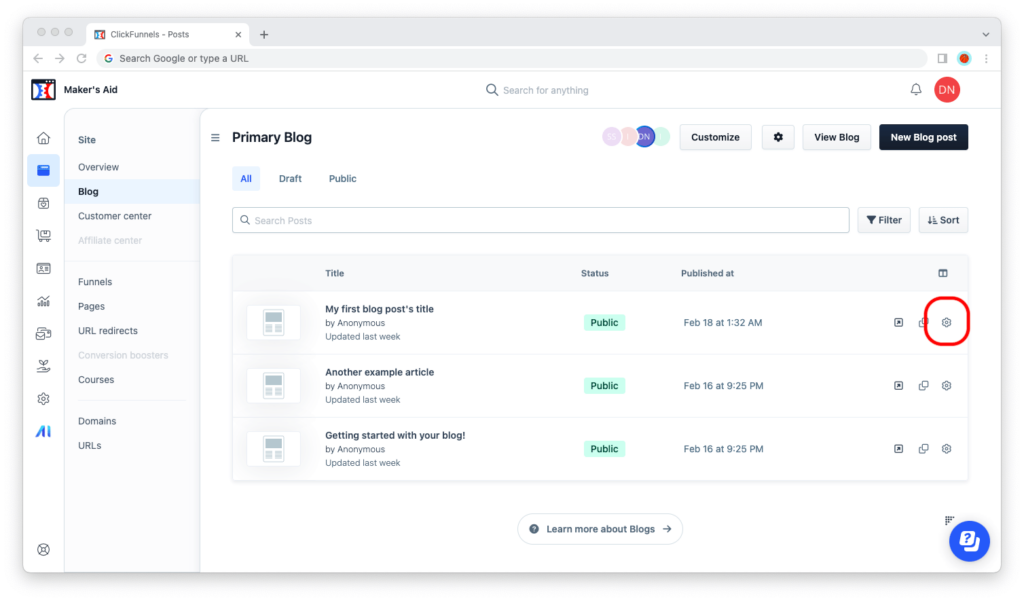
Step 5: Wait for the post settings editor to load, then scroll all the way down and click on the red “Delete blog post” button.
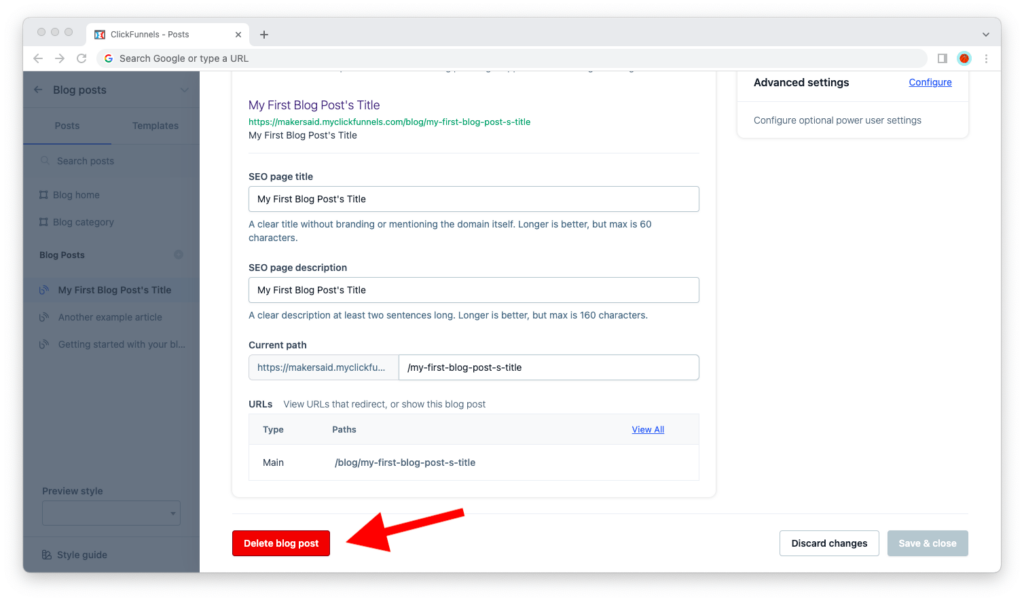
Step 6: Confirm that you really want to delete this blog post by clicking on the “Proceed” button. Remember that this will permanently delete the post and it can’t be undone.
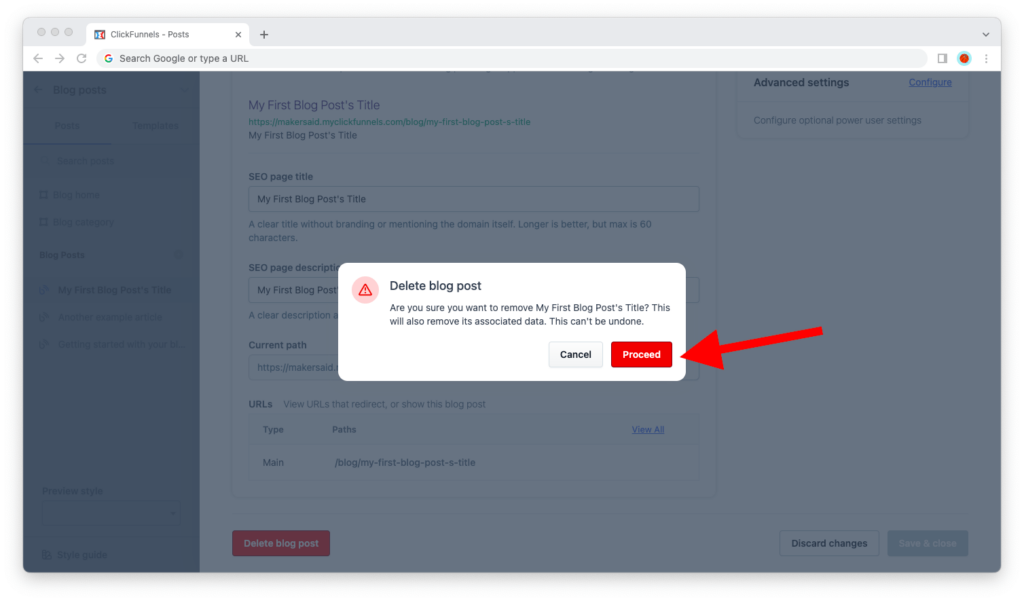
That’s it!
When the deletion is done, ClickFunnels 2.0 will redirect you to the list of blog posts again. If you read through the list of titles, it won’t take you long to find out that the blog post you just deleted is no longer on it.
SEO Considerations When Deleting a Blog Post
As a golden rule, it’s a good idea not to delete a post on your blog unless you have a valid reason to.
The most common reason is that the post in question isn’t getting any traffic from search engines and there’s no reason for it to sit on your blog anymore. Google, after all, has something called a crawl budget — it only looks at this many pages on a website this often, and you want to preserve that budget for what matters.
If you delete a blog post, its URL will return an error 404 when a visitor or a search engine crawler tries to visit it. For blog posts that don’t have any traffic and have no internal or external links pointing to them, that’s generally okay. However, if your blog post is getting traffic or has high-value links whose link juice you want to preserve, create a URL redirect instead: redirect the old URL or a new blog post or page.
Only redirect a blog post if the new page or post you’re redirecting to is relevant, though. Google doesn’t like it when you redirect for the sake of redirection, and doing it systematically can hurt your website’s search engine optimization.

