
Suppose you want to fire a tag (or block the firing of a tag) if the page URL contains a certain URL parameter. How can you do this with Google Tag Manager?
First, you need to extract the value of this URL parameter and save it as a user-defined variable in Google Tag Manager. If you don’t know exactly how to do that, I’ve explained it step by step, and with screenshots, in this post.
Second, you need to configure a trigger that applies only to the value of the URL parameter to which you want to apply it. This is what I’ll show you how to do in the rest of this post.
How to Trigger Based on URL Parameter in Google Tag Manager
Step 1: Fire up your browser, go to Google Tag Manager, and open the GTM container that you want to edit.
Step 2: Create a user-defined variable for the URL parameter. I’ve explained how to do this in a post titled “Extract a URL Parameter With Google Tag Manager.”
Step 3: Create a new trigger of the trigger type you want to use for the URL parameter. For the purposes of this tutorial, I chose the “Page View” trigger.
Step 4: Since this trigger should only work if the value of the URL parameter matches a certain rule, it shouldn’t work for all page views. So under “This trigger fires on”, select the “Some page views” radio button.

Step 5: Two dropdown menus and a text box will now be displayed on a new line. Configure your trigger to follow the business logic you need, knowing that:
- The first dropdown menu is for the name of the user-defined variable—the one from Step 2—you stored the value of the URL parameter in.
- The second dropdown menu is for the rule you want to apply to the value.
- The text box is for the value to which the rule should apply.
Here’s what this looks like in Google Tag Manager:
Step 6: Save the trigger.
Step 7: Test your setup in Preview mode. (Make sure the URL you’re testing contains the URL parameter with the value that you want to test.)
Real-World Example
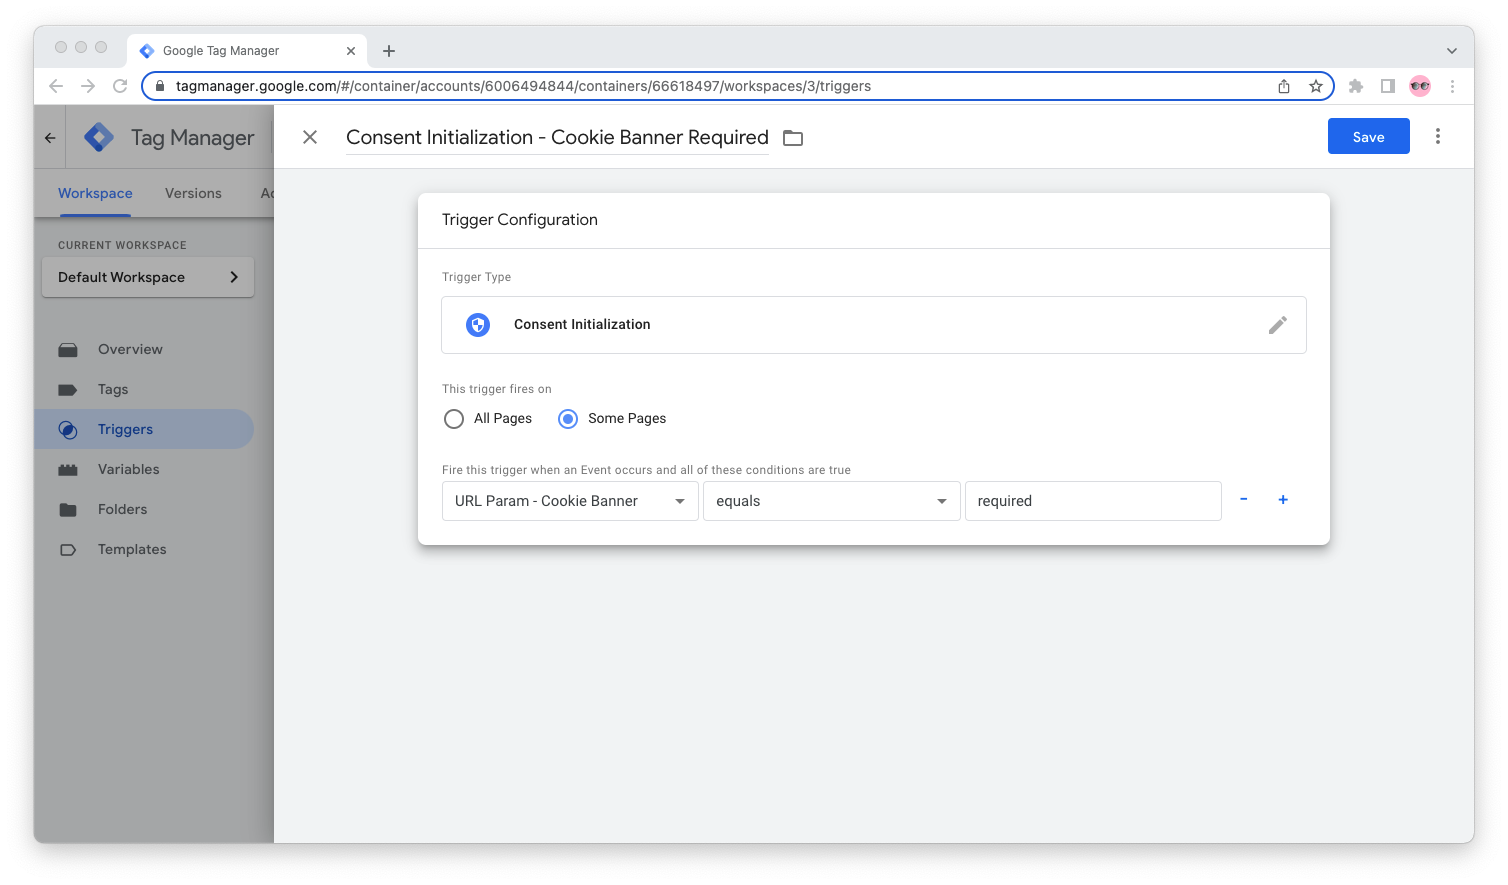
If you want to display a cookie banner only to visitors who visit your landing page through a link that contains the URL parameter cookie_banner=required, you can do so by following the steps in this tutorial.
By the time you’re done, your GTM container will have a user-defined URL variable that holds the value of the cookie_banner query:

And a Consent Initialization trigger that applies only when the cookie_banner URL parameter has a value that equals required:
Last but not least, you will have applied the trigger to the Custom HTML tag for your cookie banner:

This is just one of the many use cases for URL-based triggers. You can use this approach for any trigger and combine triggers with other triggers in Trigger Groups to create sophisticated triggering (or blocking) logic for your tags.