Tags are a great way to organize your contacts in ClickFunnels 2.0 and personalize their offers and overall experience on your website and in your sales funnels.
Although you can configure ClickFunnels 2.0 to automatically assign tags to your contacts based on the things they do in your funnels, you may need to manually tag a contact in your workspace every so often.
If you’ve never done this before and you’re not sure how it’s done, this tutorial will show you how.
Manually Tagging a Contact in ClickFunnels
Follow the steps in the guide below to manually tag a contact in ClickFunnels 2.0.
Step 1: Fire up your browser, go to myclickfunnels.com, and sign into your ClickFunnels 2.0 account.
Step 2: Open your site’s workspace.
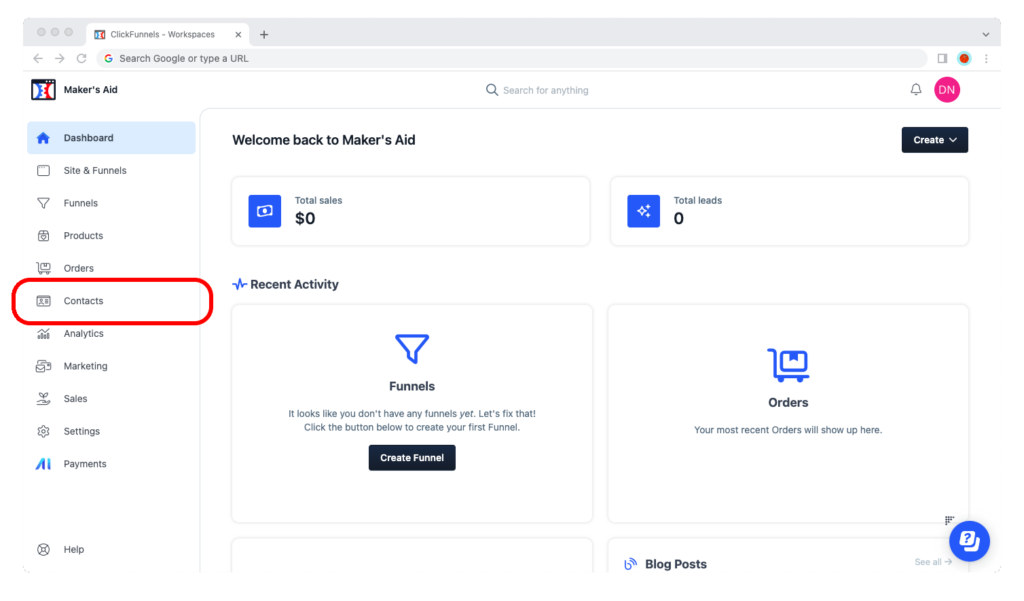
Step 3: Go to the “Contacts” tab from the left sidebar.
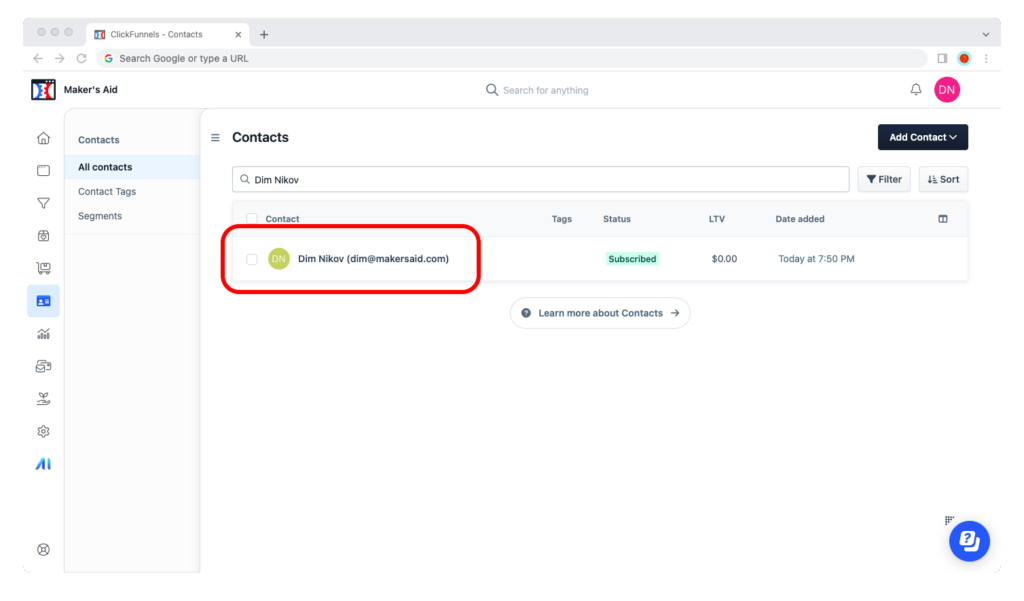
Step 4: Search for the contact whom you want to manually tag, then click on their name.
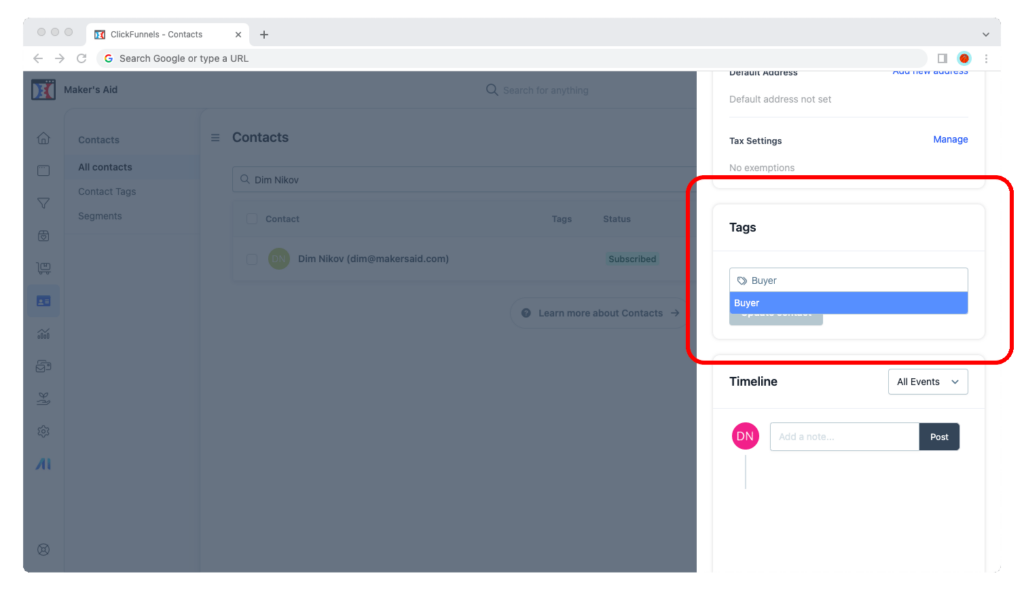
Step 5: Scroll down until you see “Tags.” Type in the name of your tag and select it with your mouse or hit the Enter key on your keyboard.
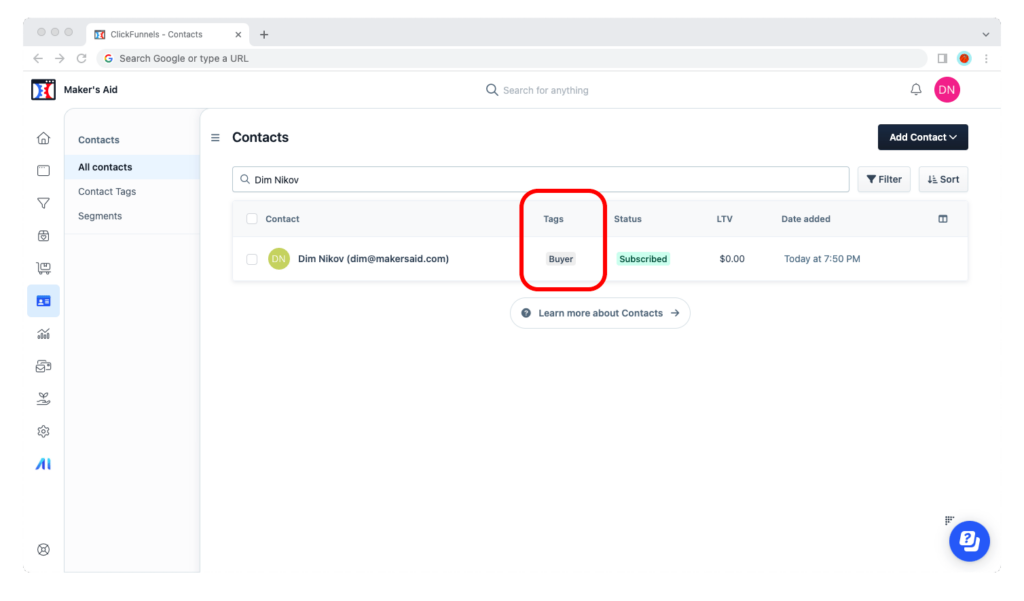
Step 6: You know everything worked if you refresh the “All contacts” tab and see the tag next to the contact’s name.
That’s it!
You’ve just manually tagged a contact in your ClickFunnels 2.0 workspace for the first time. That contact will now be included in any segments that use this tag. (Don’t know what segments are? Check out our tutorial on how to create segments!)
