Whether you’re a funnel builder, course creator, affiliate marketer, dropshipper, or online seller, ClickFunnels 2.0 is the best funnel-building tool for your needs, and mastering it can help you take your sales (and your revenue) to another level.
One of the features that make ClickFunnels 2.0 so good are workflows. With workflows, you can automate much of your advertising and marketing by creating sequences that convert visitors into leads and leads into customers in a repetitive and automated way, leaving you with the only challenge of acquiring more and more traffic to your funnels.
But workflows can be hard to master. Which is why we wrote this guide. If you’re new to ClickFunnels 2.0 and you’re not sure how to create your first workflow, you’re in the right place; we’ve rounded up everything you need to know and laid it all out of you.
How to Create a Workflow in ClickFunnels
A workflow in ClickFunnels 2.0 is a basically automation that lets you send emails, assign tags, or pass data to third-party tools via webhooks whenever a contact does something in your funnels or on your website, like opting into a form or buying a product.
Follow the guide below to create your first workflow in ClickFunnels 2.0.
Step 1: Fire up your browser, go to myclickfunnels.com, and sign into yuor ClickFunnels 2.0 account.
Step 2: Open your website’s workspace.
Step 3: Switch to the “Marketing” tab from the left sidebar.
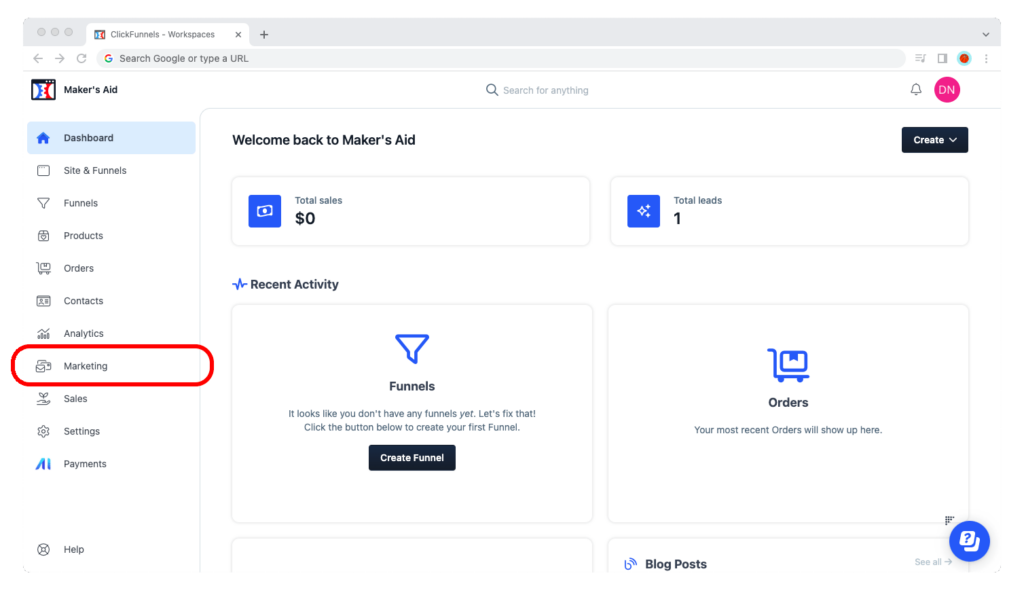
Step 4: Make sure you’re in the “Workflows” tab. (And if you’re not, switch to it.)
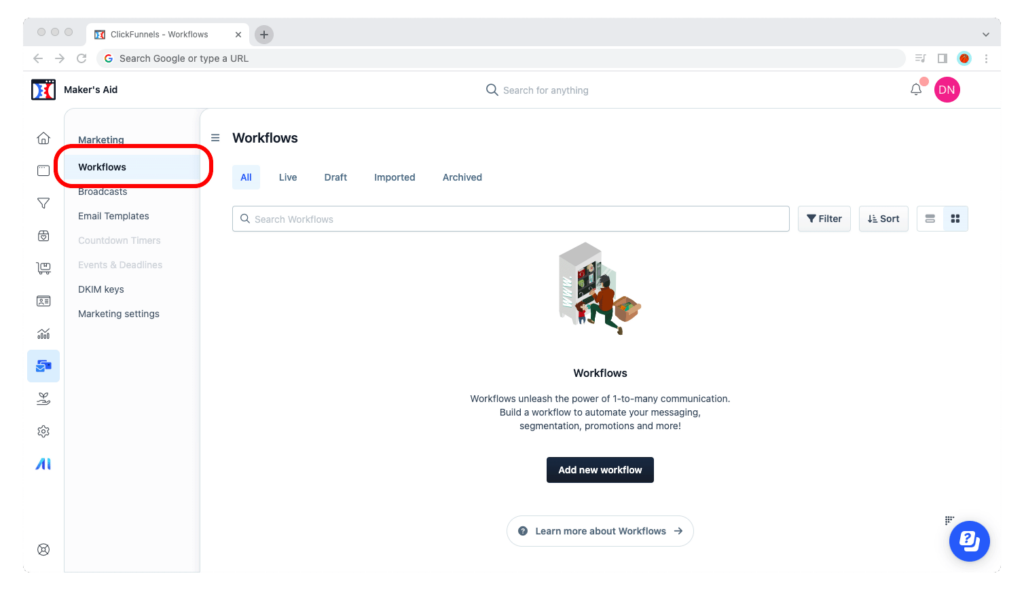
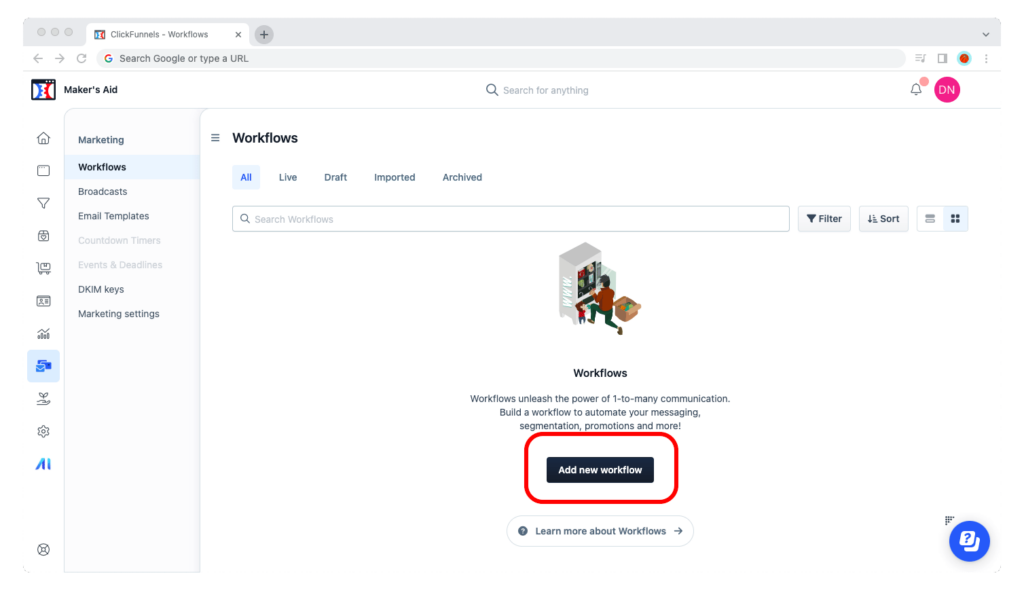
Step 5: Click on the “Add new workflow” button.
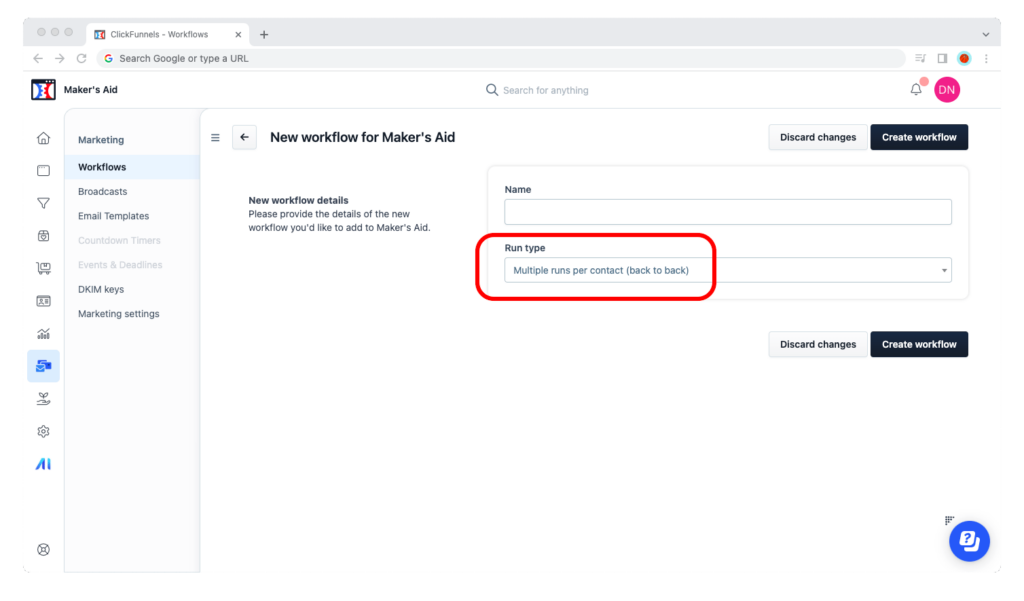
Step 6: Give your workflow a name (this is internal; only you and your team will see it).
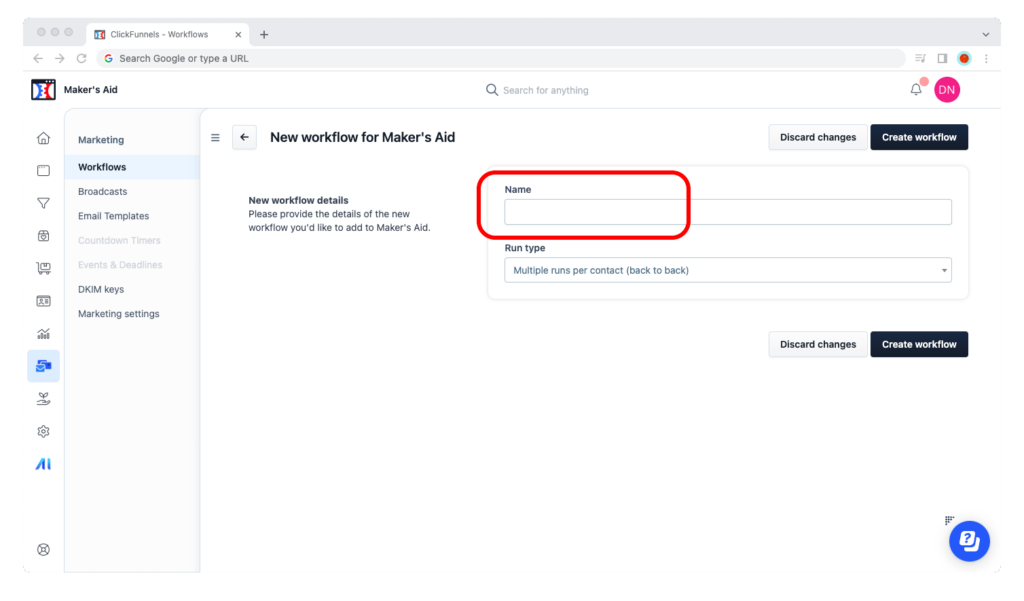
Step 7: Select your workflow’s run type. You can select between:
- Multiple runs per contact (simultaneous) – the workflow will run as many times as triggered for any given contact, and if two runs overlap, they will happen simultaneously.
- Multiple runs per contact (back to back) – the workflow will run as many times as triggered for any given contact, but if two runs overlap, they will happen one after the other, and never at the same time.
- Only one run per contact – the workflow will run only once for any given contact, even if it’s triggered multiple times.
Nine times out of ten, you’ll want to go for Option 2 if you want multiple runs per contact and Option 3 if you want one run per contact.
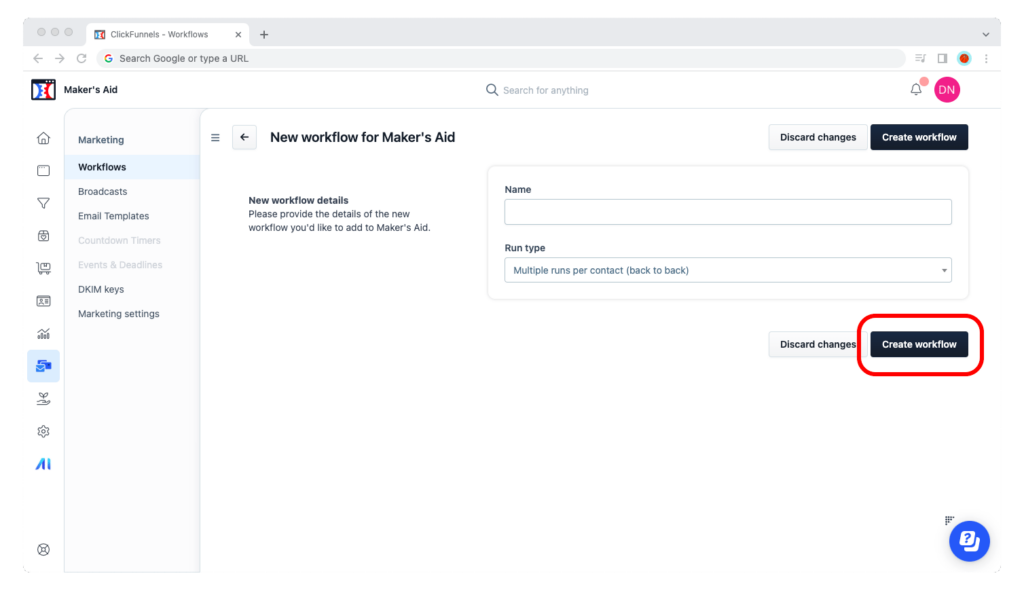
Step 8: Click on the “Create workflow” button.
Congrats!
You’ve now created your first workflow in ClickFunnels 2.0 It’s an empty workflow, although it has a name and a run type. But a workflow nevertheless. Now, you need to continue building it; read on below.
Start Your Workflow With a Trigger
To add a trigger event to your workflow:
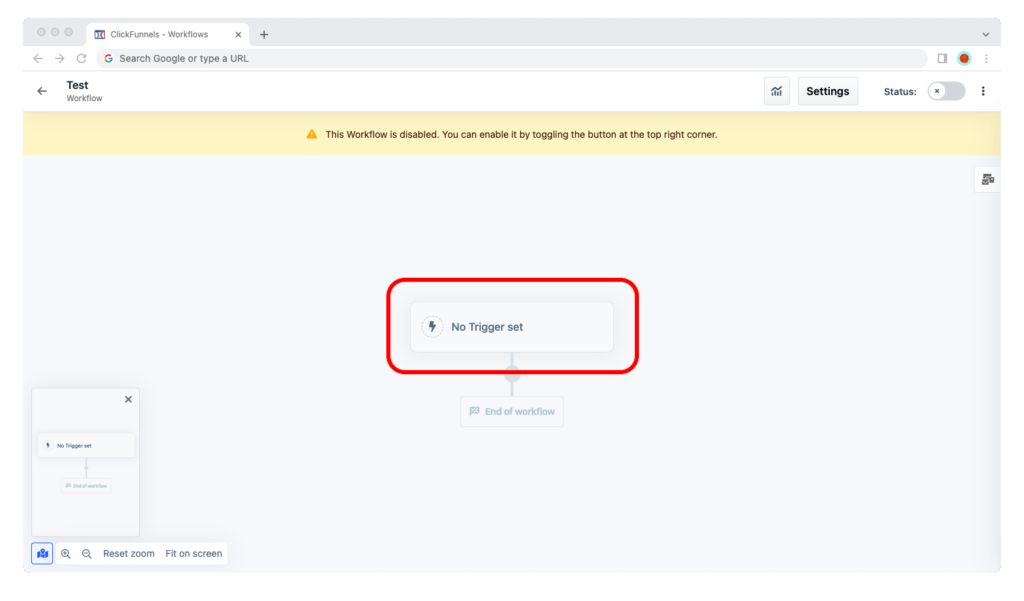
Step 1: Click on the box where it says, “No Trigger set.”
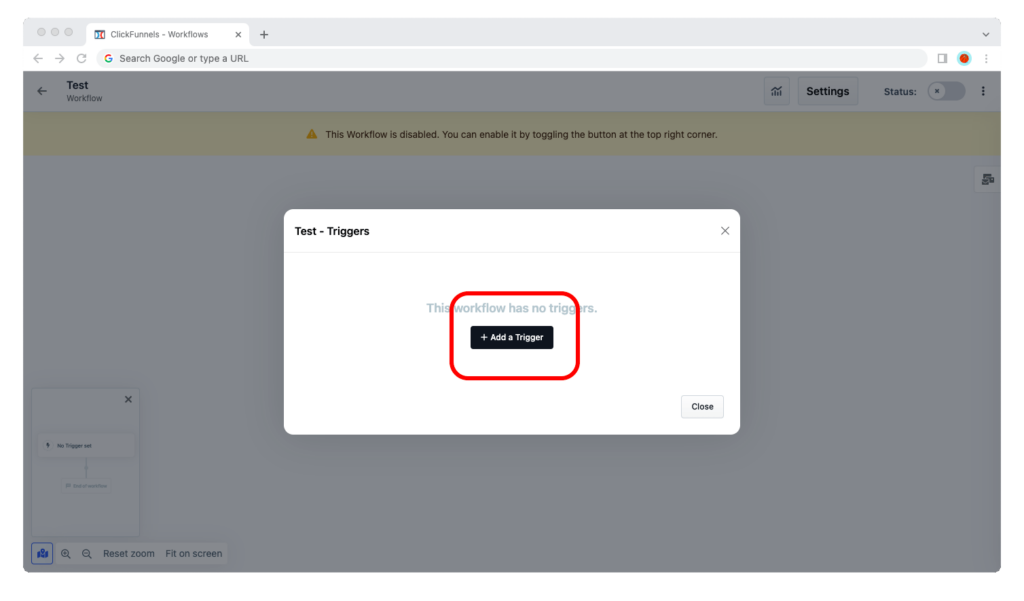
Step 2: A window will pop up telling you, “This workflow has no triggers.” Click on the “Add a Trigger” button.
Step 3: Leave the trigger as inactive for now.
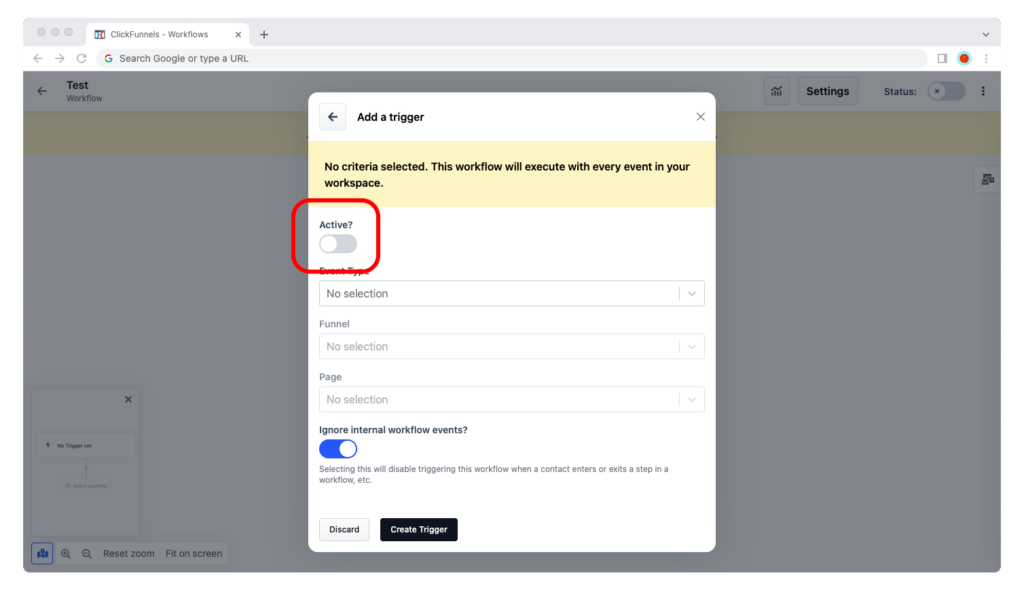
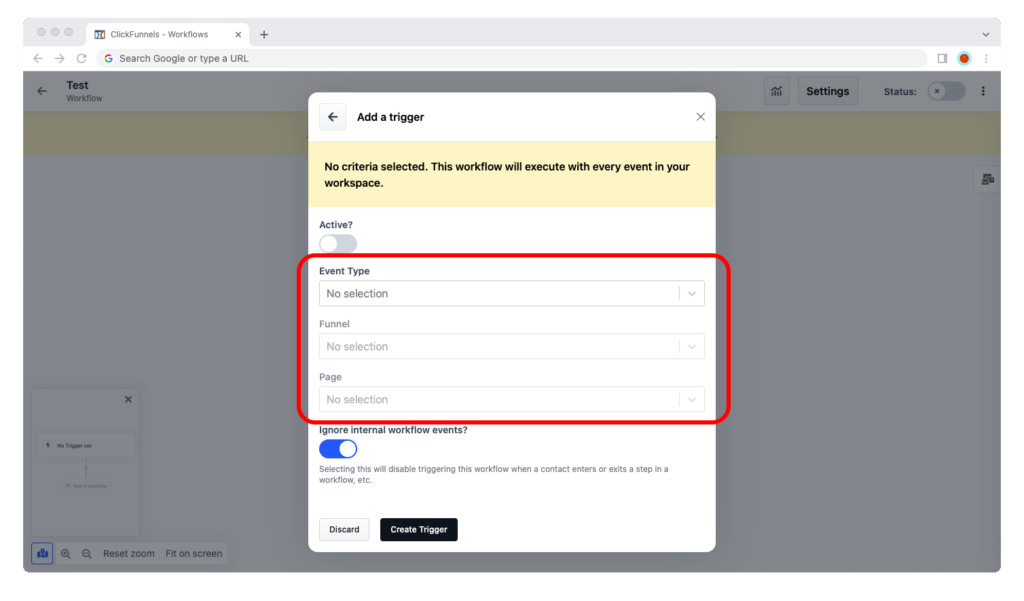
Step 4: Select the trigger event type and the funnels and/or pages that it applies to.
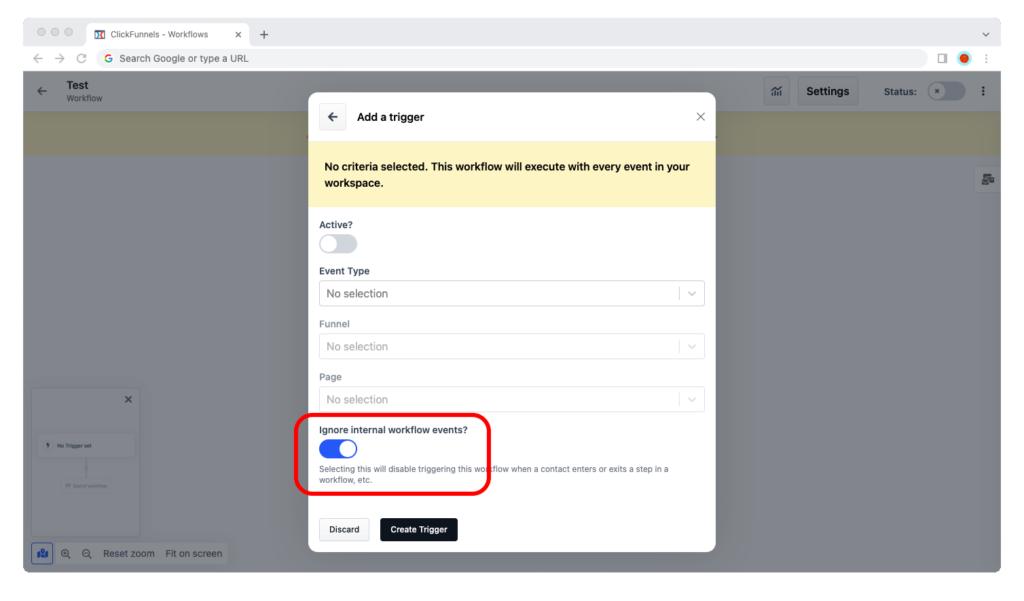
Step 5: Leave “Ignore internal workflow events” on. Otherwise, the workflow will trigger whenever any of the workflow’s steps are true — most of the time, you only want one trigger.
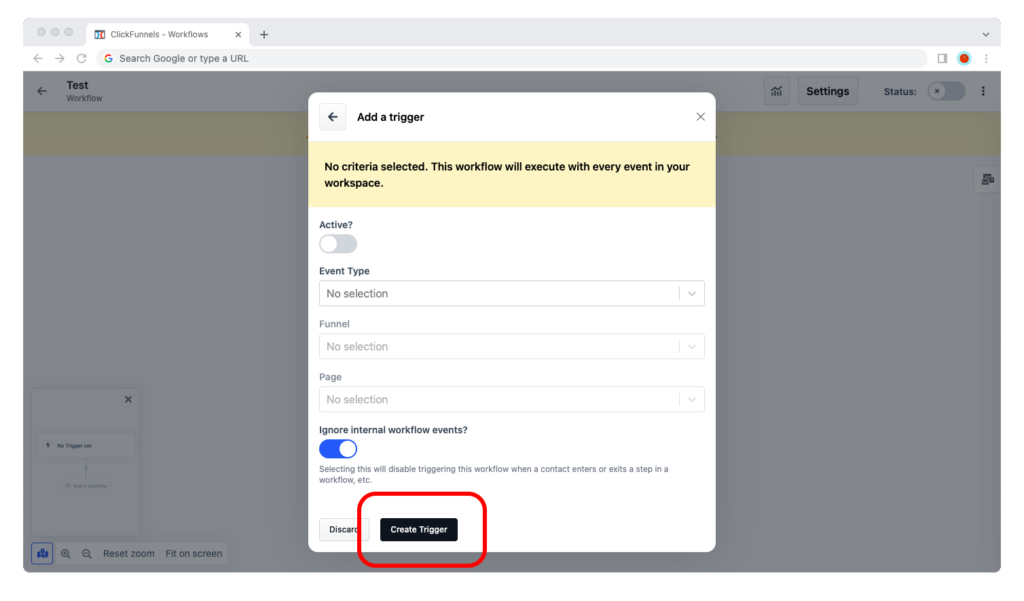
Step 6: Click on the “Create trigger” button.
Trigger events, explained:
Every workflow has a trigger, an event with certain criteria, which must be true in order for the automation to kick in. A workflow must have at least one trigger, but you can also add as many triggers for a single workflow as you want.
Here are a few example triggers:
- A contact registers for a calendar event on a funnel or a page
- A contact opts into an optin form on a funnel or a page
- A contact buys a given product successfully
- A contact views a given funnel step
Workflows are really powerful because they help you automate your advertising or marketing and boost your conversion rates to new heights. You can set up workflows to send a series of emails to any lead who abandons their cart, or to build custom or lookalike audiences on Meta and Google Ads based on their email addresses or phone numbers (make sure to ask for their consent if you need it first).
You do this by adding steps.
Next, Add Steps to Your Workflow
To add a step to your workflow:
Step 1: Click on the small gray circle where you want to insert the step.
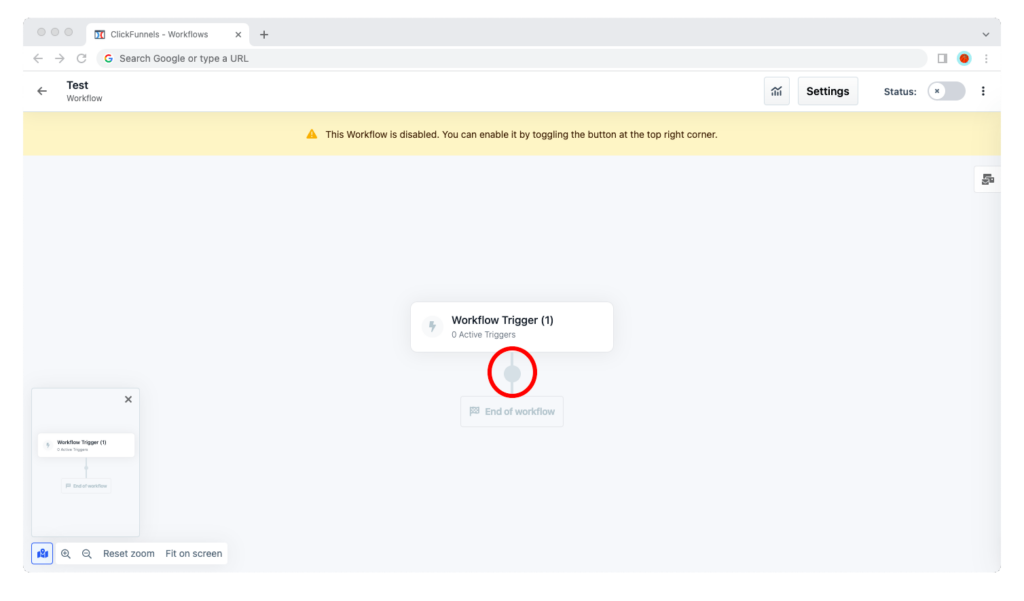
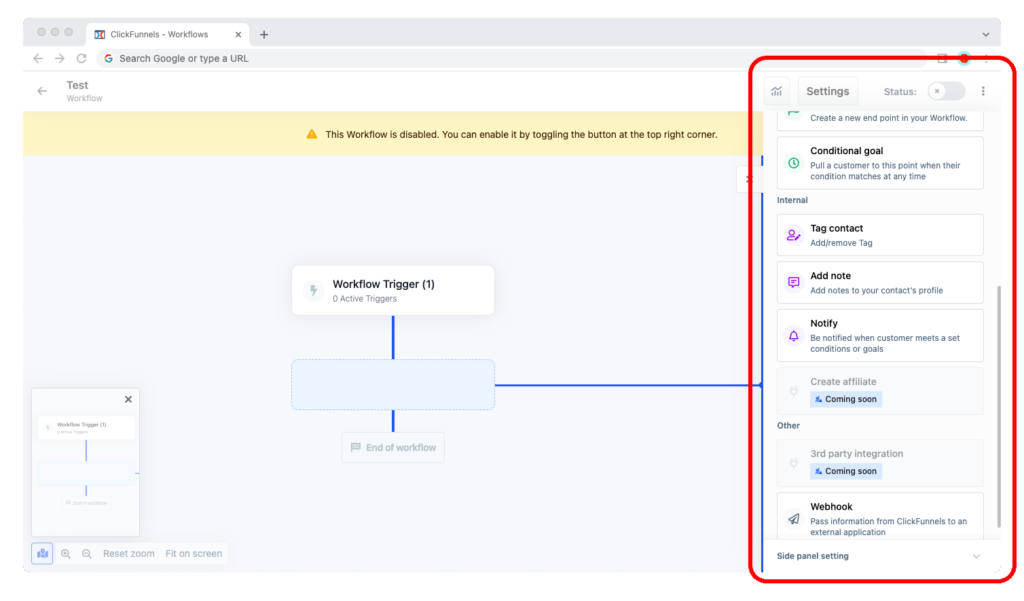
Step 2: Select a step type from the right sidebar and drag-and-drop it into the gray circle with your mouse.
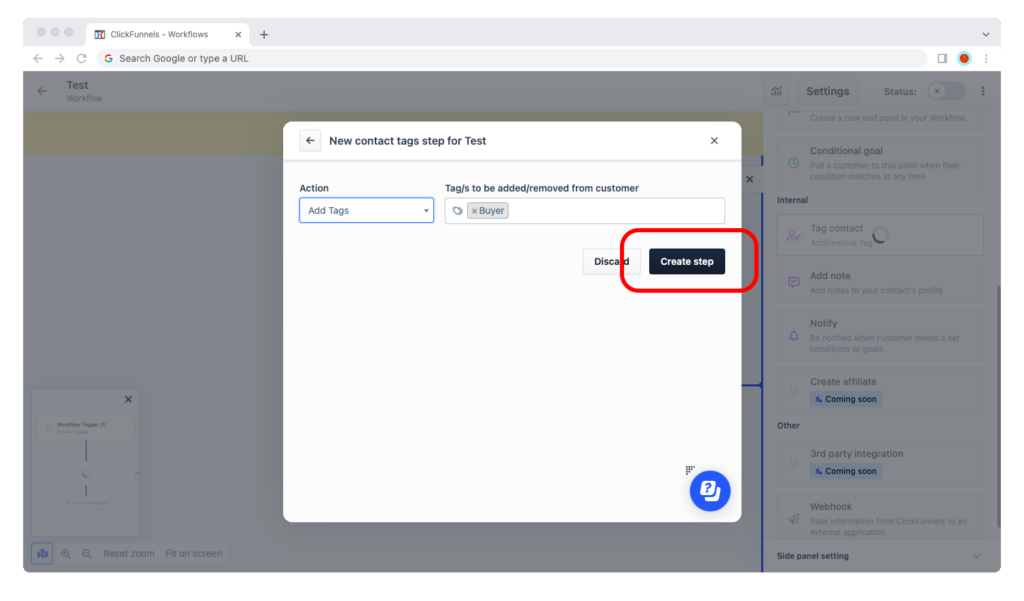
Step 3: Configure your step’s settings. If there’s a “Create step” button, click it.
Workflow steps, explained:
Steps are the logical sequence of actions that take place within a workflow once it’s been triggered by an event. A different, and maybe better, term for “steps” would be “automation steps.”
For example, if the triggering event is somebody buying a promotional bundle of three courses, you would want to add a step that enrolls them in those courses and probably another that assigns a “Buyer” tag to their contact profile so they end up in your “Buyers” segment (learn how to create segments).
Let’s look at the types of steps that you can add to a workflow:
- The Delay step adds a given amount of waiting time before the next step. You can add delay in minutes, hours, days, weeks, months, and even years.
- The Conditional Split Path step splits your workflow into two branches based on whether a given condition is true (for example, if a contact has a tag or not).
- The Split Test step splits your workflow into two branches based on the traffic, allowing you to conduct A/B testing by sending a percentage to your contacts down one branch and the rest down the other.
- The Add/remove tag step assigns or removes a tag from a contact.
- The Send Email step sends a single email message to the contact.
- The Enroll step enrolls a customer in one or multiple courses in your workspace.
- The Webhook step sends a webhook to a given URL, allowing you to send customer data to third-party tools or an automation platform like Zapier.
- The Trigger Another Workflow step sends the contact into another workflow.
- The Notify trigger sends an alert to select team members via email or a notification.
- The Add Note step adds an internal note to the contact’s profile in your workspace.
The best way to become familiar with these steps is to create a test workflow in ClickFunnels 2.0 and fool around with each of them until feel like you’ve gotten the hang of it. You can go through the workflow with a test account if you want to, though you don’t necessarily need to — just playing around with their options should be enough to help you understand how they work.
When Your Workflow’s Ready, Enable It
The last and final step of creating a workflow is to enable it. By enabling a workflow, you’re basically making it live. This means that any contacts whose actions meet the criteria for your workflow’s triggers will go through that workflow and its steps.

