Editing a video in Canva? You’ll be glad to learn that you can add sound to your video. This sound can come from the video footage itself, from a separate sound track, or both—and you can adjust its volume to your liking from the Canva editor.
You can upload your own audio tracks, especially if you want to add microphone recordings or background music. And you can use the royalty-free stock footage and audio from Canva’s library.
This tutorial will show you how to do both. So if that’s what you came here to find out, read on.
How to adjust the volume of video footage in Canva:

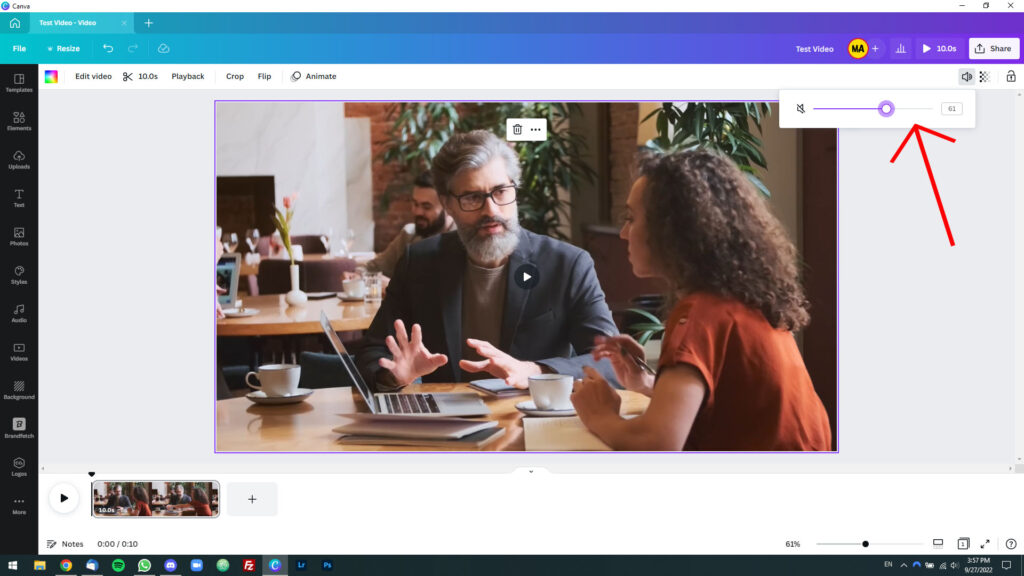
Say you’re editing a video in Canva and you have video footage with sound. To adjust its volume, click it with the left mouse button to select it, then click on the volume icon in the upper-right corner of the window. Using the slider, set the volume to the desired level.
If you set the volume to zero, you will mute it. We’ve written a whole article on the topic titled, How to Mute Your Videos in Canva. So if you want to learn more about how to do this, check it out.
How to add audio to your Canva video:

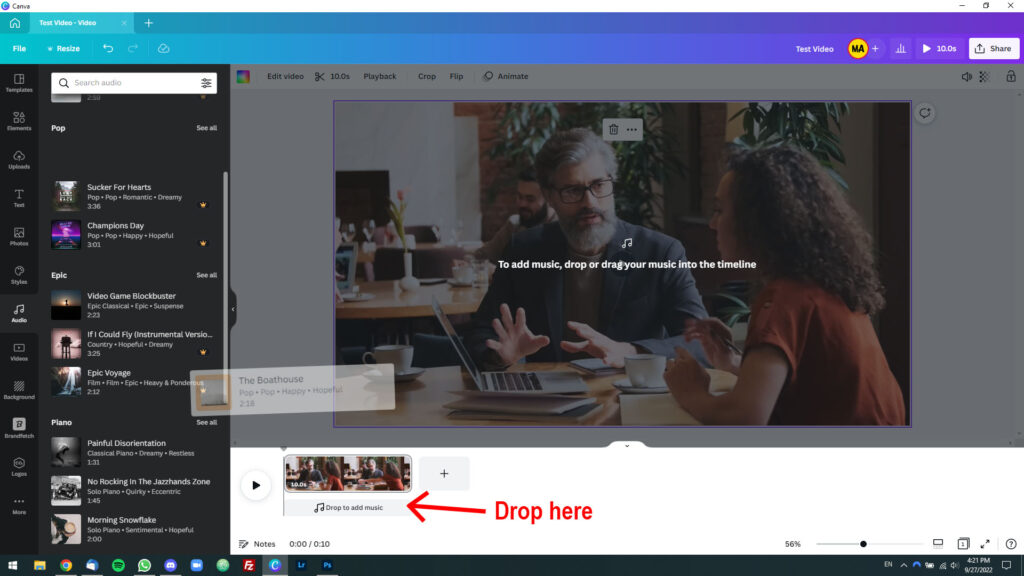
To add audio to a Canva video, click “More” at the bottom of the left sidebar and bring up the “Audio” tab. Next, find a tune you like and drag and drop it onto the timeline in the Canva editor.
You can also upload your own audio tracks to Canva, whether they’re audio files purchased on the Internet or audio recorded with a microphone. To do this, simply locate the audio file on your computer and drag and drop it into Canva. From there on, you can find it in the “Uploads” tab in the sidebar.
Note: If you don’t have an audio track under your video footage yet, you won’t see the audio timeline at first. You’ll need to go to the “Audio” or “Uploads” tab and then drag and drop an audio track to make it appear.

