Not everyone knows that, in Canva, you can not only create and edit videos but also insert transitions between shots.
So if you’re learning Canva and you want to know how to create videos with transitions, this tutorial will show you how—in just four steps, explained in plain English and with screenshots.
How to add transitions to your Canva videos:
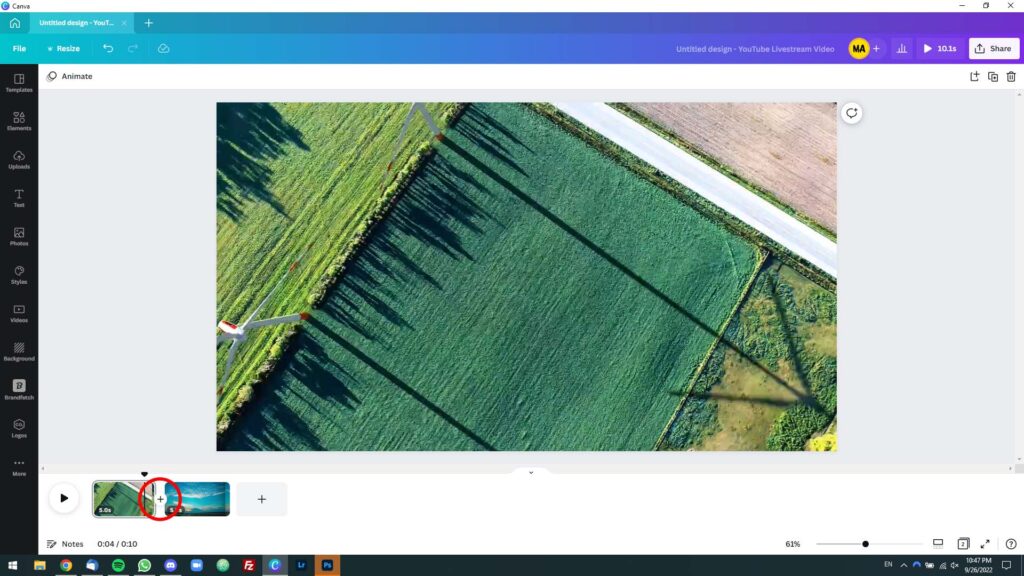
Step 1: Click on the “+” icon between the two shots where you want to add a transition.

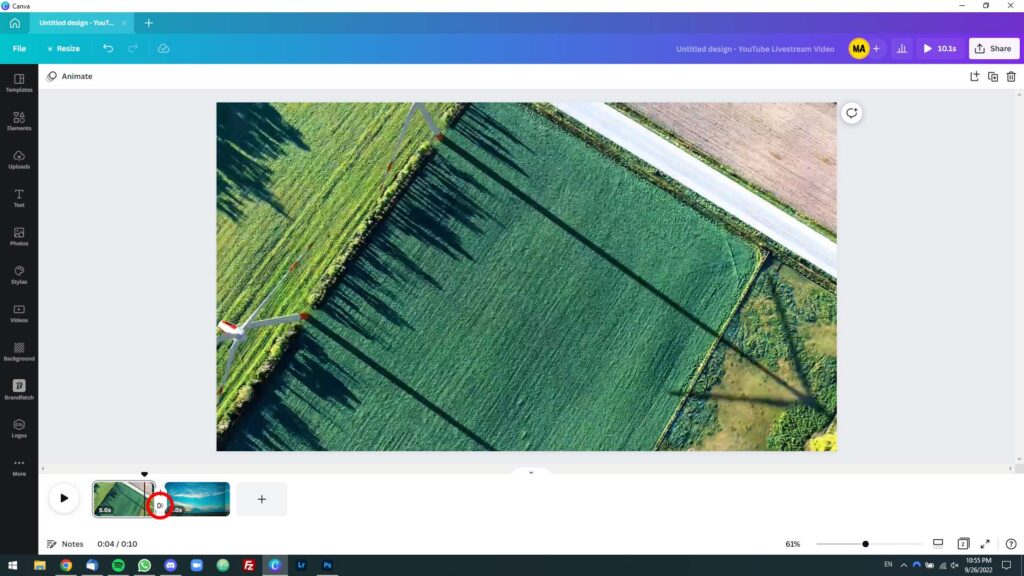
Step 2: A small menu with two options will pop up. The top option is for adding a page (or shot), and the bottom option is for adding a transition. Click on the latter.

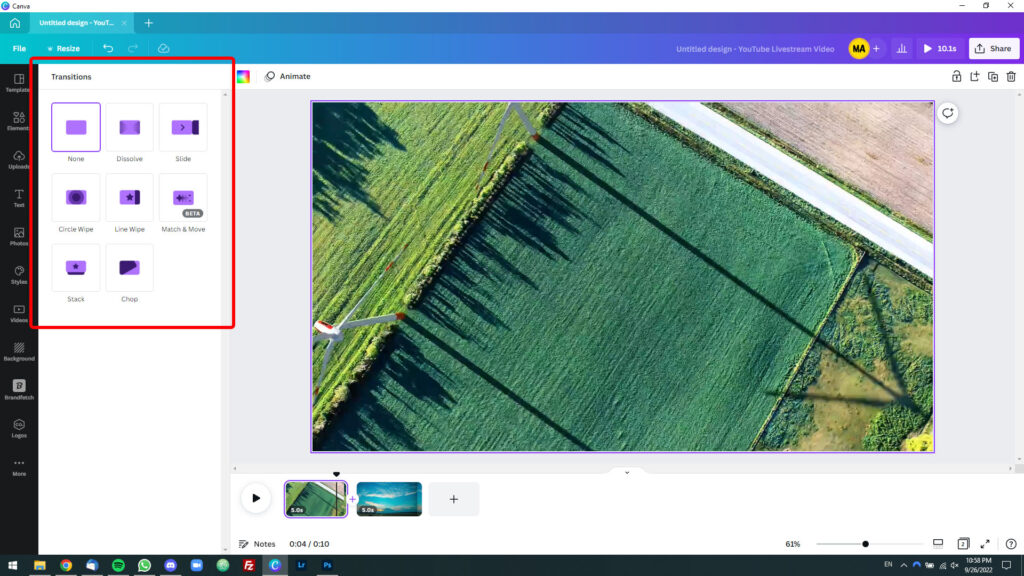
Step 3: A list of transitions will be displayed in the left sidebar. Try different transitions until you find the one you like best.

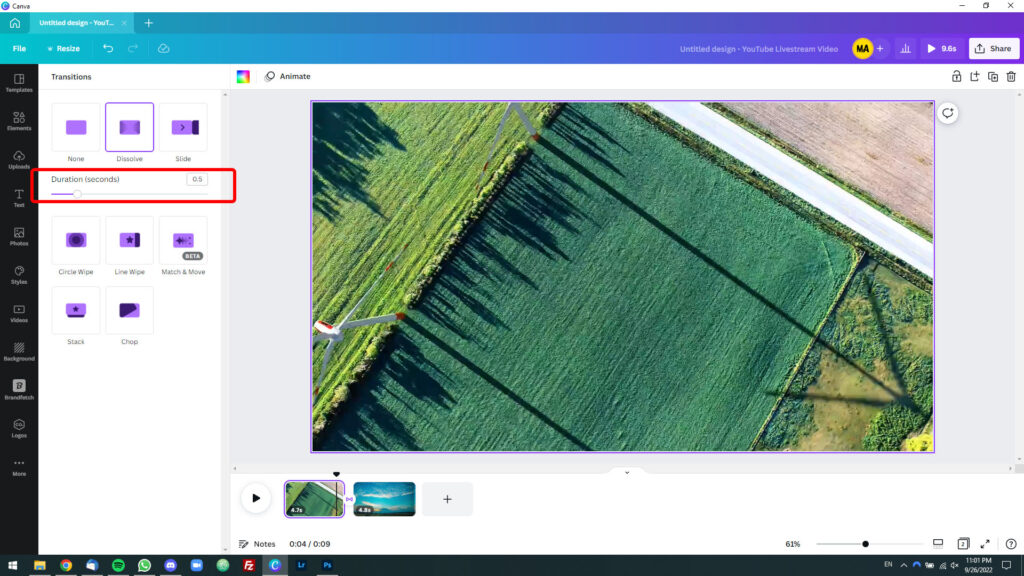
Step 4: Configure the transition’s duration to your liking using the “Duration (seconds)” slider.

Pro tip: Do you want to add a transition between two scenes in the same page (shot)?
Move the slider to the place where you want to insert the transition, and then press S on your computer’s keyboard.

This will split the shot into two at the point where you moved the slider. Now, you can easily add a transition between them using the steps in this tutorial.

