If your Canva image or video downloads blurry, it’s probably because it contains resized design elements that are too small and can’t be scaled. Images can also be blurry when downloaded as JPG files with reduced quality.
In this article, we will go into the details of both of these cases so you know exactly what the cause is and the things that you can do to fix it.
Reason #1: They Contain Resized Elements That Don’t Scale
If your Canva images or videos are downloading blurry, then they probably contain resized design elements that are too small and don’t scale.
How can you find out if this is the case for you? It comes down to three things, really:
- The size of your Canva design
- The type of design elements that you used
- Whether you resized those design elements to make them bigger
The size of your Canva design:
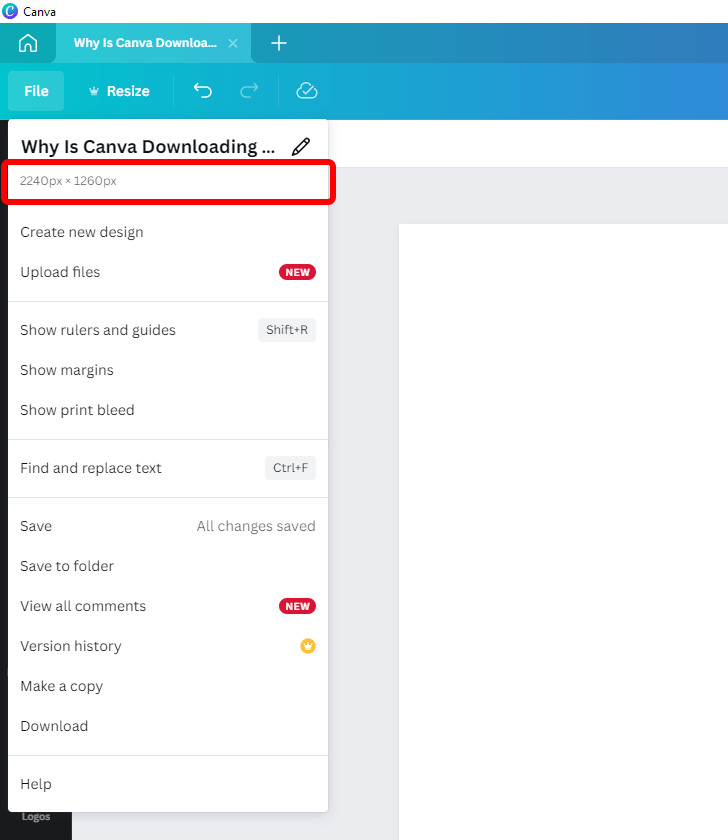
To determine the size of your Canva design, click on “File” in the upper left corner of the screen and look at the values under that design’s name.

The width and height of your Canva design are given in pixels.
In other words, in the example above, the Canva design has a width of 2,240 pixels and a height of 1,260 pixels.
The type of design elements that you used:
There are many image formats out there, from the JPG/JPEG, PNG, and SVG images on the web to the HEIC/HEIF photos on our iPhones. And yet all images can generally be classified into one of two categories: raster images or vector images.
Raster images are made up of pixels—tiny squares on a huge grid, each with its own color. Viewed together and from a distance, these pixels make up the image. Raster images can contain a lot of details, which is why they’re used for photography, scanning, and painting, but they don’t resize well.
The raster image formats that you can upload into Canva are JPG/JPEG, PNG, HEIC/HEIF, and WebP.
Vector images are mathematical formulas that your phone, tablet, or computer reads to draw a simple and infinitely scalable image on the screen. Because they are rendered from a mathematical formula, vector images can be sized up and down without losing quality.
The only vector image format that you can upload into Canva is SVG.
Whether you resized those design elements to make them bigger:
Why am I telling you all of this?
Because if you used a raster image from the Canva library (say, a stock photo or a cut-out from a stock photo in the “Elements” tab), or you uploaded your own image and resized it to make it larger than it actually is, it will get blurry.
And if that image appears blurry in the Canva editor, it will also appear blurry when downloaded. The same applies to any images, design elements, or stock footage that you use in your Canva-created videos.
The solution: Add appropriately sized stock photos, design elements, or video footage to your Canva images and videos. If they are raster images, do not resize them above their original size in pixels.
Reason #2: You Downloaded Them as JPG With Low Quality
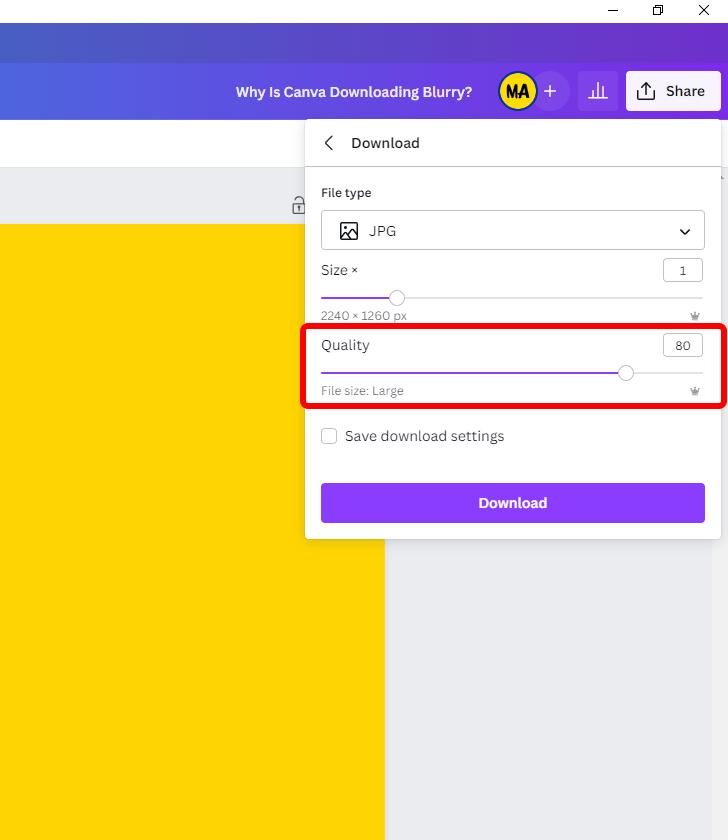
If you’re subscribed to Canva Pro, Canva’s paid plan that unlocks more features, you can control the quality of your designs when you export them as JPG files.

So when you’re exporting your Canva designs as JPG, there’s a compromise that you will have to make: A JPG file with a quality of less than 100 will be smaller, but it will also be slightly blurrier. Conversely, a JPG file with a quality of exactly 100 will have no loss of quality, but it will also be very large.
The solution: Download your Canva images as JPG files with 100% quality or as PNG files.

