Beginners in graphics editing are often intimidated by Photoshop because it has so many features and options to choose from. In truth, though, Photoshop is really easy to use—you just have to know what to look for and where to find it!
Making a .gif image loop, whether infinitely or only for a certain number of times, is one of those things that only takes a few clicks in Photoshop. And, in this tutorial, I’ll show you how to do it step by step.
How to Loop a GIF in Photoshop
Steps to loop a .gif image in Photoshop:
Step 1: Launch Adobe Photoshop and open the .gif file that you want to loop.
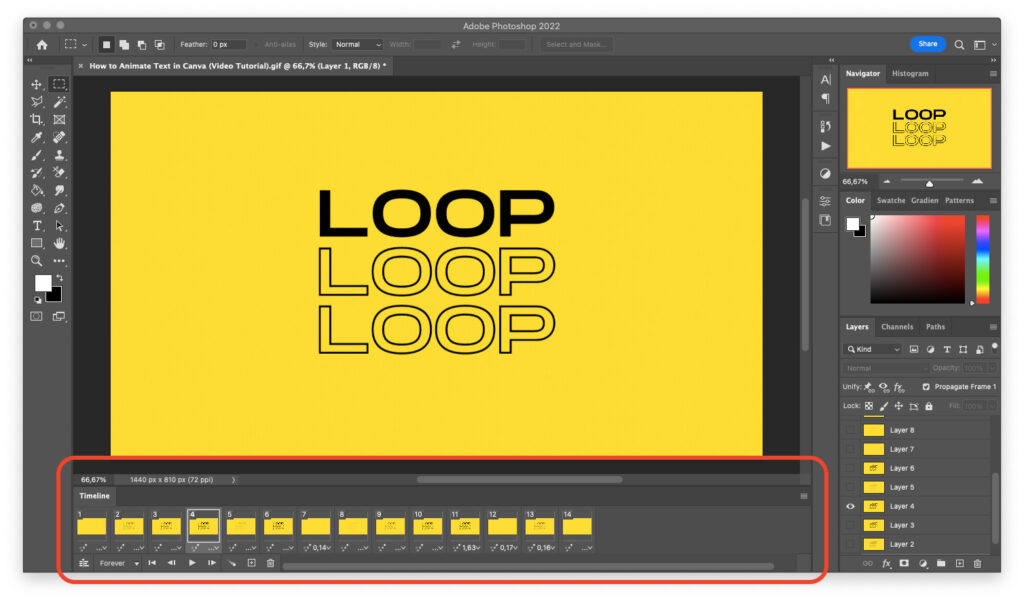
Step 2: Make sure the “Timeline” window is in your Photoshop workspace. If it isn’t, go to Window > Timeline to add it.

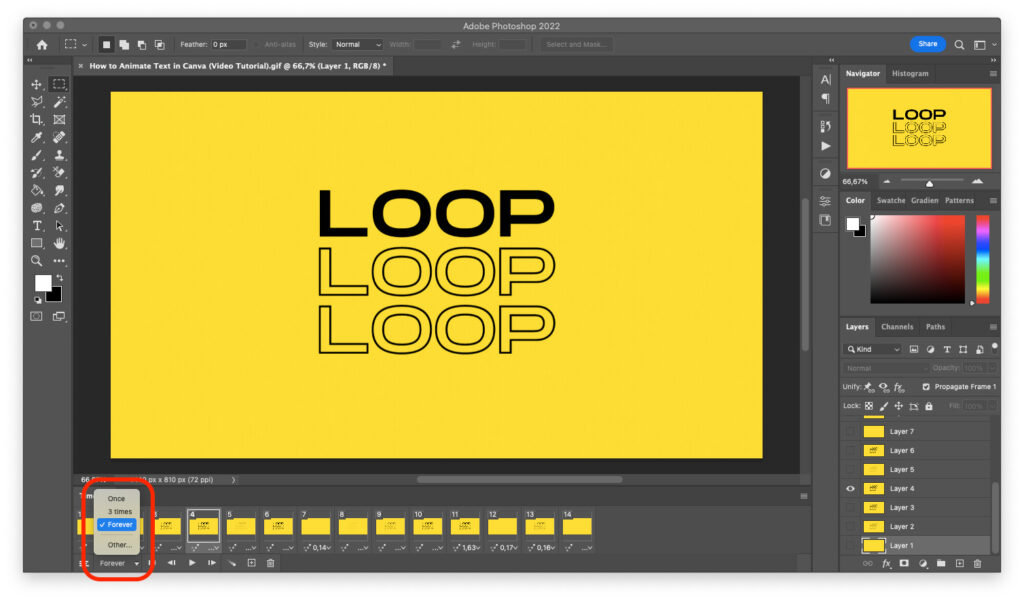
Step 3: From the dropdown menu at the bottom of the “Timeline” window, select “Forever” if you want your GIF to play in an endless loop, or “Other” if you want it to play only a certain number of times.

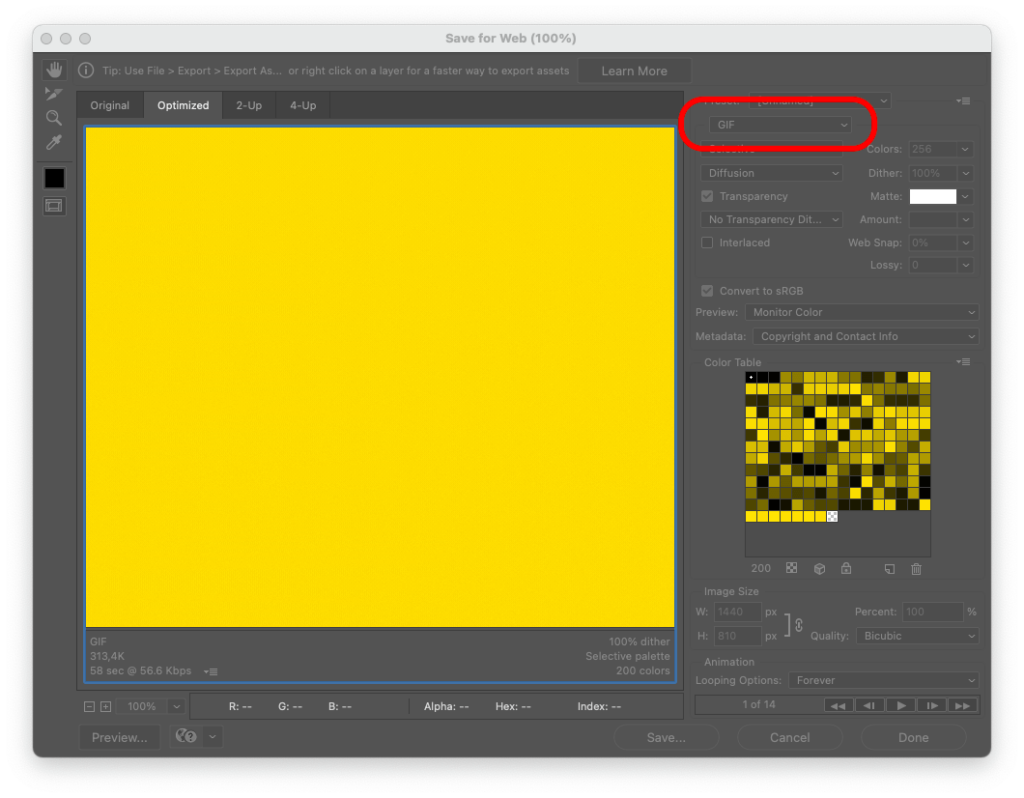
Step 4: To export your animated .gif, click on File > Export > Save for Web (Legacy) and save it as a GIF file.
Keep in mind that you can’t export an animated .gif from the new saving interface. This is why you should use Save for Web (Legacy).

Step 5: You’re all set! Open the .gif image in your image viewer or browser to check if it behaves as expected (as long as you followed the steps in this guide, it should).
Final Words
Now, you know how to loop your .gif images in Photoshop, infinitely or for as many times as you want!
Animated .gifs can get pretty big. Unless you’re uploading yours to a social media network, like Giphy, you probably want to keep tabs on the size of your file.
If your .gif ended up being too big, consider compressing it with an online tool, like Ezgif.com’s free compressor.

