Suppose you’re creating a test case in Selenium IDE, and you need to upload a file in one of the steps. What’s the best way to do that?
Well, I have good news for you. Not only will I show you exactly how to upload a file with Selenium IDE, step-by-step and with screenshots, but it’s also easier to do than you probably think.
Part 1: Give Selenium IDE Access to File URLs
This part only applies to Chrome users. If you’re on Firefox, you don’t need to do it — skip it and continue to part 2 instead.

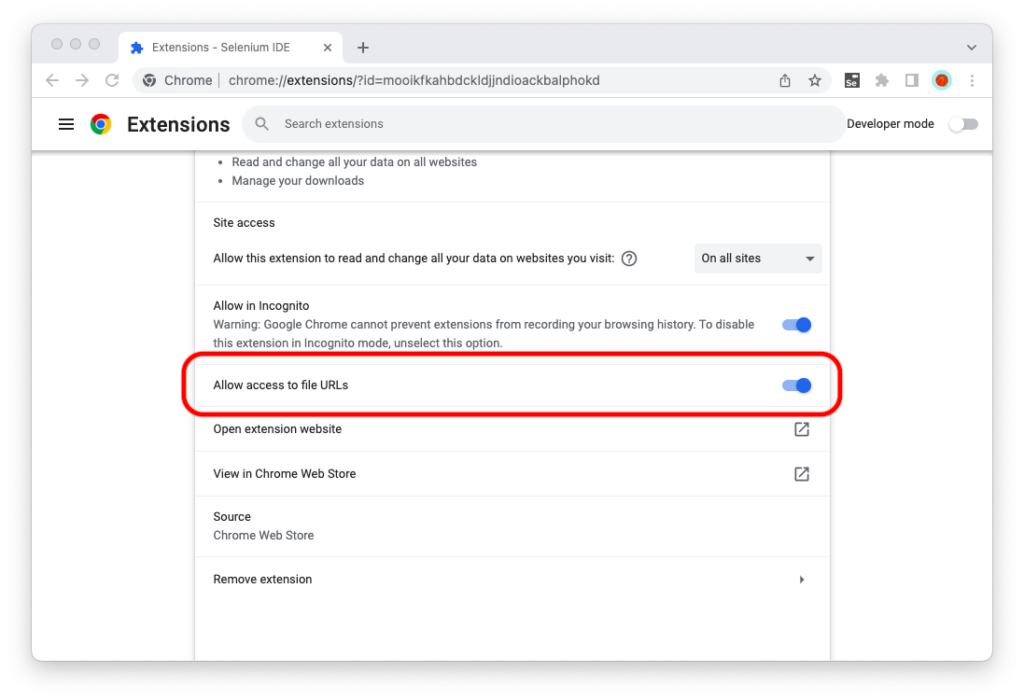
If you’re on Google Chrome, you first need to allow the Selenium IDE extension to access files on your computer. Otherwise, you will get a { "code":-32000, "message":"Not allowed" } error when you run the test case.
To do this, type chrome://extensions/ into your browser’s address bar and hit the Enter key on your keyboard. Now find the Selenium IDE extension and click on the “Details” button.
Scroll down and look for the “Allow access to file URLs” toggle. Make sure it’s toggled on.
Part 2: Use the Type Command to Upload the File
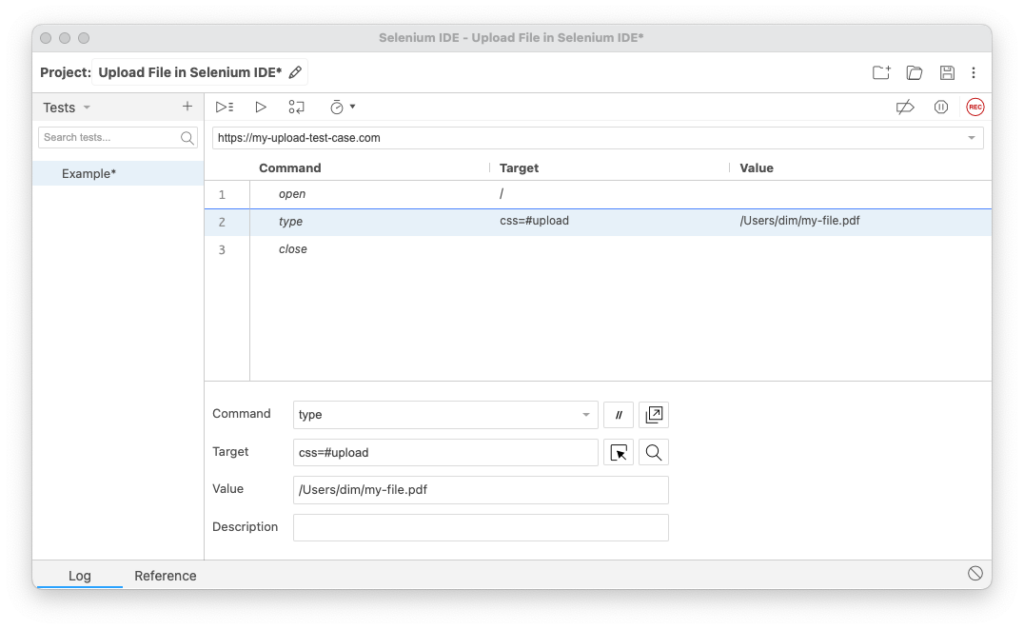
To upload a file in Selenium IDE, you target the upload form with the type command and paste the file path into the “Value” field. So you’re basically doing the same as you would when filling out a form with text — but instead of text, you’re giving the path to the file.
Here’s a screenshot:

On macOS, the file path should look like this:
/Users/YOURUSERNAME/PATHTOFILEWhere “YOURUSERNAME” is your user name and “PATHTOFILE” is the path to the file that you want to upload.
On Windows, the file path should look like this:
C:\Users\YOURUSERNAME\PATHTOFILEWhere, once again, “YOURUSERNAME” is your user name and “PATHTOFILE” is the path to the file that you want to upload.

