Maybe you created a Discord server for you and your friends, but you don’t need it anymore. Or maybe you were learning how to do it and set one up following a tutorial.
Listen, whatever brought you here, I’m willing to make a bet that the question is one and the same: “How can I delete this Discord server that I don’t need anymore?”
As always, we’ve got you covered. Read on for our guide to deleting a Discord server, in steps and with screenshots.
Steps to Deleting a Discord Server
Step 1: This one is obvious, but we can’t leave it unsaid. Open up Discord — whether from the website or the app you’ve installed on your computer — and go to the server you want to delete.
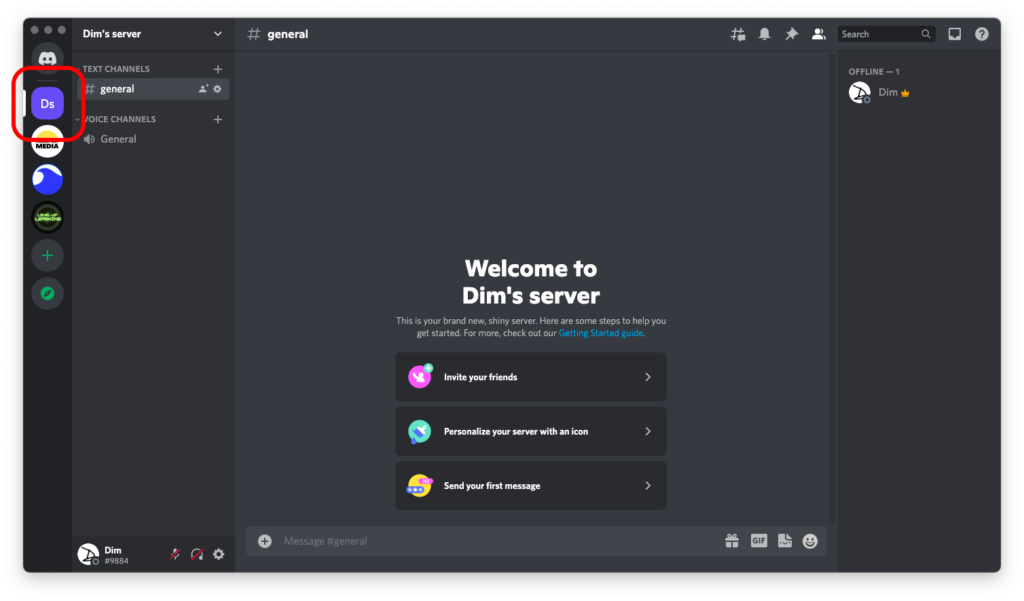
Step 2: Click on the downward arrow icon next to the name of the server.
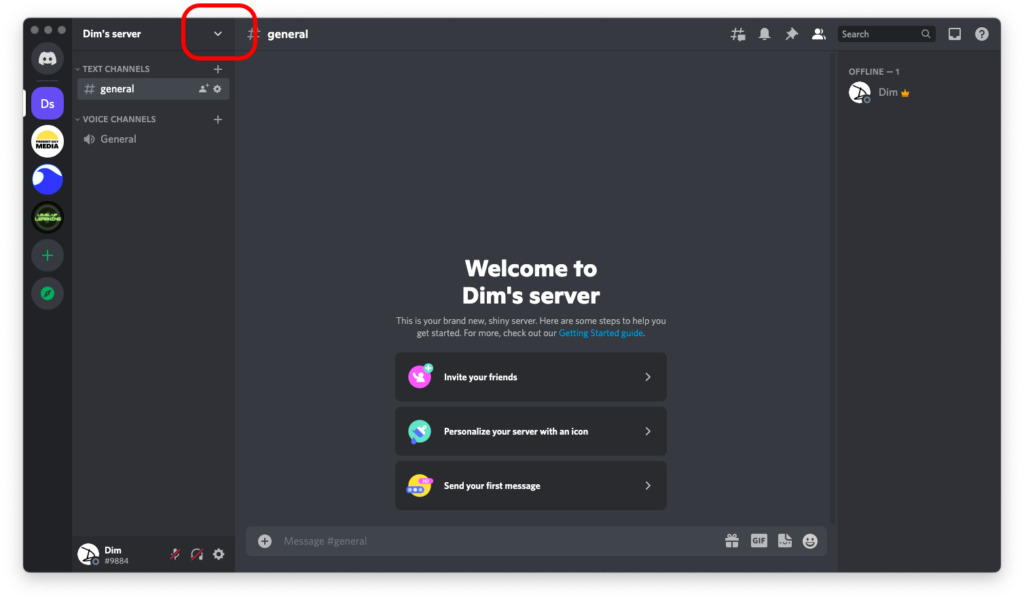
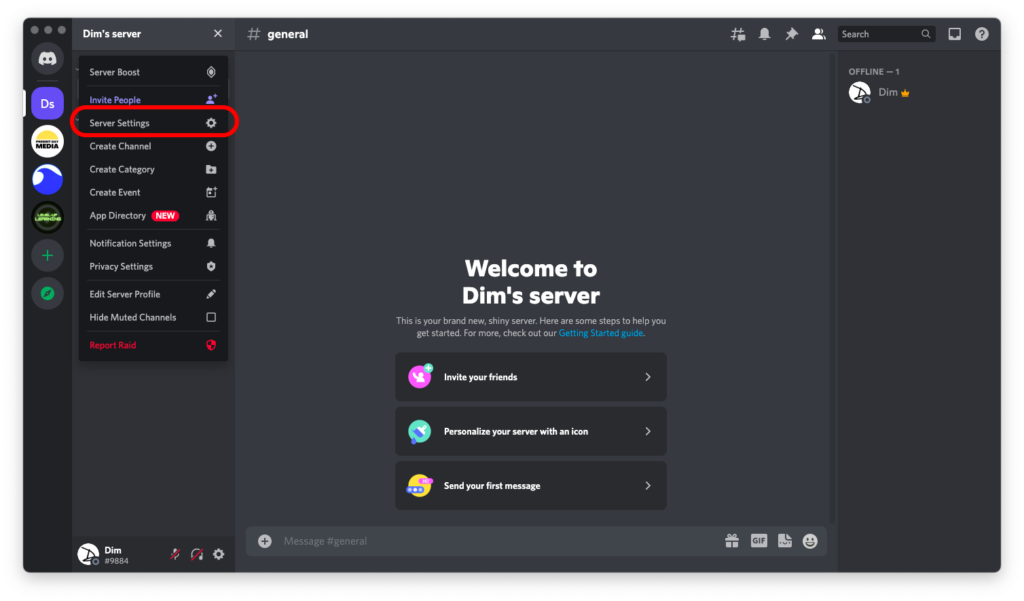
Step 3: Now go to “Server Settings.” Hint: unless the UI changed a lot since we published this article, it should be one of the first few options.
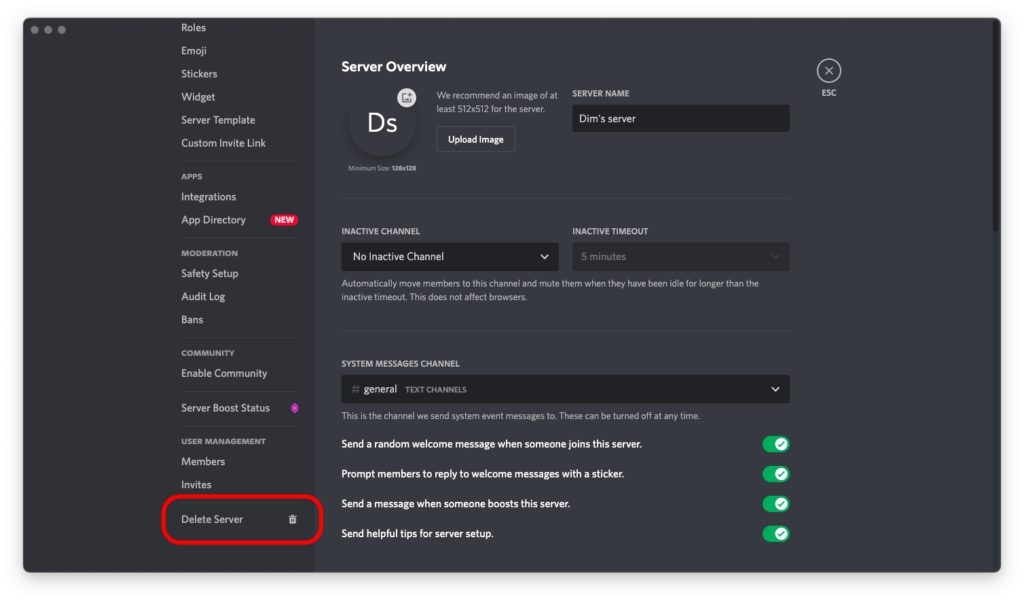
Step 4: Hover your mouse over the left sidebar and scroll down till you can see the “Delete Server” link. Click on it.
Step 5: A confirmation prompt will appear. Now is a good time to decide if you really want to delete this server or not… because once you do, this cannot be undone!
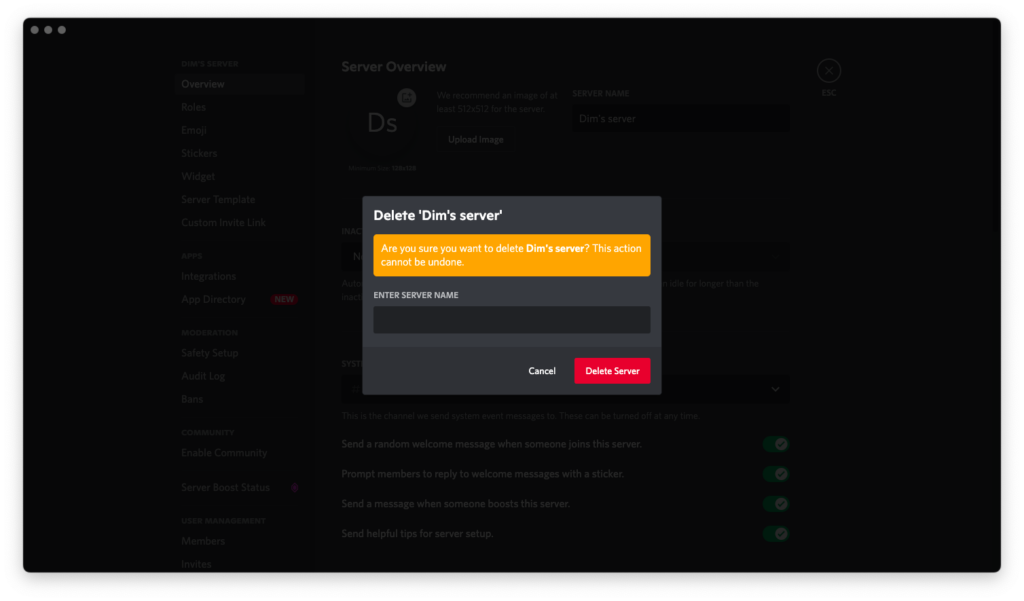
Let me repeat this just in case you skimmed through the step above this screenshot. CAUTION: TREAD LIGHTLY. YOU CANNOT UNDO DELETION.
Step 5: You’re reading this step, so I take it you decided to do the deletion after all. Type in your server’s name, then hit the red “Delete Server” button. If you have multi-factor authentication turned on, Discord will ask you to authenticate.
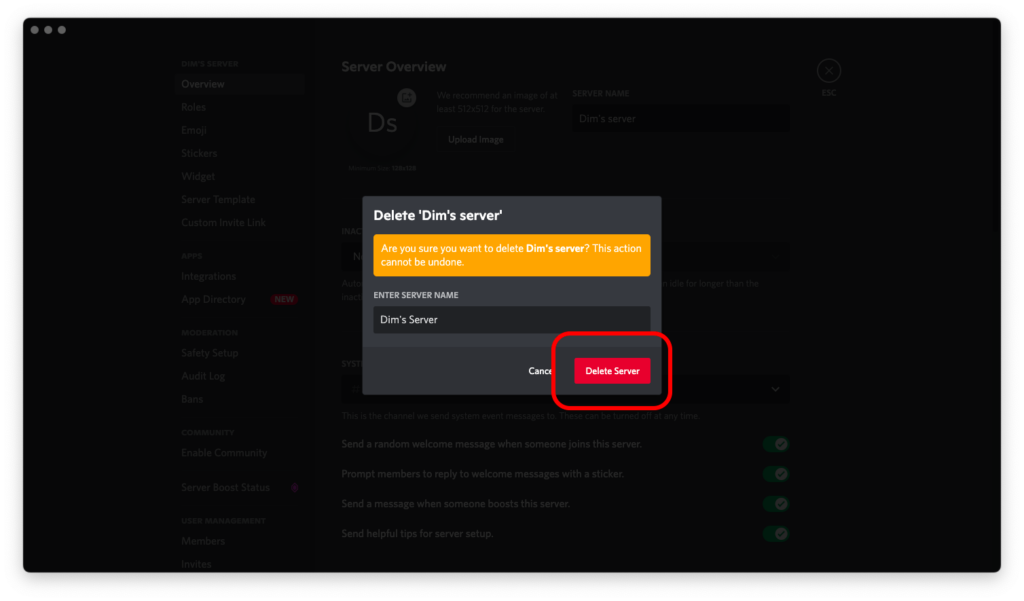
Whoosh! This is it.
Now, you can sleep safe and sound knowing you’ve got one Discord server less to worry about.
