Not all contacts in your ClickFunnels 2.0 workspace are created equal. Some will be buyers who’ve purchased one or more of your products, or maybe subscribers who’ve signed up for one of your courses. Others will be potential buyers who’ve opted for your marketing emails, or who’ve seen a funnel step but haven’t taken action.
ClickFunnels 2.0 lets you create tags, so that you can tag your contacts and sort or segment them by tags in your marketing campaigns. A “tag” is essentially a label that you can assign to the people whose contacts you’ve collected through your sales funnels.
This tutorial will teach you how to create your first contact tag.
Adding Contact Tags in ClickFunnels
Step 1: Fire up your browser, go to myclickfunnels.com, and sign into your ClickFunnels 2.0 account.
Step 2: Open your site’s workspace.
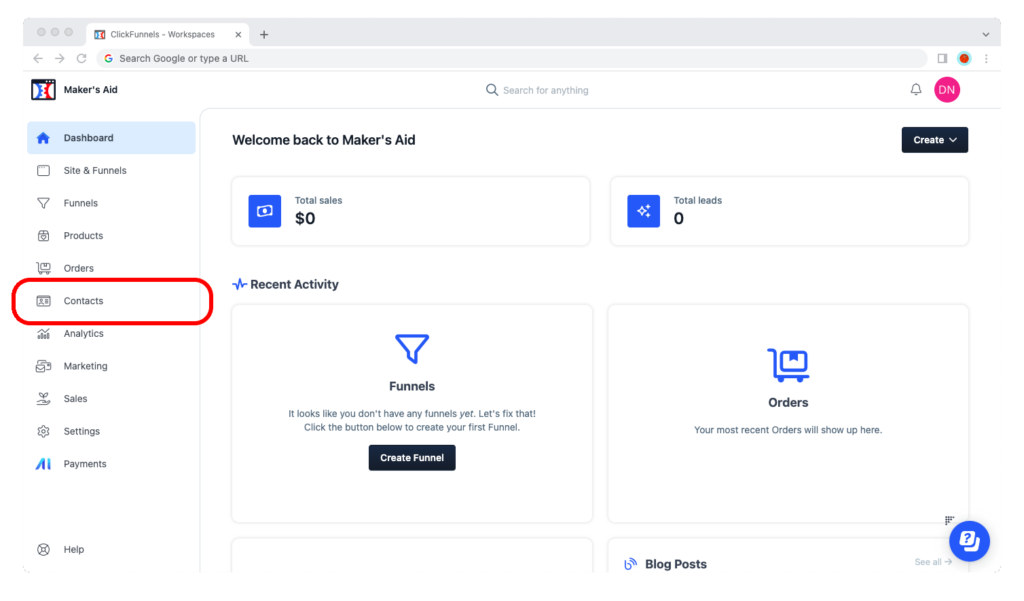
Step 3: Go to the “Contacts” tab in the sidebar on the left.
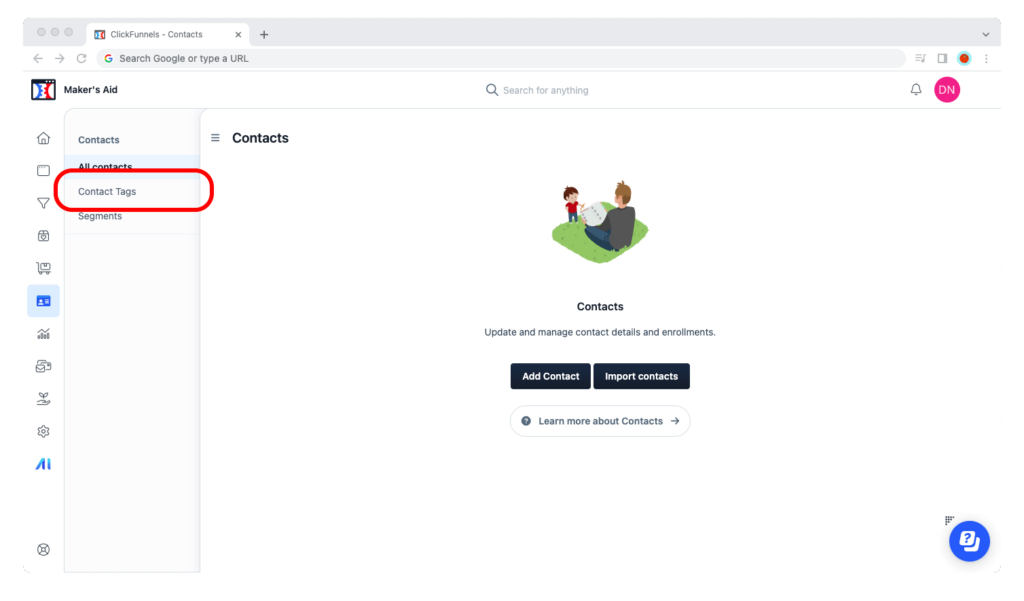
Step 4: Now go to “Contact tags.”
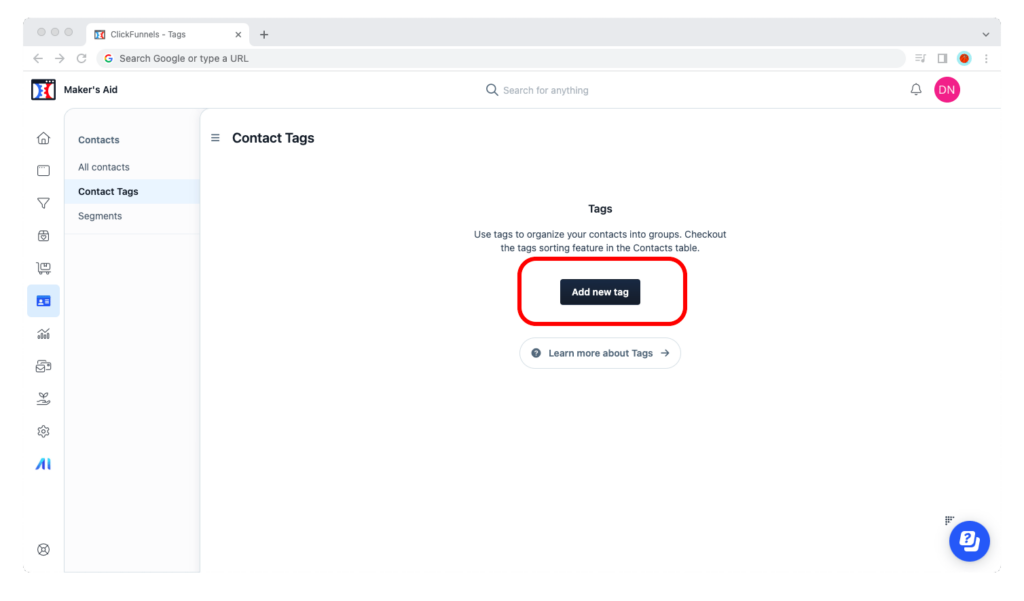
Step 5: Click on the “Add new tag” button in the upper-right corner of the browser window.
Step 6: Give your contract tag a short, self-descriptive name. For example, “Buyers” for contacts who’ve bought one or more of your products, and “Abandoned Cart” for those who’ve completed only the funnel steps up until checkout.
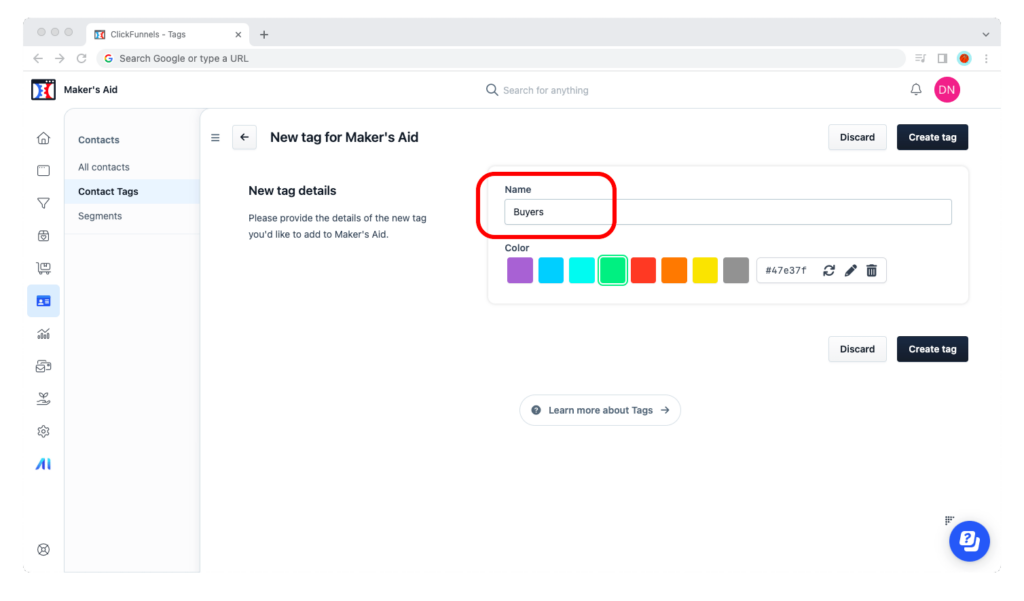
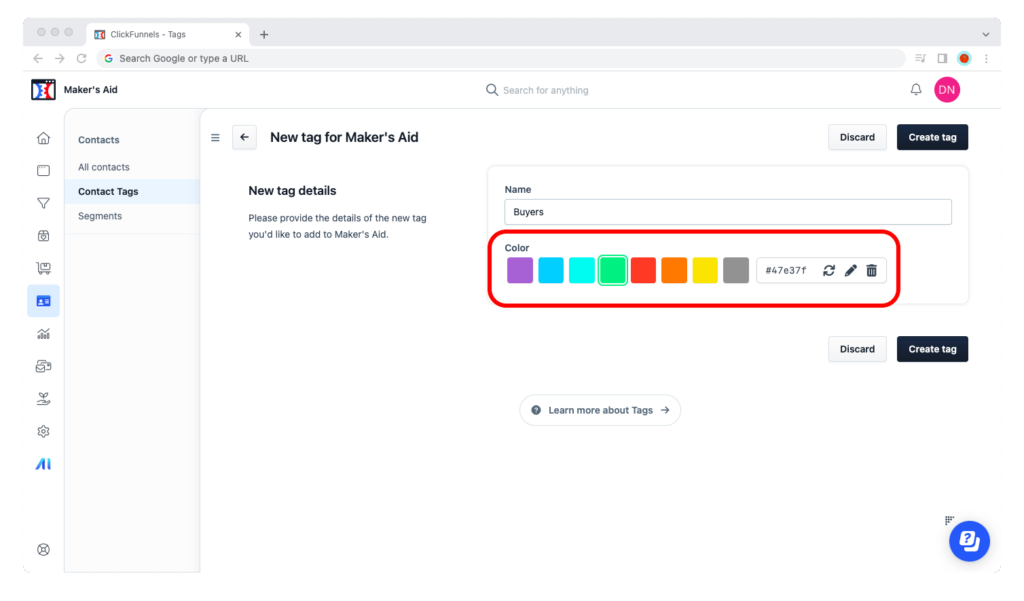
Step 7 (Optional): Choose a tag color. You can choose one of eight colors or enter a HEX value for a custom color.
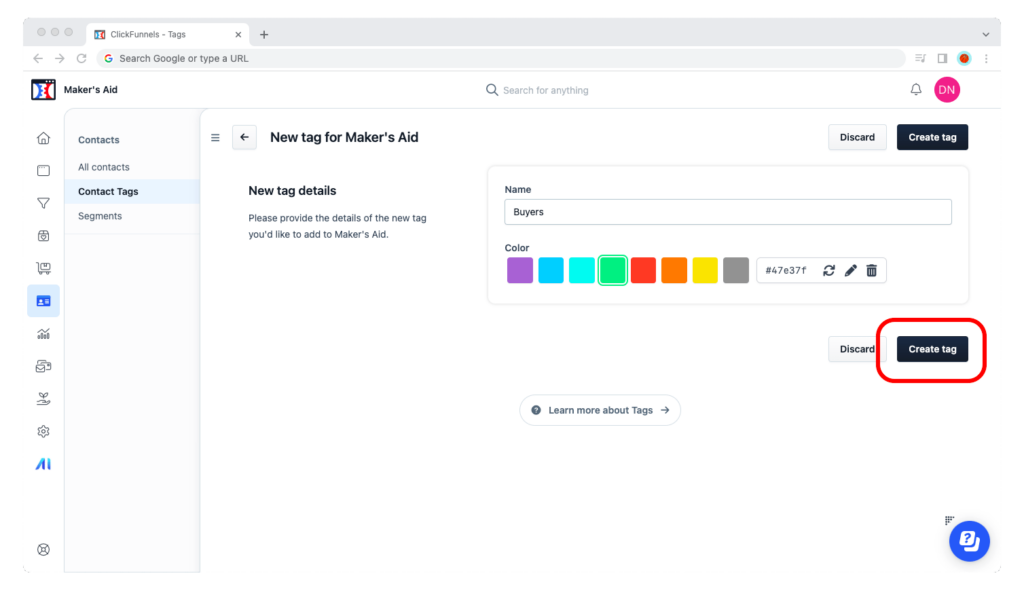
Step 8: Click on the “Create tag” button.
That’s it!
You can now organize your ClickFunnels 2.0 contacts by assigning them tags — and you can segment those contacts based on the tags that they have (or that they don’t have).

