Have you ever had a team member push your unfinished work live when they publish a new version of the Google Tag Manager container you’ve both been working on?
Not only is this frustrating, but if those changes involve cookies (or any tags that require consent), it can be damn right risky in territories covered by data protection laws. It’s good that you stopped by, because with workspaces in Google Tag Manager, you can stop this from happening once and for all.
In this article, I’m going to introduce you to workspaces in Google Tag Manager, explain how they work, show you how to use them, and try to answer all of your questions about using them in your tagging team’s daily work.
What Is a Workspace in Google Tag Manager?
A workspace in Google Tag Manager is a working area where you can make changes to and publish new versions of a GTM container separately from the rest of that container’s users.
With workspaces, a tagging team’s members can edit the same GTM container at the same time without conflicts. They can keep their changes in separate drafts, so that they don’t publish each other’s unfinished work when they want to release a new version of that container.
This feature is a real boon for big teams who work on live, high-traffic websites or mobile apps with many users, and one that every tagging professional should learn how to use. So let’s go over everything you need to know to help you get started!
How Do Google Tag Manager Workspaces Work?
Workspaces in a Google Tag Manager container are like the branches in a code repository. Each GTM container can have two or more workspaces. There’s one main workspace, called the “Default Workspace,” where all tag, trigger, and variable changes eventually get merged into.
Each workspace lets the user working in it create, edit, or delete tags, variables, and triggers. When the user publishes their changes, a new version of the container goes live, and the workspace is automatically deleted. The user can then create another workspace whenever they need to work on that container at the same time as somebody else.
Let’s take a look at an example:
Pete and John are two tagging professionals on the same team.
John needs to deploy a Meta pixel in a GTM container, but Pete is already in the default workspace, making tweaks to an unrelated trigger.
Instead of working in the same workspace as Pete, John creates a new workspace, called “John’s Workspace,” and gets down to work in it. He adds the Custom HTML tag for the pixel, gives it a couple of triggers, and previews his changes on the live site to verify that the pixel is firing as expected.
John fixes a variable he had mistyped, then gives the draft container version in his workspace a final preview before publishing it. He hits the “Submit” button, publishes Version 2 of the container, and moves on.
Pete updates his workspace, the default workspace, to check for conflicts. Upon update, GTM shows no conflicts, so he publishes Version 3 of the container once he’s done previewing the changes and his work can be considered done.
How to Create a Workspace in Google Tag Manager
To create a new workspace in your Google Tag Manager container, follow the steps in the guide below.
Step 1: Fire up your browser, go to tagmanager.google.com, and open the Google Tag Manager container that needs editing.
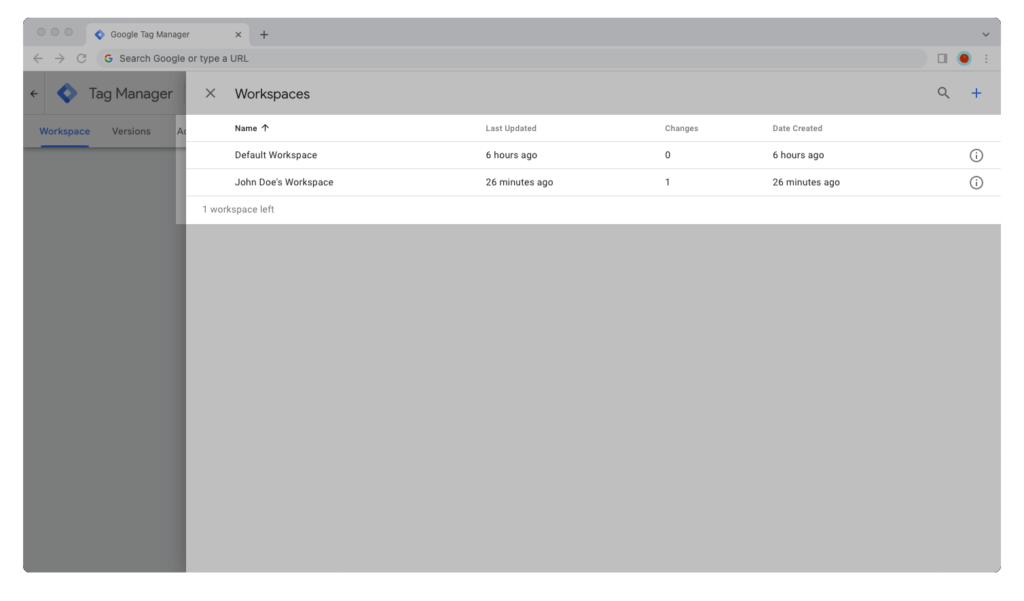
Step 2: Bring your cursor to the upper-left corner of the window and click on the name of the current workspace, the one below Google Tag Manager’s logo and tabs.
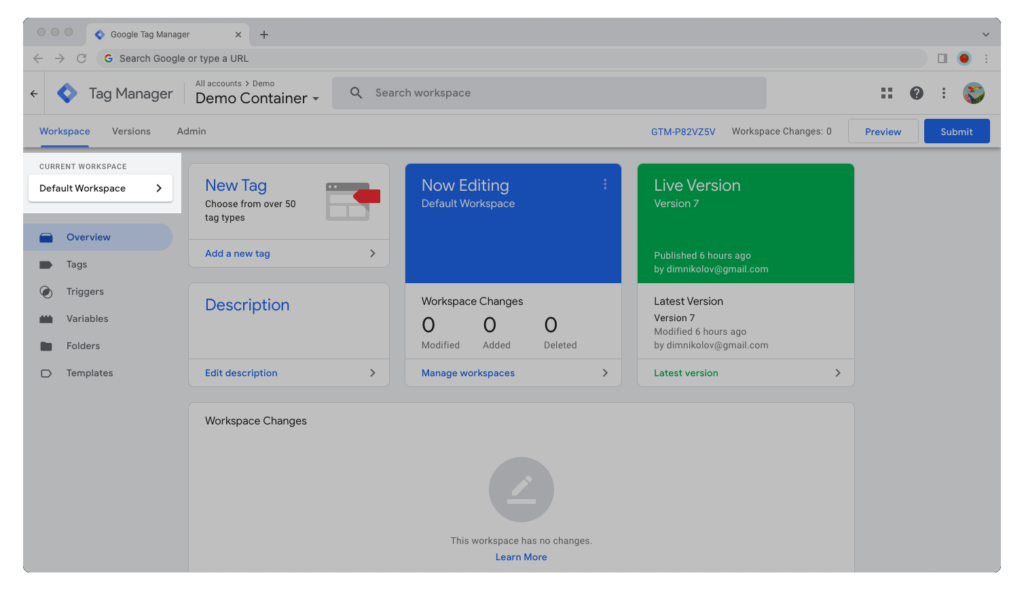
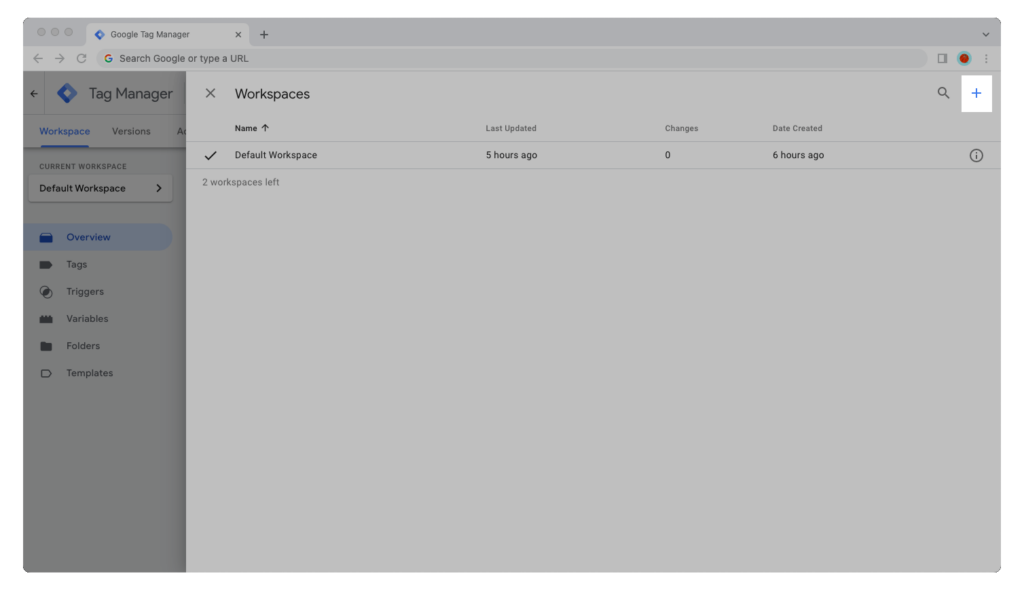
Step 3: Now click on the blue “+” icon in the upper-right corner of the window.
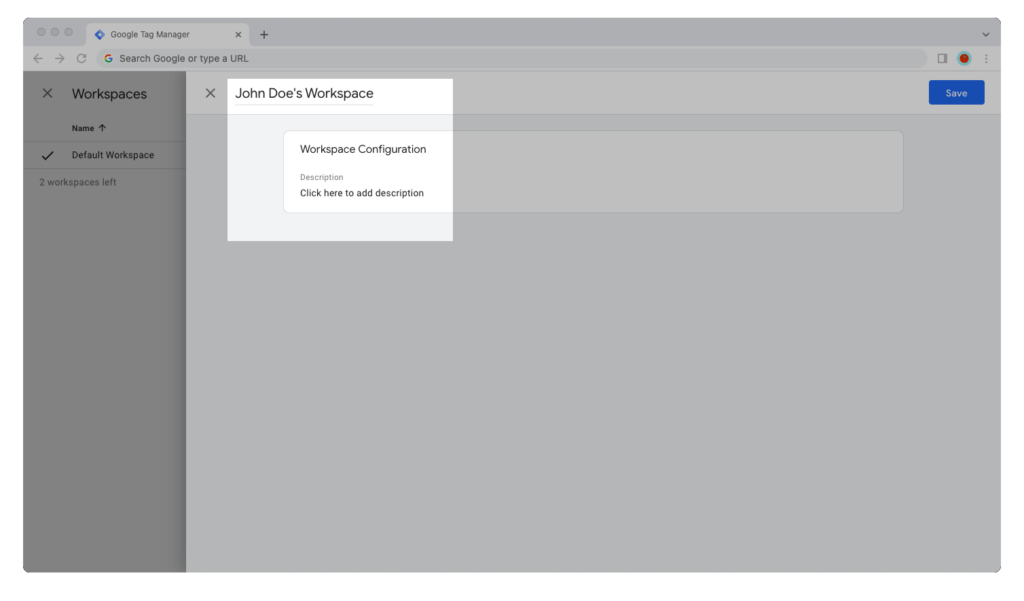
Step 4: Give your workspace a name.
If you’re creating that workspace for yourself and nobody else will be working in it, give it a name like “John’s Workspace.” But if that workspace is meant for working on a feature and other team members will also be working in it, name it appropriately, for example, “CookiePro Cookie Banner.”
Optionally, you can also give your GTM container workspace a description.
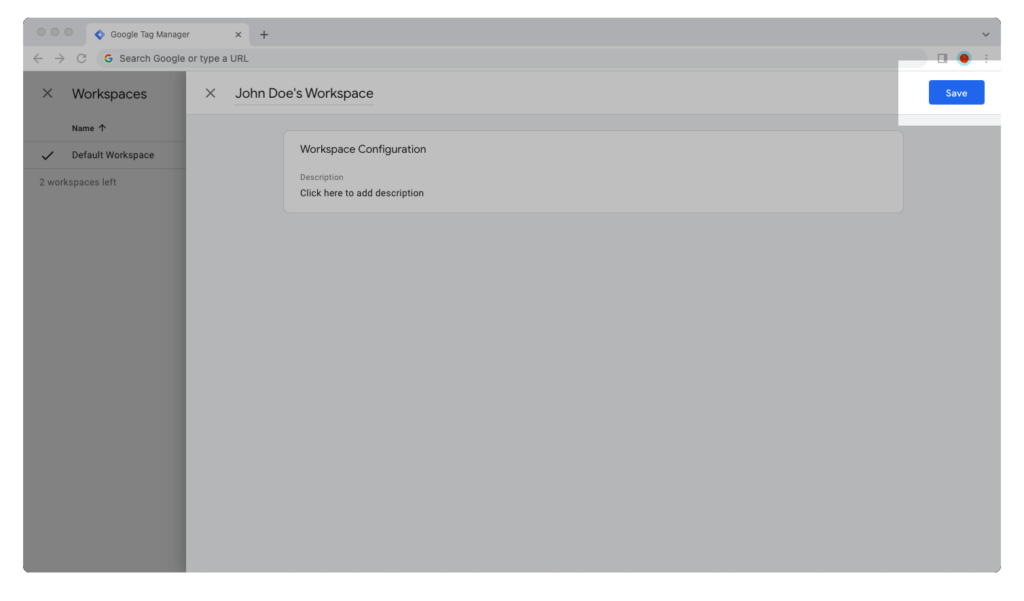
Step 5: Click on the “Save” button.
Step 6: Make the changes you need to make to the Google Tag Manager container within your newly-created workspace.
Step 7: When you’re done, click on the blue “Submit” button in the upper-right corner of the window.
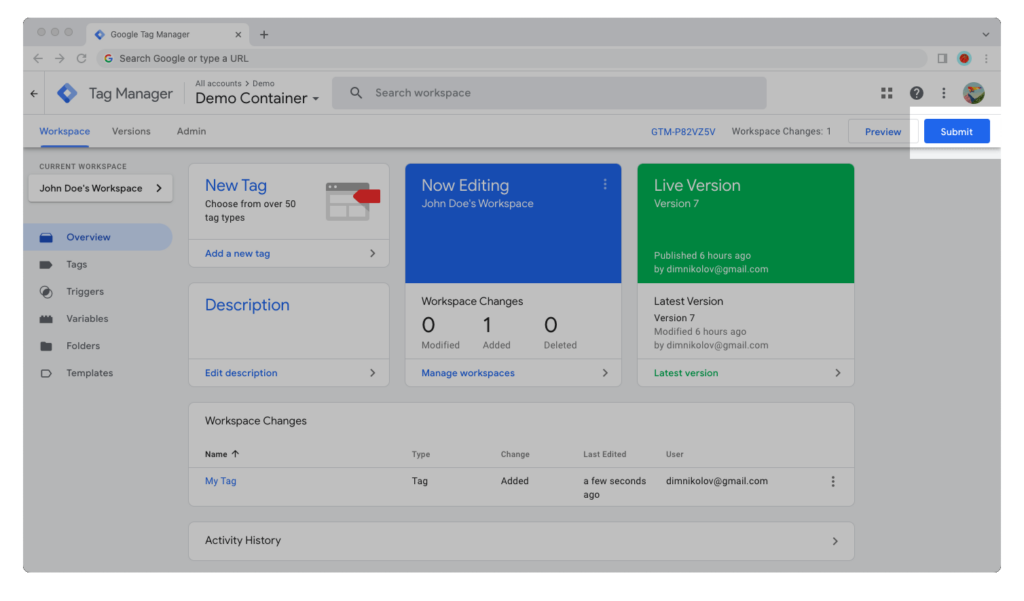
Step 8: Choose how you want to publish your workspace’s changes.
When publishing a workspace in Google Tag Manager, you have two options:
- Publish and Create Version will create a new version of the GTM container that other workspaces can be updated with and push the changes to your live site.
- Create Version will create a new unpublished version of the GTM container that won’t go live until it’s published in another workspace.
In both cases, the workspace will be deleted as soon as a new version is created.
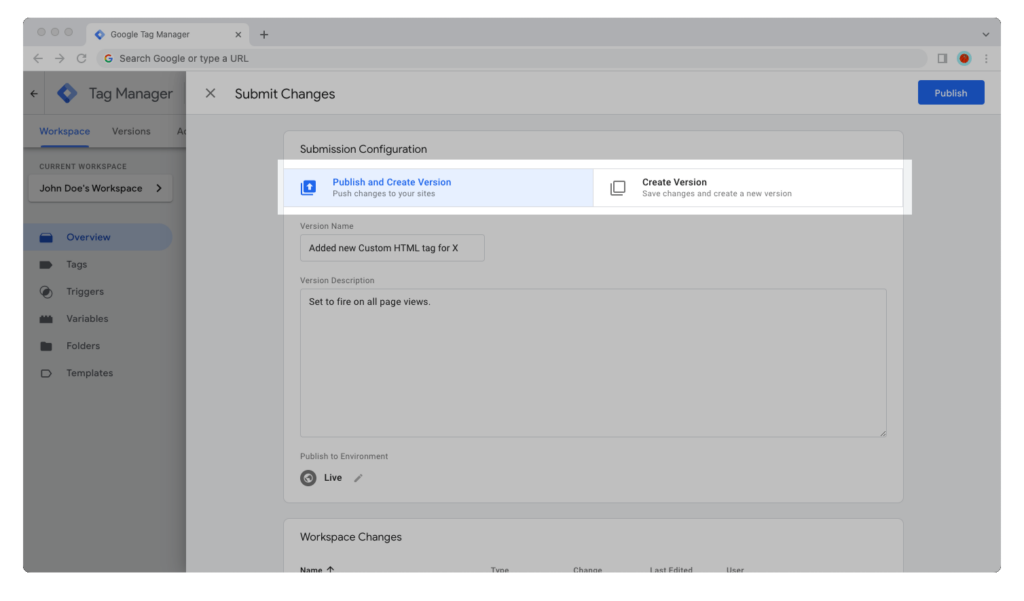
Step 9: Give your container version a name and description, then hit the “Publish” button.
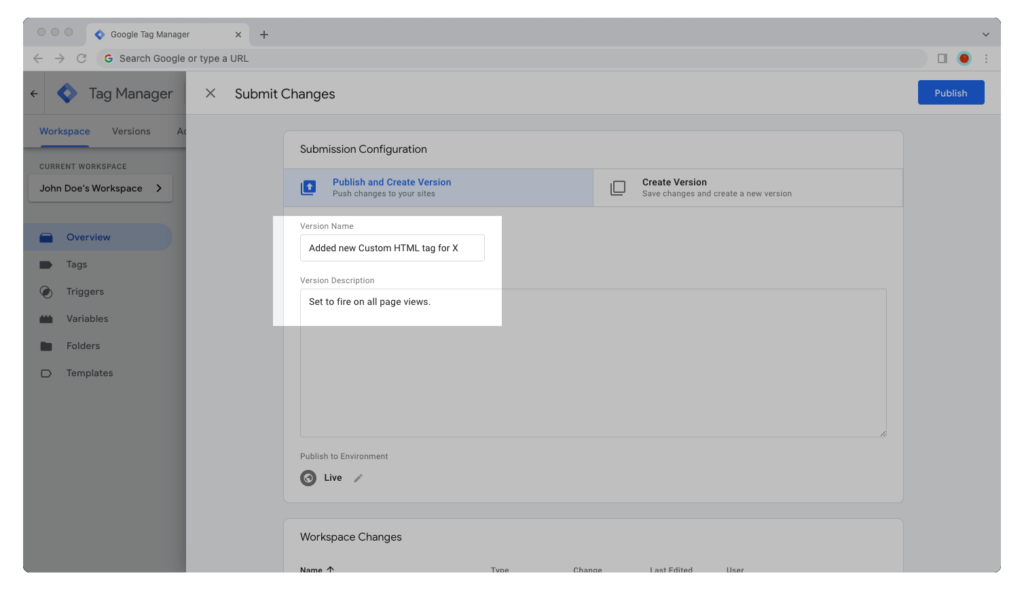
Step 10: That’s it! GTM will push the container version live and delete the workspace automatically.
If you need to work on this container simultaneously with somebody else again, simply create another workspace — now, you know how to do it!
How to Resolve Workspace Conflicts
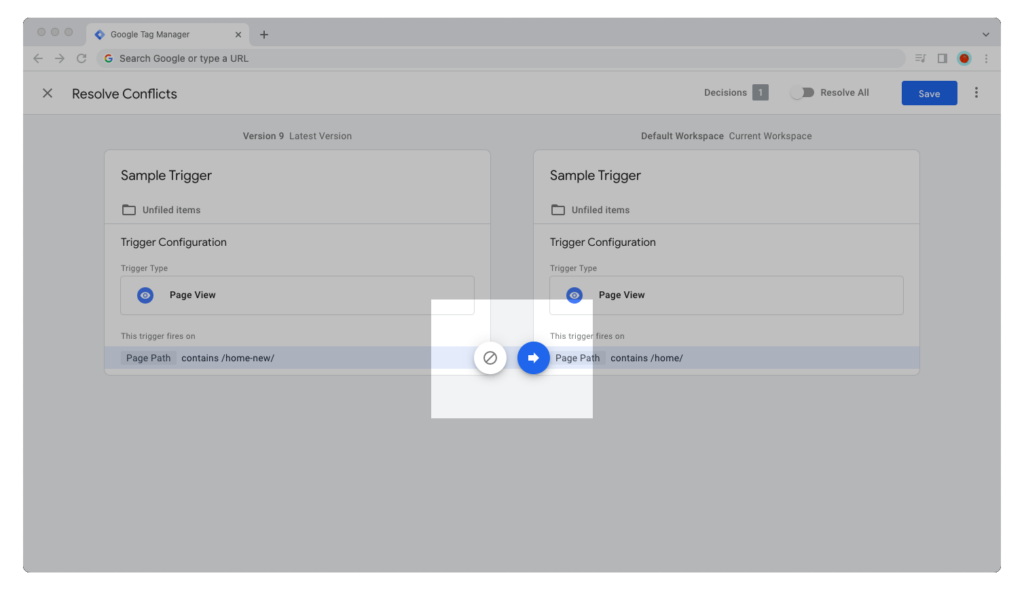
If you made changes to the same tag, variable, or trigger as another team member, then Google Tag Manager will show a conflict warning when you try to publish a new version of the container.
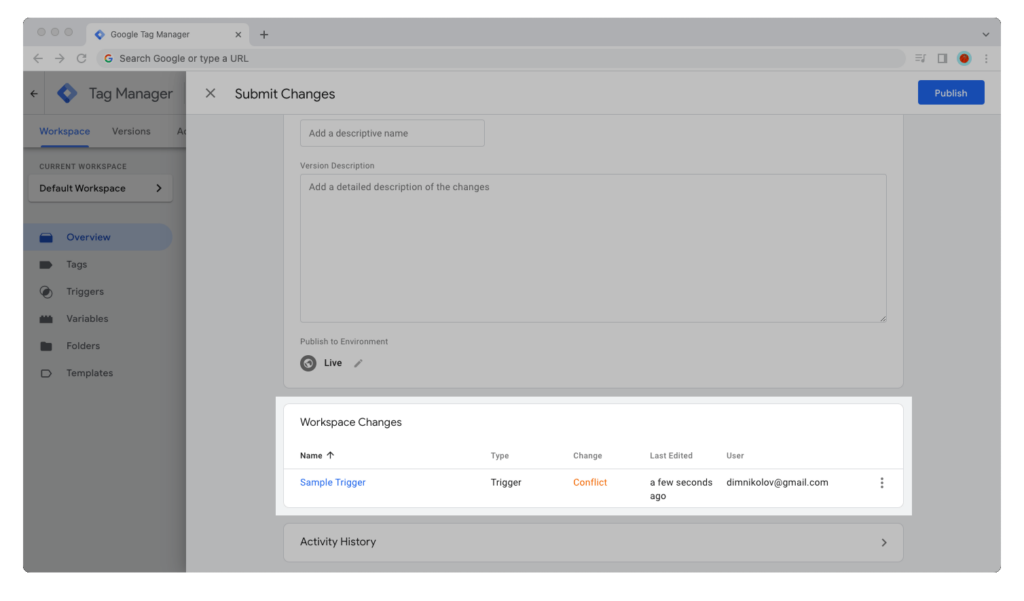
You have two options for resolving a conflict: you can either override the other version with your changes, or abandon your changes in lieu of the other version.
How to Switch Between Workspaces
To switch between two workspaces in a Google Tag Manager container, follow the steps in the guide below.
Step 1: Fire up your browser, go to tagmanager.google.com, and open the Google Tag Manager container that needs editing.
Step 2: Bring your cursor to the upper-left corner of the window and click on the name of the current workspace, the one below Google Tag Manager’s logo and tabs.

Step 3: Click on the name of the workspace you want to switch to.
Workspaces in GTM: Frequently Asked Questions
A Google Tag Manager container can have up to three workspaces at any moment. This includes the default workspace and two additional ones. A Google Tag Manager 360 container (the paid version of GTM) can have an unlimited number of workspaces.
When you publish a workspace in a GTM container, the changes in it will go live in a new version of the container, then the workspace will be deleted automatically. Other workspaces will be asked to update before publishing their changes. If there are any conflicts, those conflicts will have to resolved first.
You can delete any additional workspace in your Google Tag Manager container, but you can’t delete the default workspace. If you delete a workspace in a GTM container, the workspace will be removed and all the changes in it will be abandoned.
Once deleted, a workspace in a Google Tag Manager container can’t be restored. If you did this accidentally or by mistake, your best bet is to recreate the lost changes from scratch.
If you create a workspace in a Google Tag Manager container and don’t publish or delete it, it will stay active until you publish it, abandon the changes in it, or delete it.
You can’t copy or duplicate workspaces in a Google Tag Manager container. When you create a workspace, it contains the GTM container’s latest live version. Unpublished changes can’t be copied to other workspaces unless you publish the changes and update those other workspaces.
You can’t merge two workspaces in a Google Tag Manager container. However, you can publish the changes in one of those workspaces and update the other to contain the new version with those changes.
You can’t move unpublished tags, variables, or triggers between two workspaces in a Google Tag Manager container. However, if you publish one of the workspaces and update the other with those changes, you will be able to see and use them.
You can’t restrict access to the individual workspaces in a Google Tag Manager container. All users who have access to a GTM container will be able to see all the active workspaces in it. However, you can manage user access and permissions (Read, Edit, Approve, Publish) for the container itself.
The “Default workspace” is already the main and default workspace in your Google Tag Manager container. Eventually, all changes get merged into it. Unlike additional workspaces, the default workspace doesn’t get deleted when the changes in it are published live.
