Your website’s URL, especially if well structured, can be a rich source of information.
Although a URL consists of several parts, the URL parameters are the part that probably contains most of the information that’s relevant to tagging.
This leads us to the question this post is all about: how can you extract the information from the URL parameters on your landing page with Google Tag Manager?
To extract a URL parameter with Google Tag Manager, create a new URL variable of the Query component type, then enter the URL parameter’s key. Save your variable and test it in Google Tag Manager’s Preview mode.
Once you’ve created a Google Tag Manager variable for a URL parameter, you can:
- Pass the value of the URL parameter to your tags;
- Create triggers to fire tags based on the value of the URL parameter;
- Reference the variable in the Custom JavaScript variables and Custom HTML tags of your GTM container.
If you’ve never done this before and you want to see how it’s done step by step, I’ll show you how with screenshots in the rest of this tutorial.
How to Extract a URL Parameter
Part 1: Set Up Your Container
Step 1: Fire up your browser, go to Google Tag Manager, and open the container with which you want to extract the URL parameter.
Step 2: Go to “Variables.” Under “User-Defined Variables,” click the “New” button to create a new user-defined variable for your URL parameter.
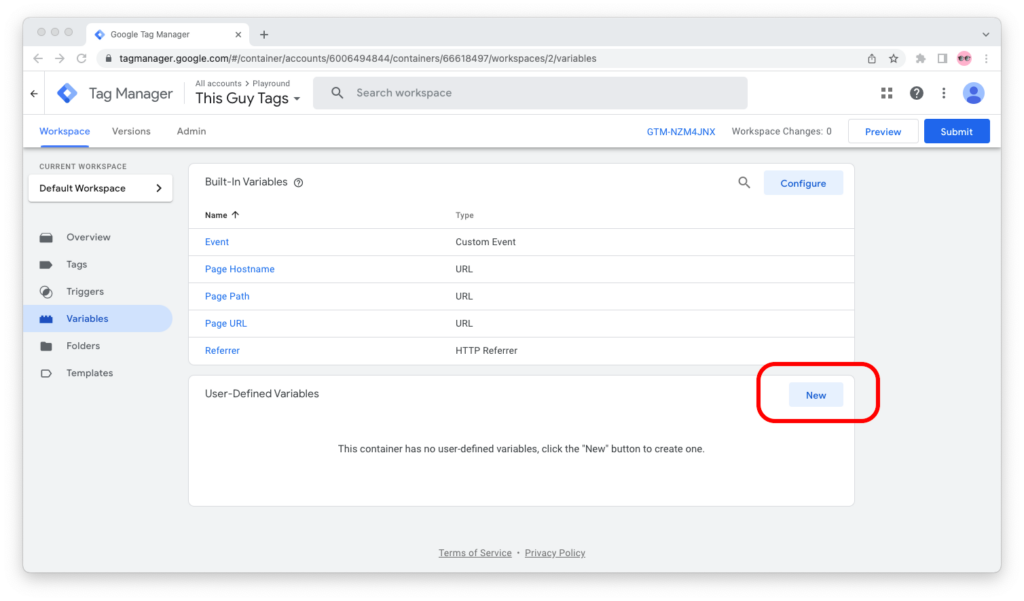
Step 3: Give your variable a name that’s easy to remember for you—and just as easy to recognize for others.
For example, I gave mine the name “URL – My Parameter” because, for the purposes of this tutorial, I’m configuring a made-up URL parameter with a key of my_parameter.
Step 4: Click on “Variable Configuration.” The “Choose variable type” window will slide in. Under “Navigation,” select “URL.”
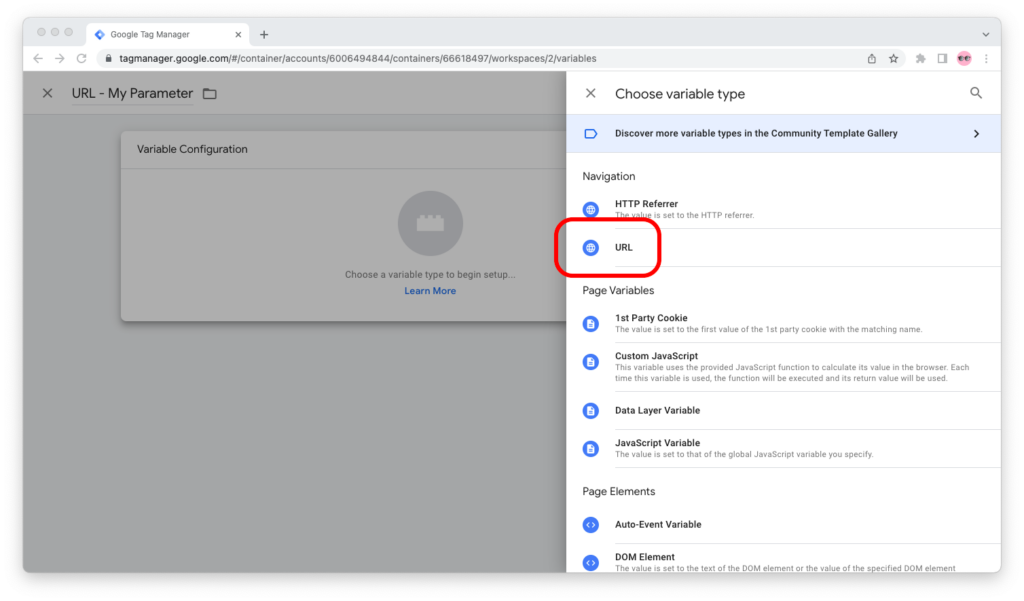
Step 5: From the “Component Type” dropdown menu, select “Query.” Enter the URL parameter’s key under “Query Key.”
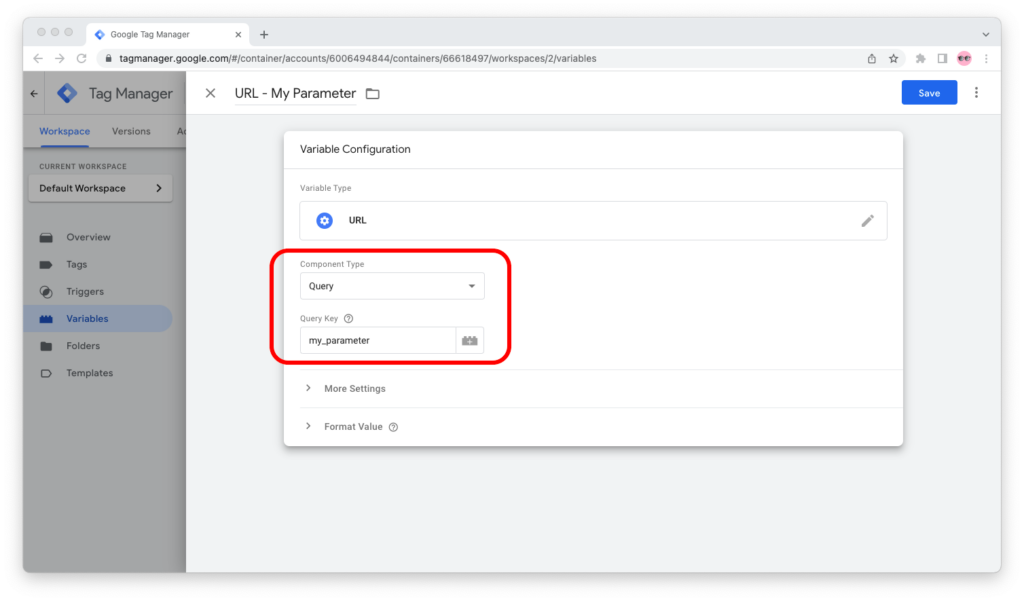
Step 6: Click the “Save” button in the upper right corner of the screen.

Step 7: You’re all set! You just created a user-defined variable for your URL parameter, which you can use in the configuration of your tags and triggers, as well as reference in your custom JavaScript code in Google Tag Manager.
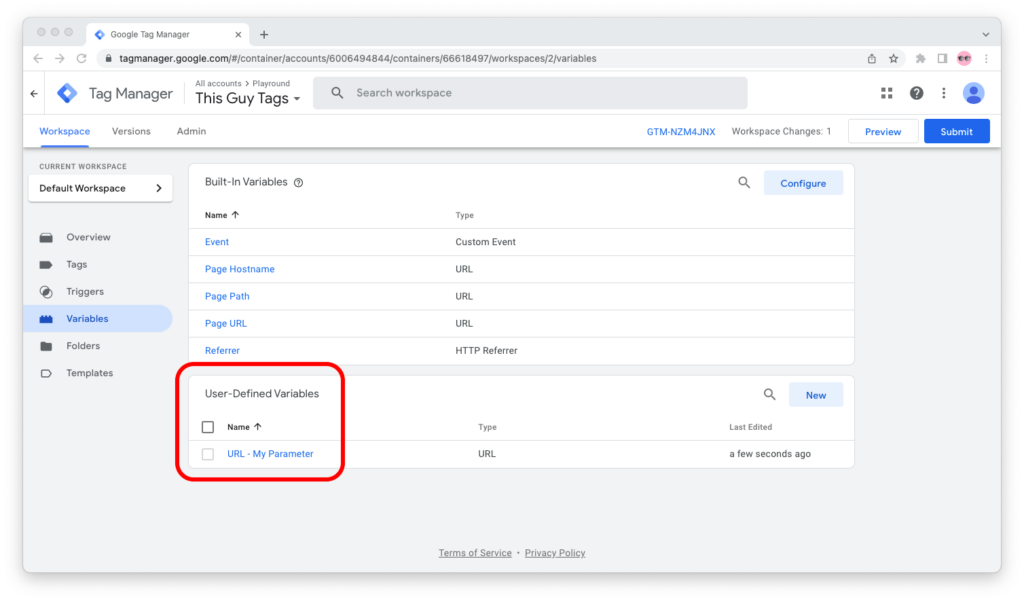
Part 2: Test Your Container
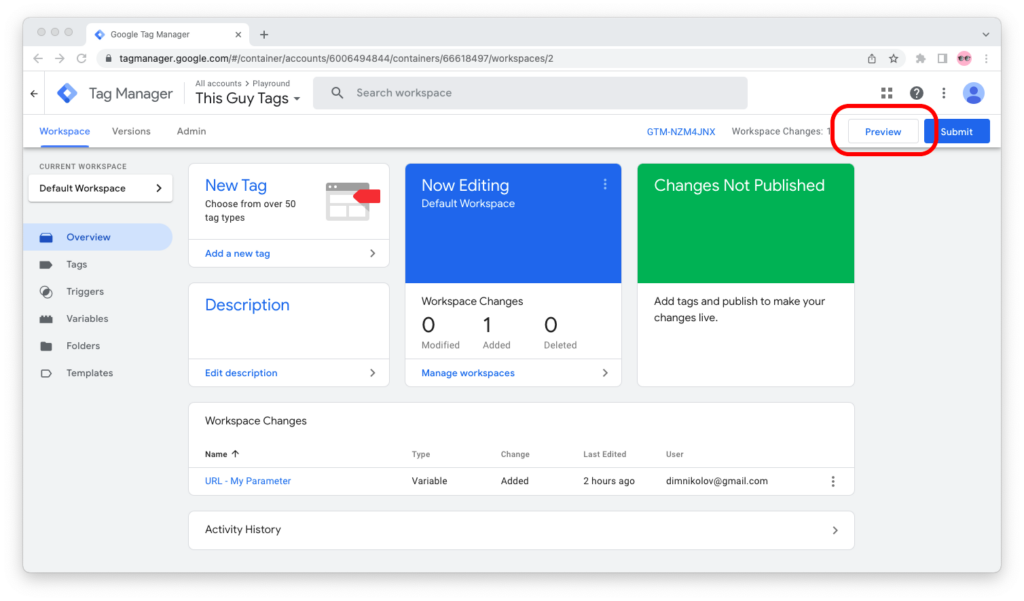
Step 1: Click the “Preview” button in the upper right corner of the screen.
Step 2: In “Your website’s URL,” enter the URL of your landing page with the URL parameter that you want to test included.

Step 3: To check the variable’s value, select any of the events in the “Summary” sidebar to the left. Then go to the “Variables” tab and find your variable in the table.
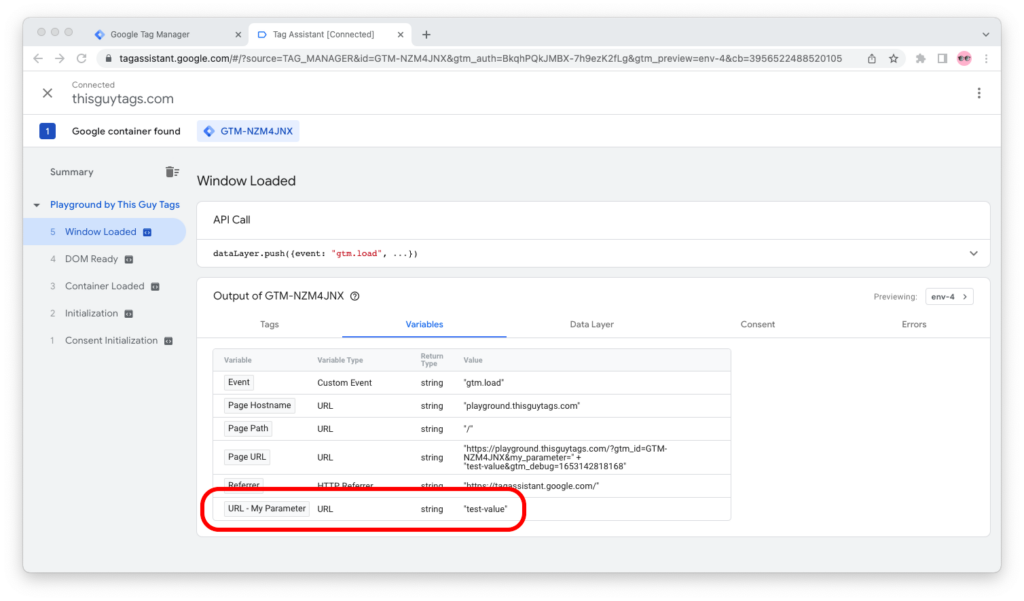
If you set up the Google Tag Manager container correctly and you entered the URL with the URL parameters in the “Preview” tab, the variable should hold the right value.
How URL Parameters Work
With URL parameters, advertisers, marketers, and their technologists can add additional information about a landing page’s visits by appending key/value pairs to the end of that page’s URL.
Sounds complicated, I know, but it’s actually simple:
Suppose the URL of your landing page is https://site.com/page.
If you’re about to link to that landing page in an email campaign to your email subscribers—and you want to be able to track how many of them clicked on it—you can add two URL parameters.
One URL parameter will hold information about the source of that visit (in our case, email). The other URL parameter will contain the Campaign ID from your CRM system (say, 123).
So now, your landing page’s URL becomes https://site.com/page?source=email&campaign=123.
For anyone who visits this link, you can infer that they came from the traffic source “email” and from the campaign ID “123.”
Keys, Values, and the Characters In-Between
A URL parameter consists of a key/value pair.
This means that every URL parameter must have a key (also called a name) and a value.
Keeping to the example above, the link https://site.com/page?source=email&campaign=123 holds two URL parameters, which can be broken down into the following key/value pairs:
| Key | Value |
|---|---|
| source | |
| campaign | 123 |
Decomposing the URL parameters from our example link
You see three additional characters in the link, a question mark (?), an ampersand (&), and the equals sign (=) because the browser needs to know:
- Where the URL parameters start
- Where each of the URL parameters ends
- The key and the value of each URL parameter
To signify the end of the page path and the start of the URL parameters, a question mark (?) is added between the page path and the first URL parameter:
https://site.com/page?source=email
To separate two adjacent URL parameters, an ampersand (&) is added between them:
https://site.com/page?source=email&campaign=123
To tell the browser what the key and the value of each URL parameter are, the key and the value are separated by the equals sign (=):
source=emailcampaign=123
A properly formatted link has only one question mark (?) where the page path ends and the URL parameters start, and as many ampersands (&) and equals signs (=) as necessary to separate the individual URL parameters and the key/value pairs that they contain.
Not All URL Parameters Require Manual Tagging
Certain tools, like Google Analytics, can ingest certain parameters, like UTM parameters, automatically. As long as a link to a landing page contains properly formatted UTM parameters and the Google Analytics tag is fired on that page, Google Analytics will capture enriched data about that page view.
But not all tools capture URL parameters automatically.
And even if you’re using a tool that does capture certain URL parameters automatically, you may need to use custom URL parameters for your use case.
This means that you, as a tagging professional, will need to ingest the URL parameters through Google Tag Manager and pass them onto one or multiple tags for ad optimization, website analytics, or other purposes.
Now you know how to do this!

