The latest and greatest version of ClickFunnels, dubbed ClickFunnels 2.0, has many notable changes compared to ClickFunnels Classic. But arguably the biggest of them is the introduction of workspaces.
Workspaces are like having multiple ClickFunnels accounts under one hat, each with its own site, store, funnels, blog, domains, design, and assets. In a word, Workspaces let you keep your brands and businesses — and the teams working on them — separate.
But if you’ve already created a workspace, how can you change its name? Wonder no more, my friend, because changing a workspace’s name is exactly what I’m about to show you how to do in this tutorial, step by step and with screenshots so you can follow along. Ready to dive in?
Changing a Workspace’s Name in ClickFunnels
Follow the steps in the guide below to change the name of an existing workspace in ClickFunnels 2.0.
Step 1: Fire up your browser, go to myclickfunnels.com, and sign into your ClickFunnels 2.0 account.
Step 2: Once you’re signed in, open the workspace whose name you’d like to edit.
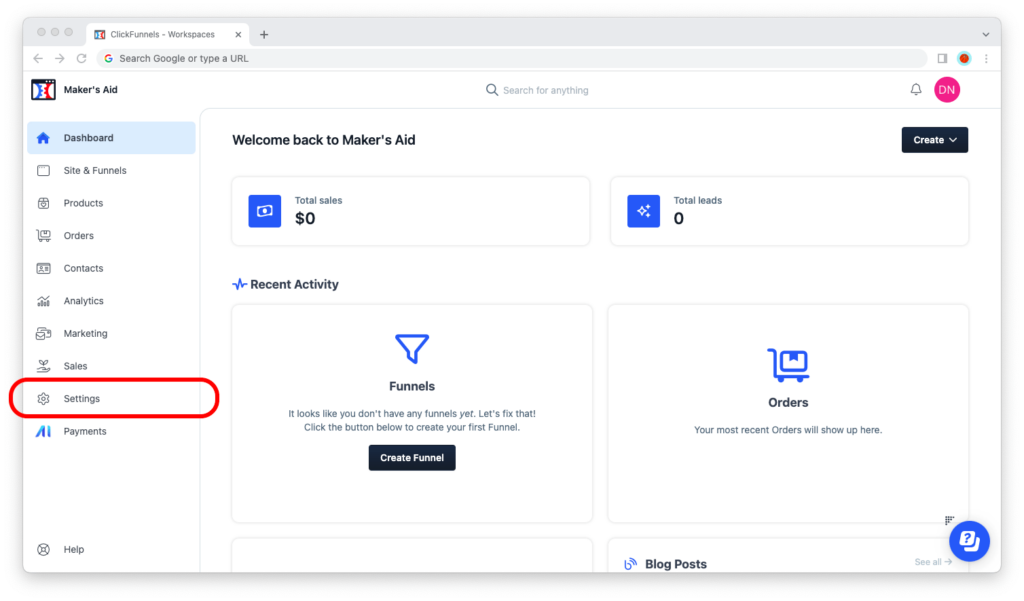
Step 3: Go to the “Settings” tab from the left sidebar.

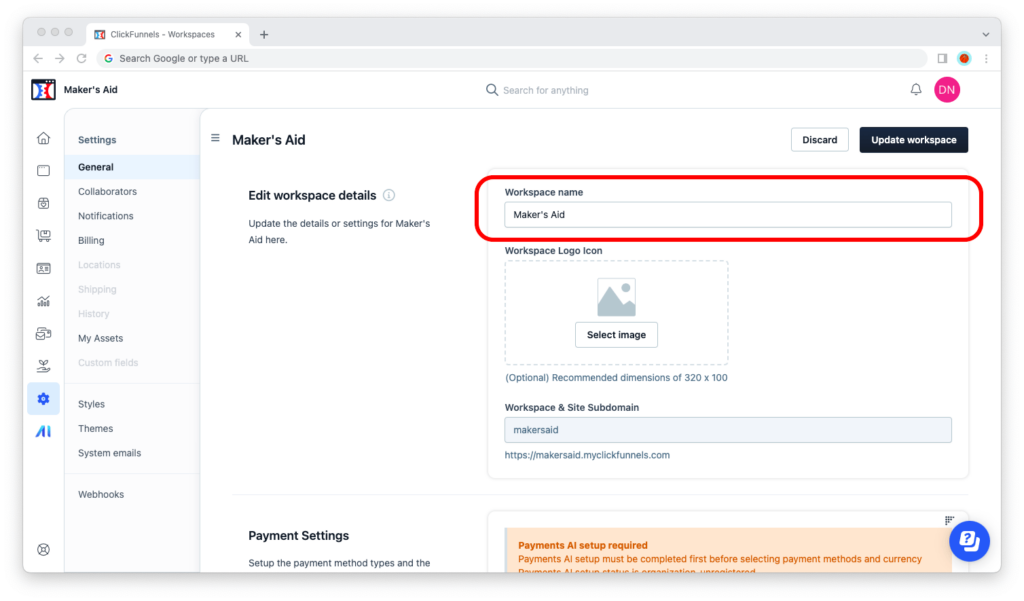
Step 4: Where it says, “Workspace details,” change “Workspace name” to anything you want.

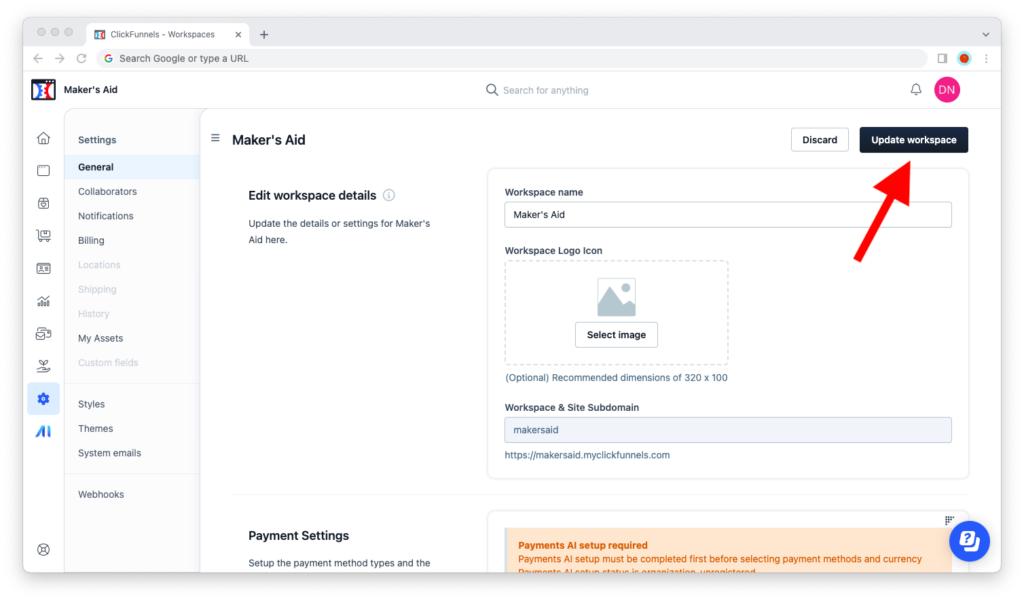
Step 5: Hit the black “Update workspace” button in the upper-right corner of the screen to save your changes.

A-a-and… that’s it!
That’s all there really is to it. Your workspace will now have a new name.
Thanks for reading this far! If you have any questions or would simply like to say thanks, leave a reply below. 🙂

