You’re creating a Kajabi product and you want to add your name, photo, and description to the “Instructor” widget, but you don’t know how. Or you tried to but, for some reason, the “Instructor” widget on your post pages just won’t change.
This tutorial will show you how: step-by-step and with screenshots.
Editing the Instructor in Kajabi
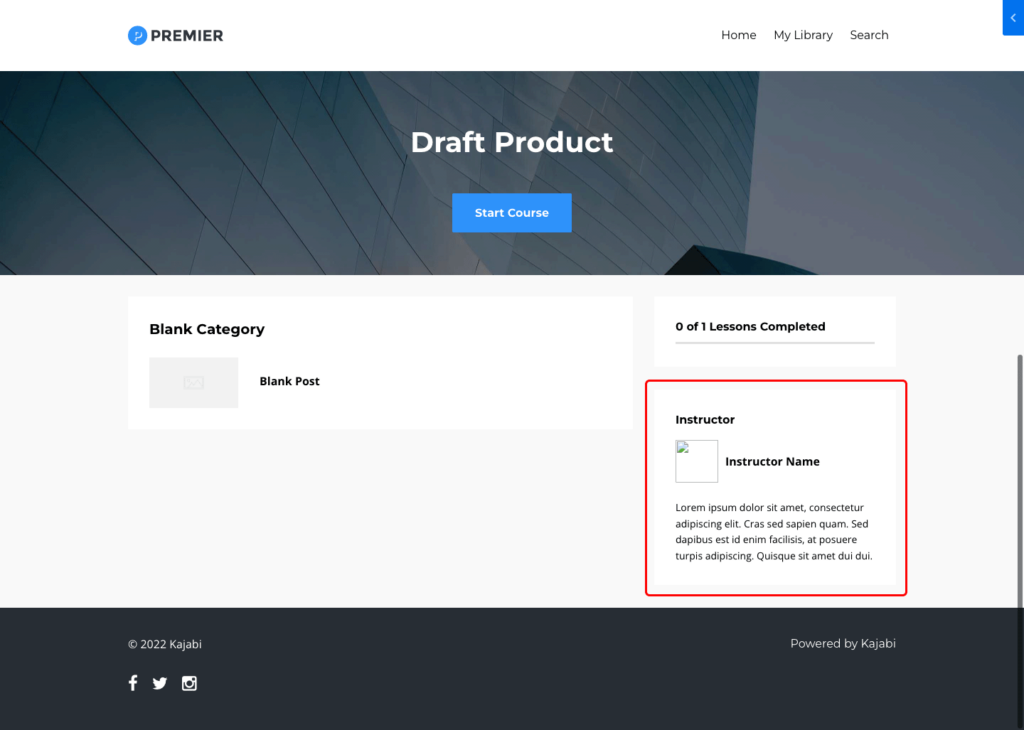
Kajabi, as you probably know by now since you’re here, lets you display an “Instructor” widget in the sidebar of each product with your name, title, photo, and a description about as long as a tweet.
But there’s a catch…
Oddly enough, you have to edit the “Instructor” widget in two places: once for the product page and once for all posts. That’s twice the clicking and copy/pasting for something that should be set up once and then forgotten…
I hadn’t realized this until yesterday, when my business partner and I were finalizing a Kajabi product for a launch, and—although I had changed the instructor on the product—the instructor widget in the posts just wouldn’t change!
Change the Instructor in Kajabi
Part 1: Change the Instructor on the Product Page
Step 1: In Kajabi admin, go to “Products” > “All Products.” Click on the name of the product that you want to edit.
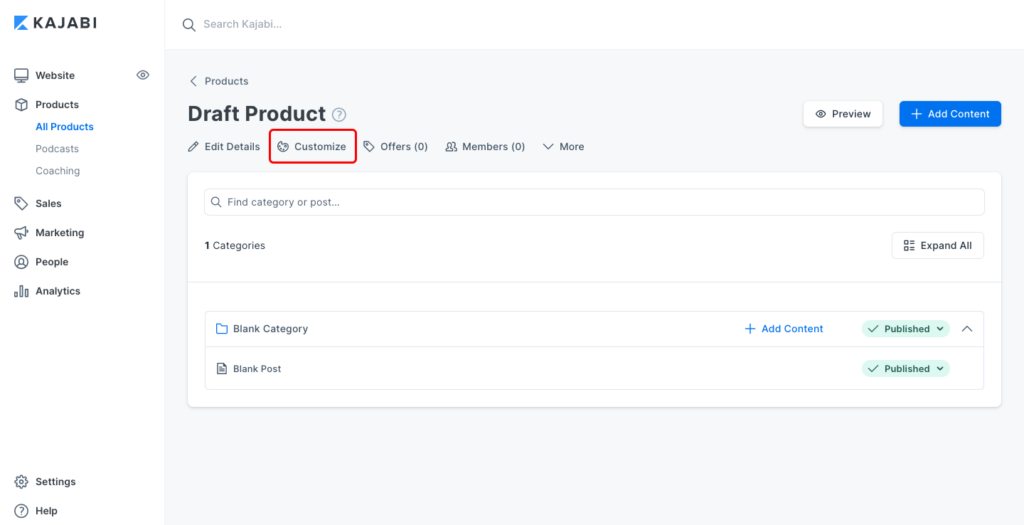
Step 2: Click on the “Customize” tab with the palette icon:
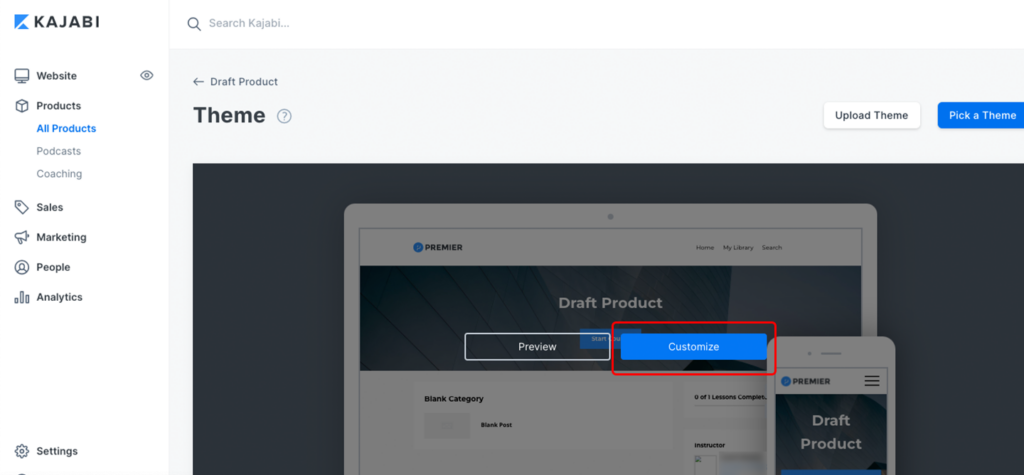
Step 3: A preview of your Kajabi theme will pop up. Hover over it and click on the blue “Customize” button.
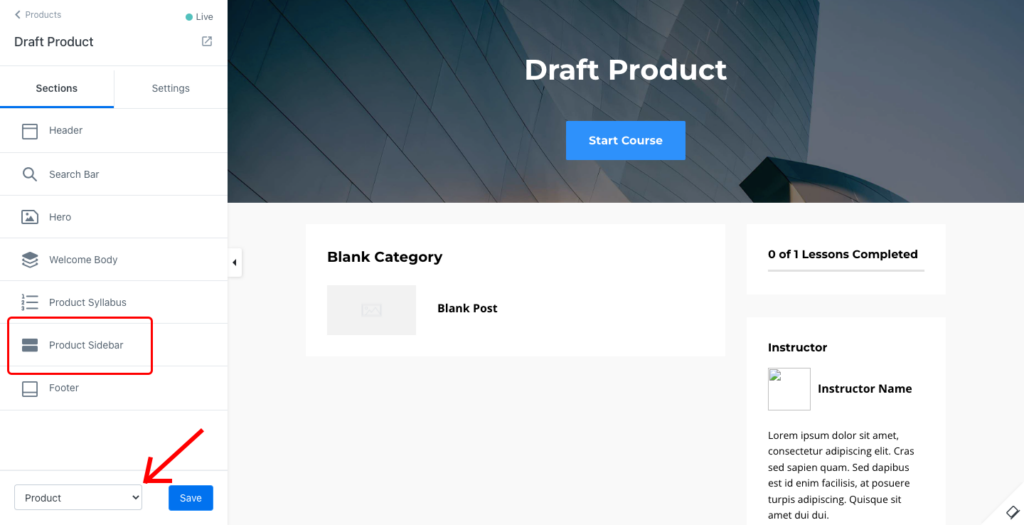
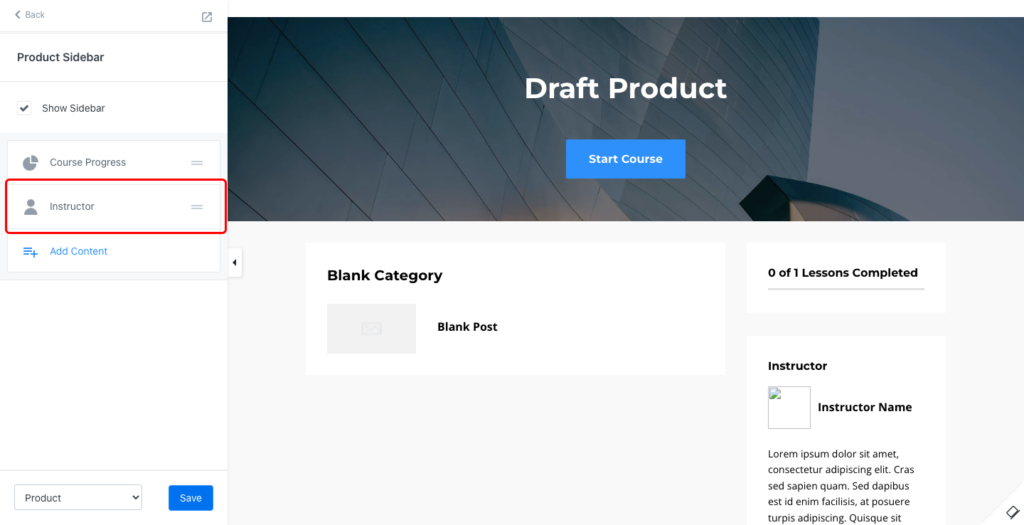
Step 4: To change the instructor for your Kajabi product page, make sure “Product” is selected in the dropdown menu at the bottom of the left sidebar, then click on “Product Sidebar”.
Step 5: Click on “Instructor,” and the options for the product page’s “Instructor” widget will open up.
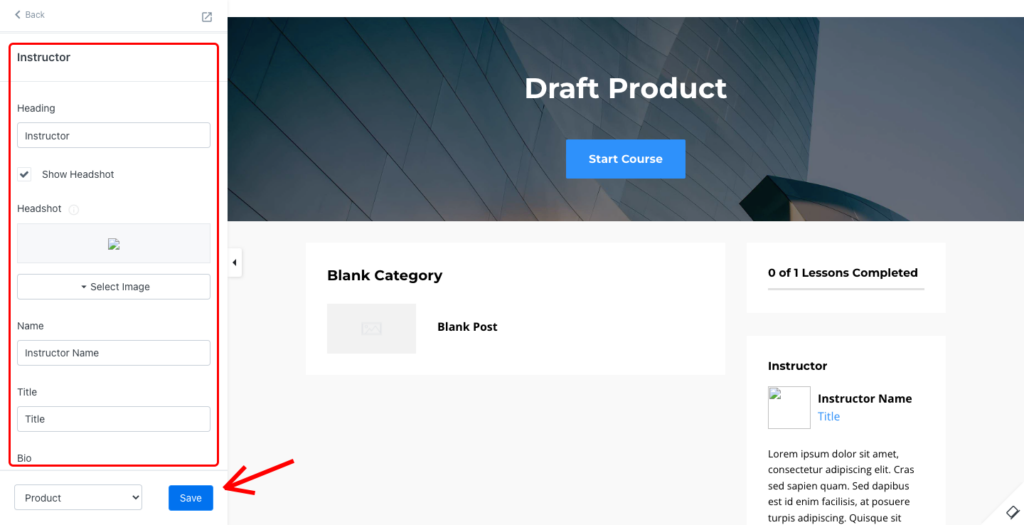
Step 6: Make your edits, then hit the “Save” button. (Note that your edits won’t show up in the preview before you’ve saved them!)
You’re halfway done. Now you need to repeat this for the post pages. Stay on the page; the good news is that, from here, you can go directly to the editor for the “Instructor” widget for the post pages.
Part 2: Change the Instructor on the Post Pages
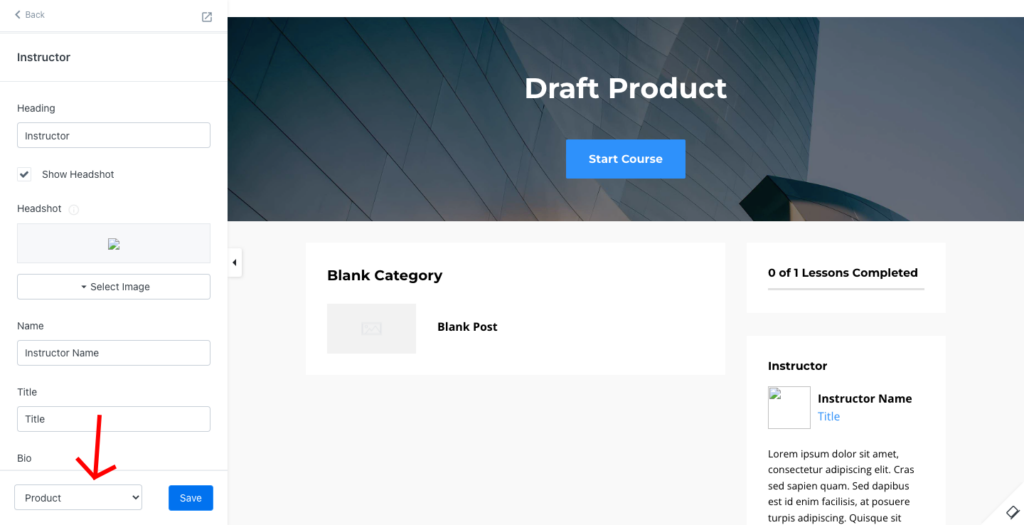
Step 7: Open the dropdown menu at the bottom of the sidebar (the one that’s left of the “Save” button) and select “Post.”
Step 8: Click on “Post Sidebar,” and the list of sidebar widgets will open up.
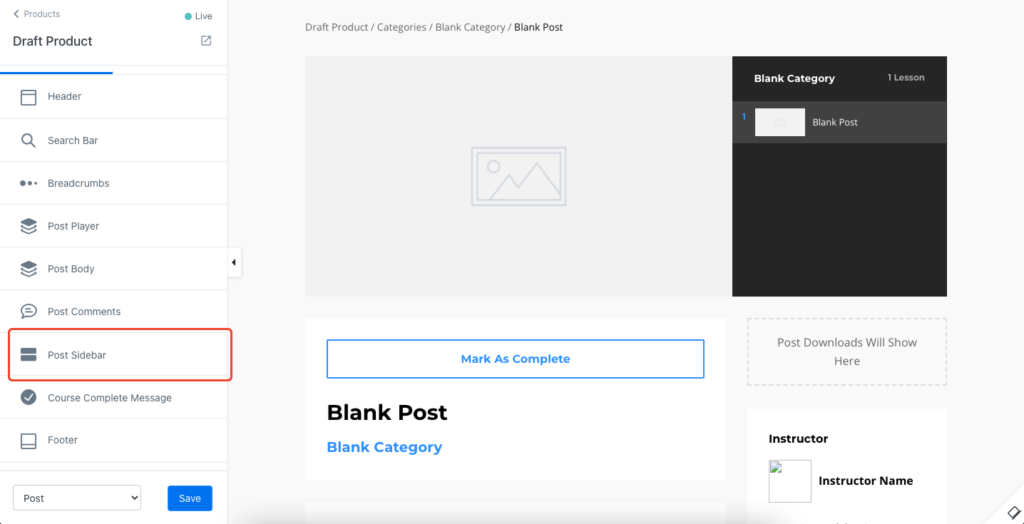
Step 9: Click on the “Instructor” widget.
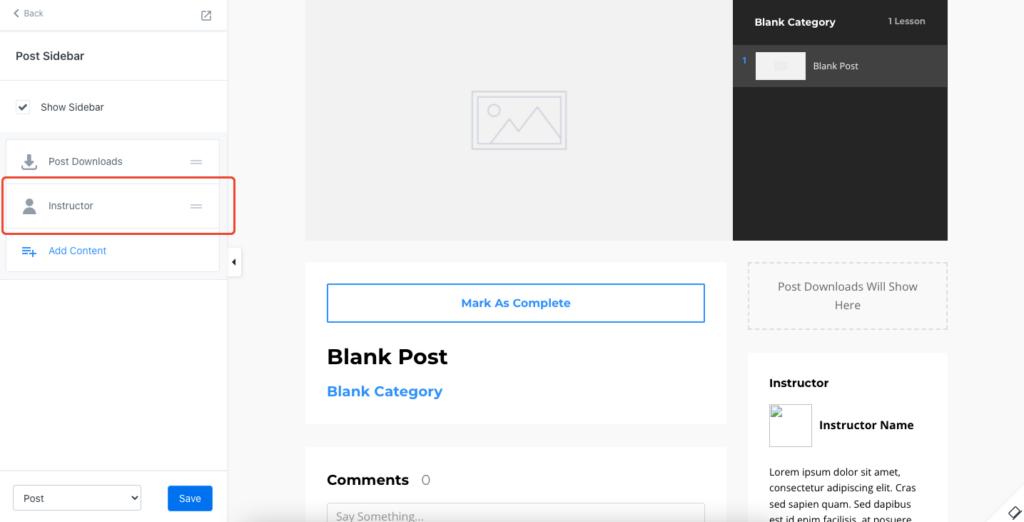
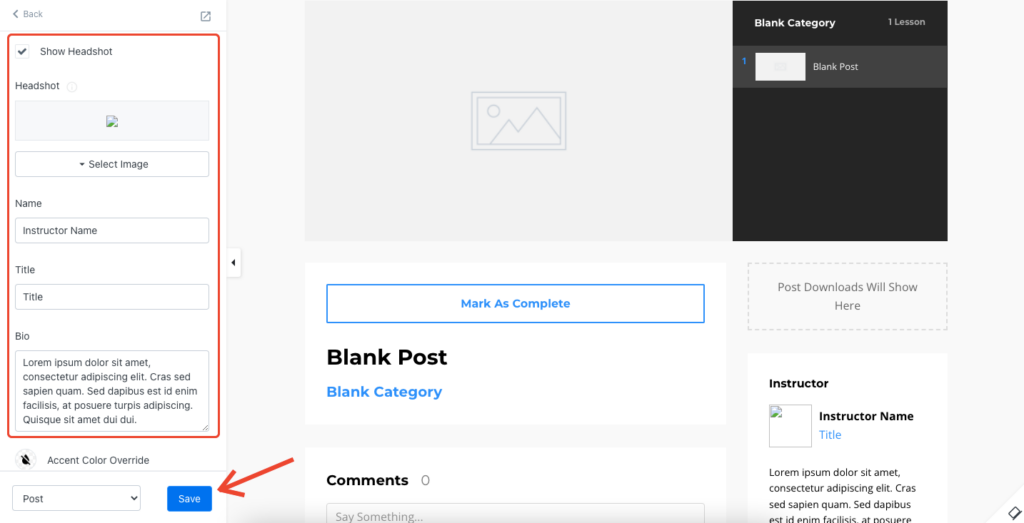
Step 10. Make your edits, hit the “Save” button at the bottom of the left sidebar, and you’re done.


Thank you for helping to complete this
Extremely useful point
Kind regards, Indre
Glad you found this helpful, Indre, and thanks for stopping by!
Jim
Thank you so much for this! I was struggling to change from the default Latin text for the lesson page.
Thank you so much, this was frustrating the life out of me!