Working on a design with multiple photos and elements in Canva, but you don’t know how to layer them properly?
Read on, because in this tutorial I’ll show you step by step how to bring images to the front in Canva, using screenshots.
How to Bring an Image Forward
There are two ways to bring a photo or element forward in Canva: “Bring to Front” moves the image to the very top of your design, while “Bring Forward” moves the image one layer up.
Bring to Front
To move a photo or element to the very top of your Canva design, right-click on it and select “Bring to Front.”
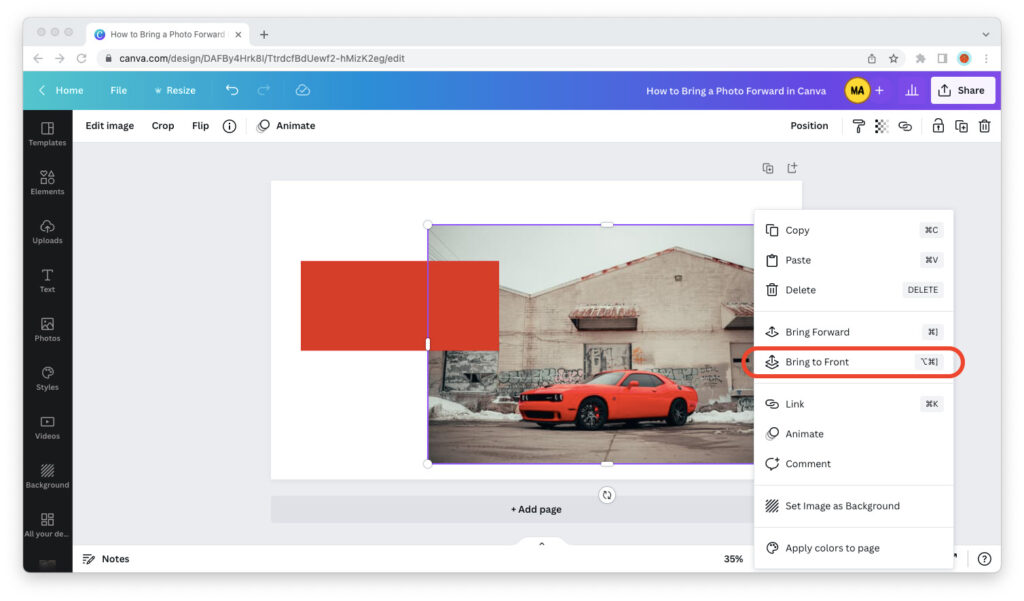
There’s also a shortcut you that can use for this. Simply select the image and press Alt + Cmd + ] on macOS or Alt + Control + ] on Windows to bring a photo or element forward.
Bring Forward
To move a photo or element one layer up in your Canva design, right-click on it and select “Bring Forward.”
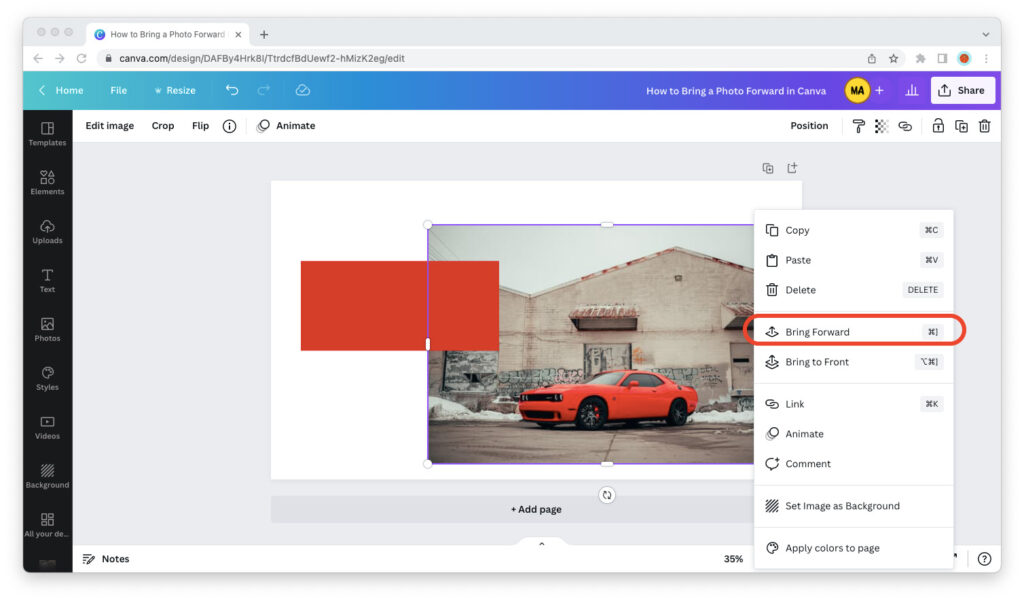
You can also bring an image forward by pressing Cmd + ] on macOS or Control + ] on Windows.
How to Detach an Image From the Background
When you drag and drop a photo into your Canva design, Canva often turns it into the background image for that design.
That’s a time saver if you actually want to use the photo as a background for your design, no question. But what about the times when you don’t want this to happen?
Detach From Background
To detach an image from the background of your Canva design, follow the steps below.
Step 1: Right-click on it and select “Detach Image from Background”.
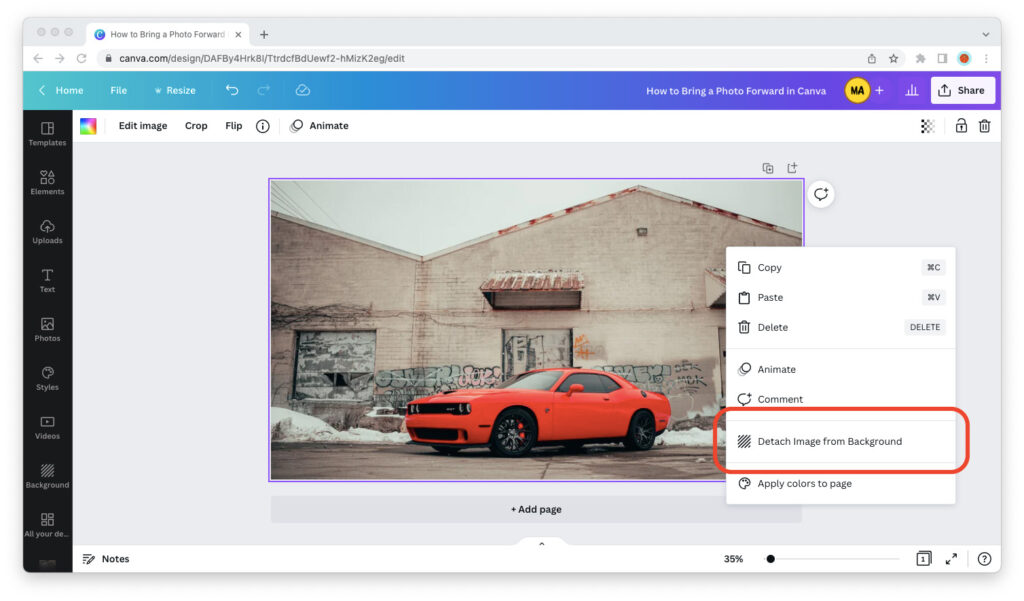
Step 2: Canva will detach the image from the background of your design, and you will now be able to move, resize, and edit it freely.
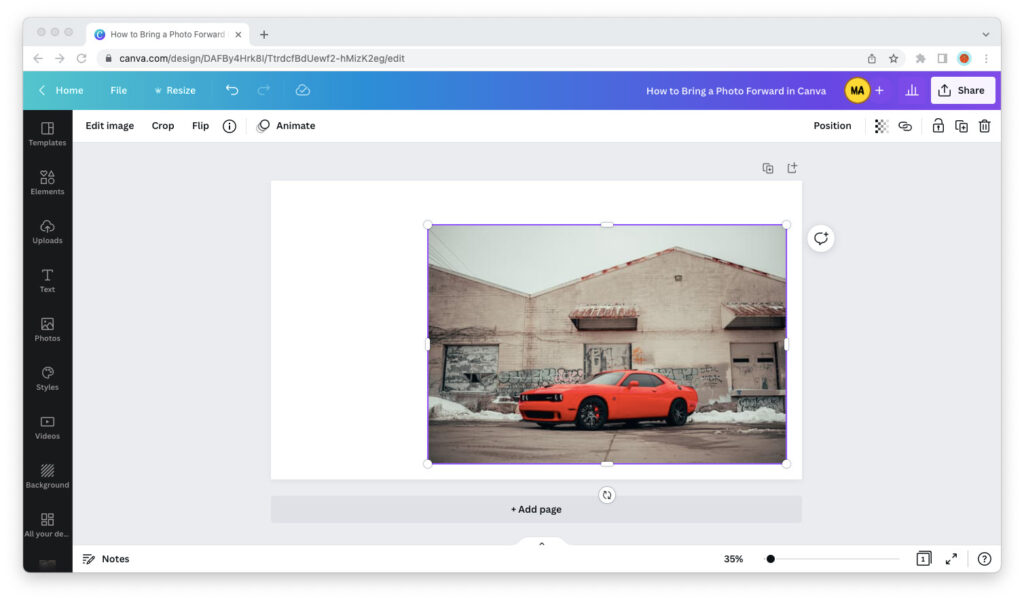
As you can see from the screenshot above, the image will remain in your design. But you will now be able to edit it however you like, as Canva will no longer treat it as the background.
