Google Search Console is a tool by Google that helps you track and improve your site’s presence in search results.
To get started with Google Search Console, you need to verify that you are the owner of your website. Once you have verified your website, you’ll be able to get information about the keywords for which it ranks and the clicks that each of its pages receives.
Google Search Console also gives you a lot of information that can help you with SEO, such as which pages are indexed, how good the user experience is, and if any issues with your hosting provider have affected the availability of your website.
To help you get access to all of this, this tutorial will show you how to verify your site with Google Search Console.
How to Verify Your Site in Google Search Console
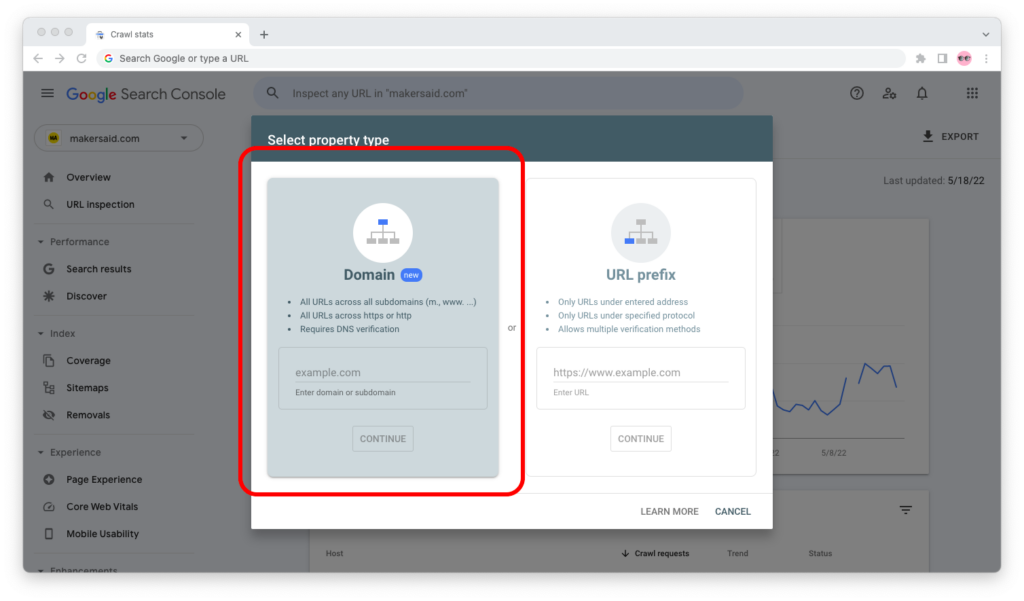
There are two ways to add your site to Google Search Console. The newer one (and the one recommended by Google) is to add it as a domain property, and the older one is to add it as a URL-prefix property.
You can learn more about the difference between a domain property and a URL-prefix property here. This tutorial assumes that you’ve added your website as a domain property and, now, you want to verify it.
To follow along, your domain’s DNS records must be managed in cPanel. This means your domain must either be the root domain of a cPanel hosting account or an addon domain within that account.
If this isn’t the case, read through nevertheless; it’s a good primer for what needs to be done, even if the interface will be a bit different. Then check the help section of your domain registrar or hosting provider to see how exactly you can add a TXT record to your domain name through their interface.
Part 1: Copy the TXT Record From Google Search Console
Step 1: Go to Google Search Console. Sign in with the Google account that you want to associate your site with.
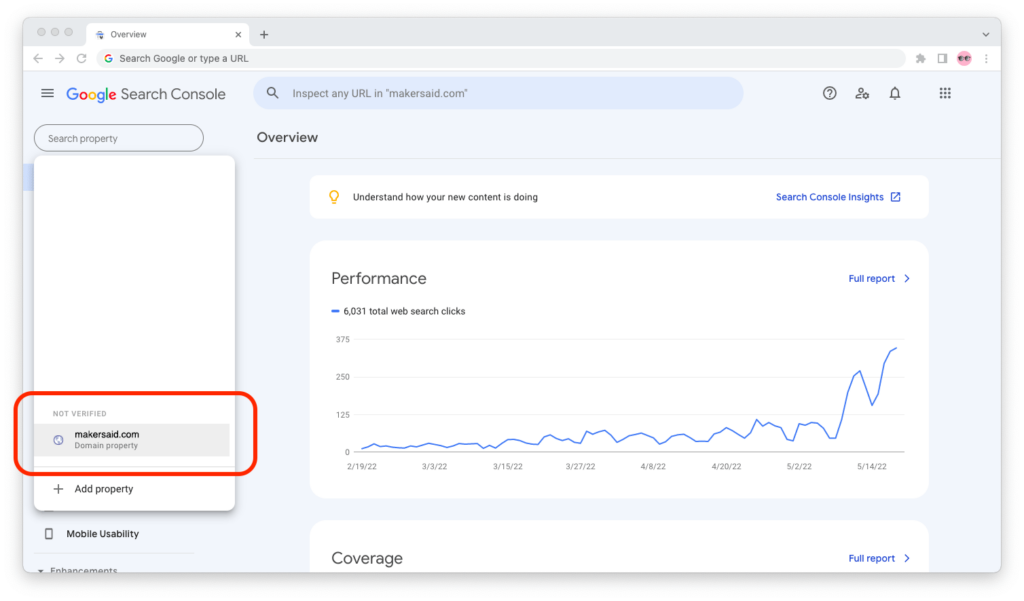
Step 2: In the sidebar on the left, open the “Search property” dropdown menu. Scroll down to “Not Verified” and click the name of the website you want to verify.
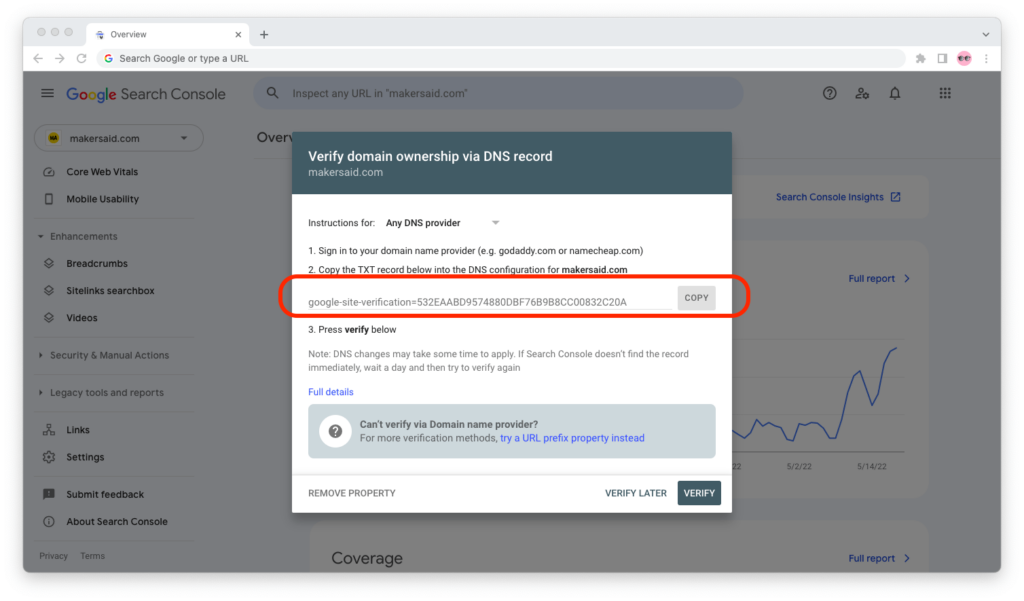
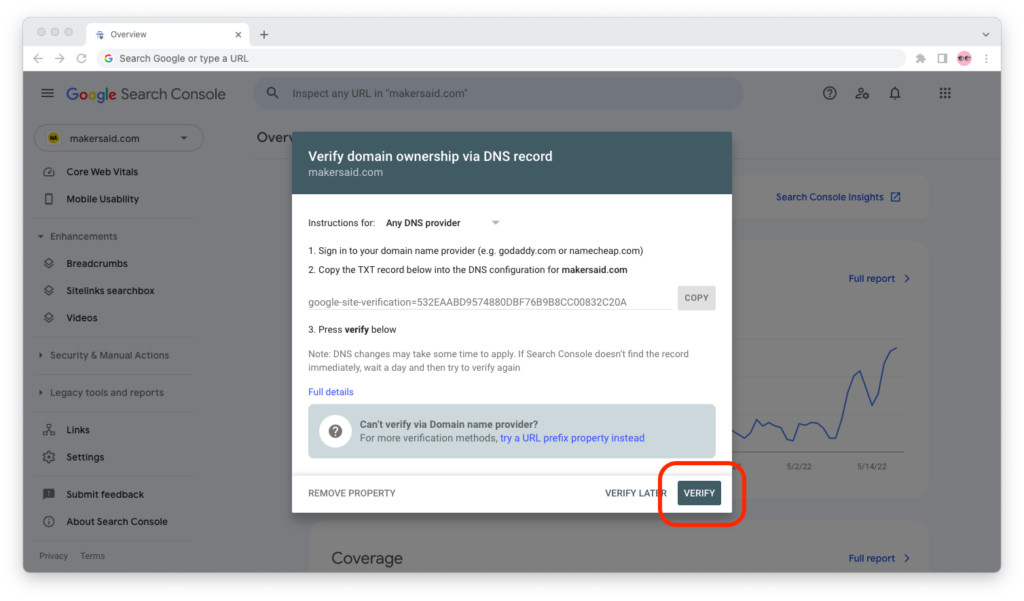
Step 3: Copy the TXT verification record for your site.
Part 2: Add the TXT Record to Your Domain Name via cPanel
Step 1: Open a new tab in your browser, go to your hosting service provider, and open cPanel for your site’s server.
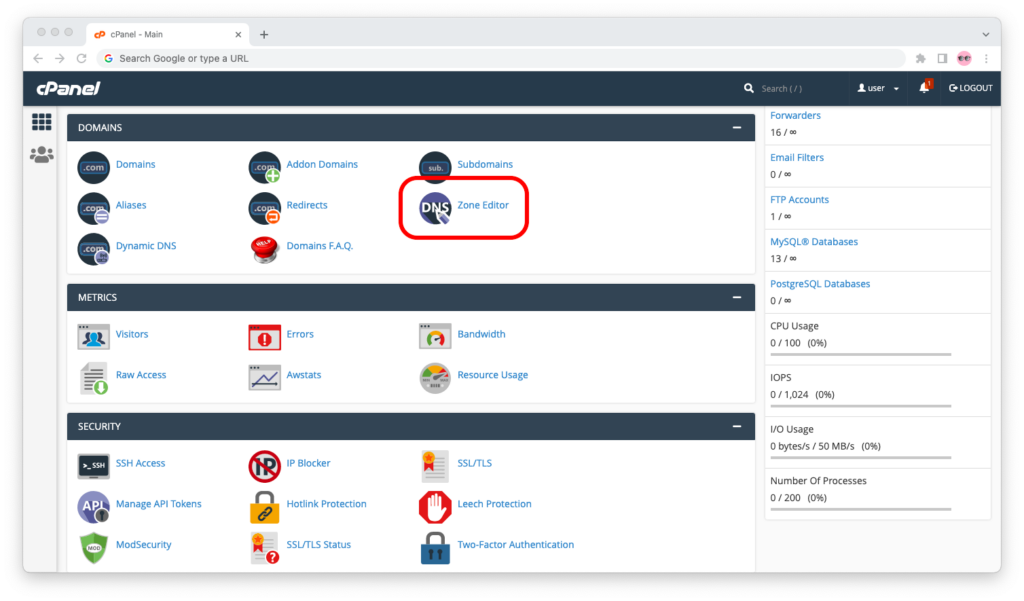
Step 2: Now that you’re in cPanel, scroll down and find the “Zone Editor” app in the “Domains” widget.
Step 3: Select your site’s domain name and click the “Manage” button.
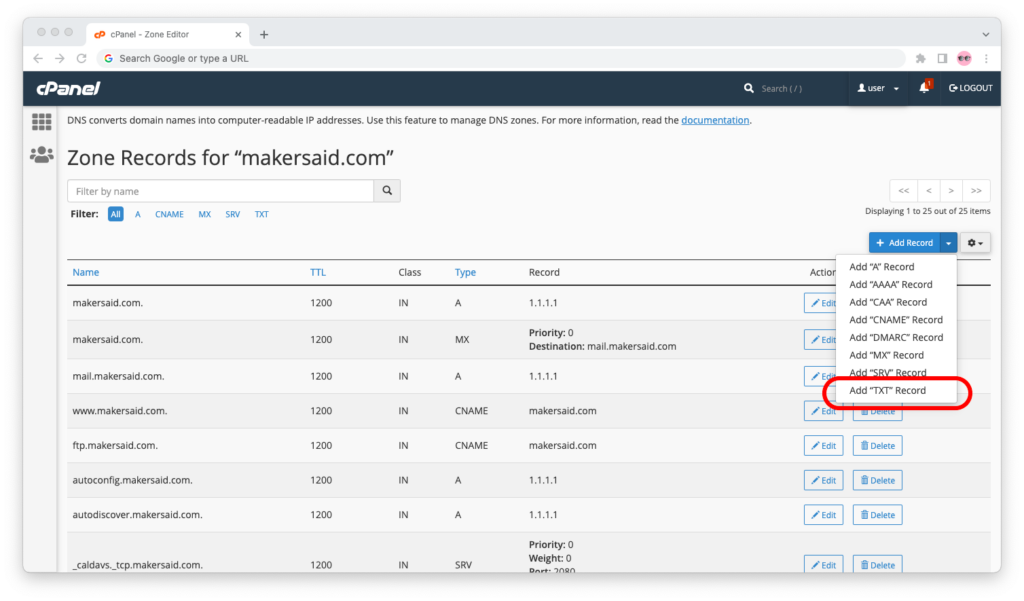
Step 4: In the zone records editor for your domain name, click the “Add Record” button in the upper right corner and go to “Add TXT Record.”
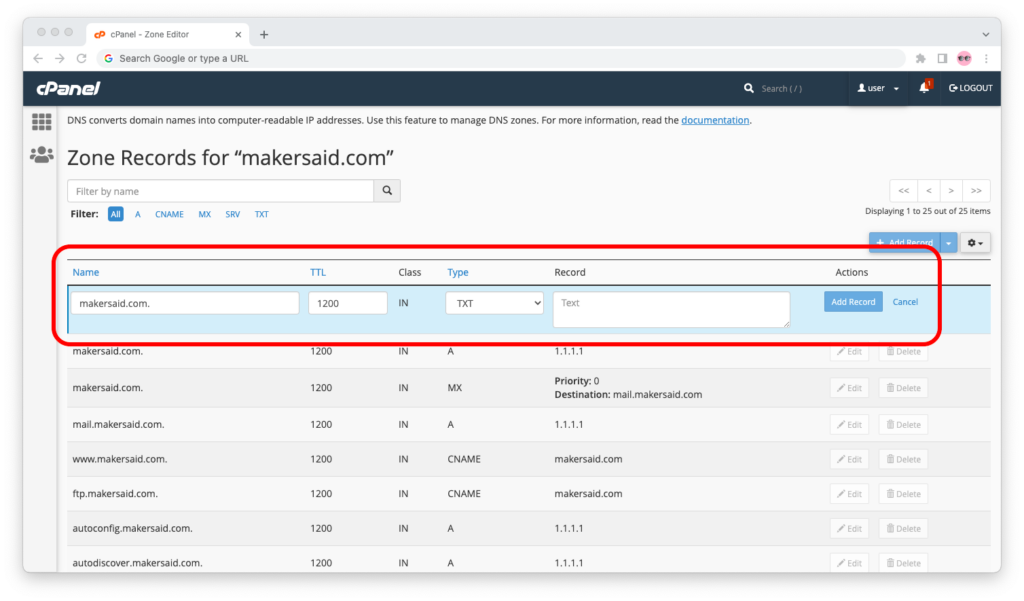
Step 5: A draft TXT record will be created:
- Enter your site’s domain name, followed by a dot (.), under “Name;”
- Leave “TTL” and “Type” as they are;
- Paste the Google Search Console verification code in the “Record” field.
When you’re done, double-check that you entered the site’s domain name (followed by a dot) and pasted the Google Search Console verification code correctly, then click “Add Record.”
Step 6: Wait at least 20 minutes for the TXT record changes to propagate. (In rare cases, it can take a few hours, even a couple of days.)
Part 3: Go Back to Search Console to Verify Your Site Ownership
Step 1: Go back to Google Search Console if you left the tab open. Provided at least 20 minutes have passed since you added the TXT record, click the “Verify” button.
(If you didn’t leave the tab open, then go to Google Search Console and find your site in the “Search property” dropdown menu again.)
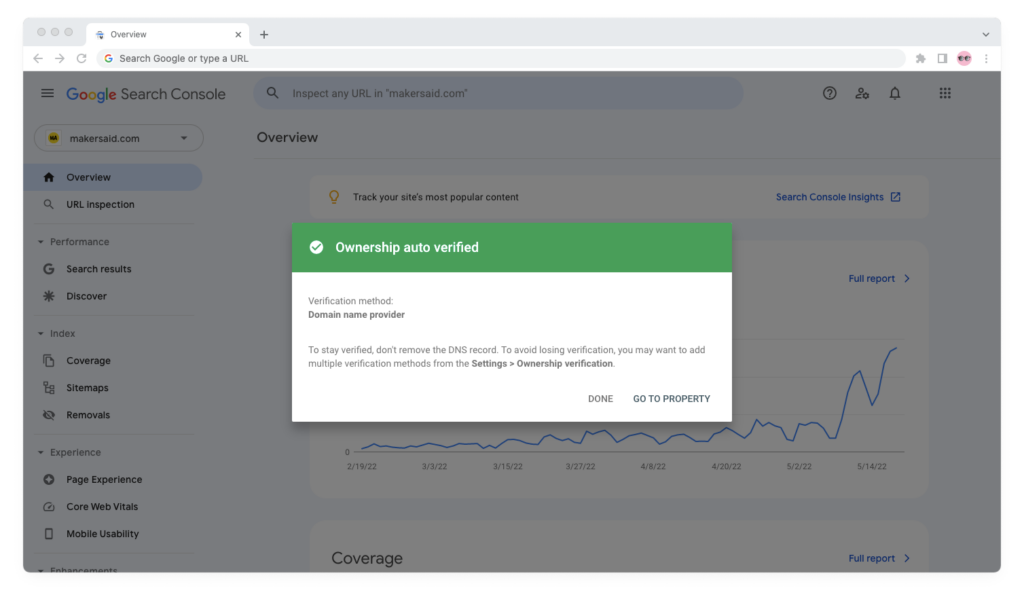
Step 2: If everything went according to plan, you will verify your site’s ownership with Google Search Console and see a success message prompting you to go to your Property.
Don’t be alarmed if you see an error. As I mentioned, it can take a few hours, in extreme cases 1-2 days, for the DNS servers to add the TXT record to your domain name (and for Google Search Console to be able to pick it up).

