Up until a few years ago, installing WordPress was a tedious process that kept even the most experienced webmasters from wanting to do it.
All that changed when Softalicious, an easy-to-use, done-for-you script installer, was introduced to cPanel. With Softalicious, installing WordPress takes just a few minutes, even if you’ve never done it before.
Of course, it needs your input here and there and, to install WordPress, you gotta know this and that. So in this tutorial, I will walk you through the process step by step, with screenshots.
By the time you’re done reading this, you will be able to call yourself a professional at using Softalicious to install WordPress!
How to Install WordPress With Softalicious
Step 1: Fire up your web browser, go to the cPanel for your hosting package, and log into your account.
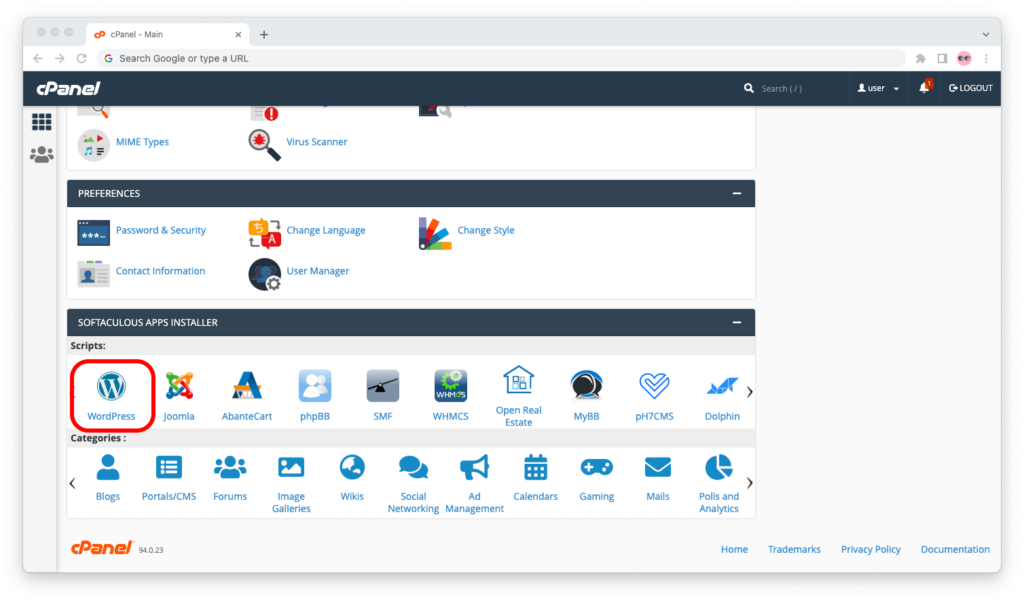
Step 2: Scroll down, find the “Softalicious Apps Installer” widget, then click on the WordPress icon.
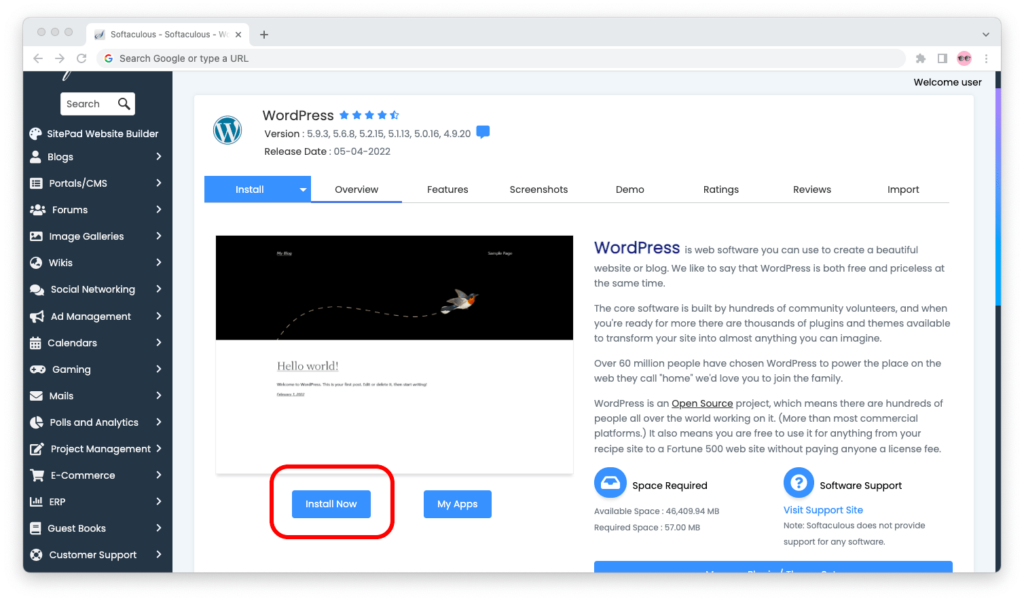
Step 3: Click the “Install Now” button.
Step 4: The WordPress setup window will pop up.
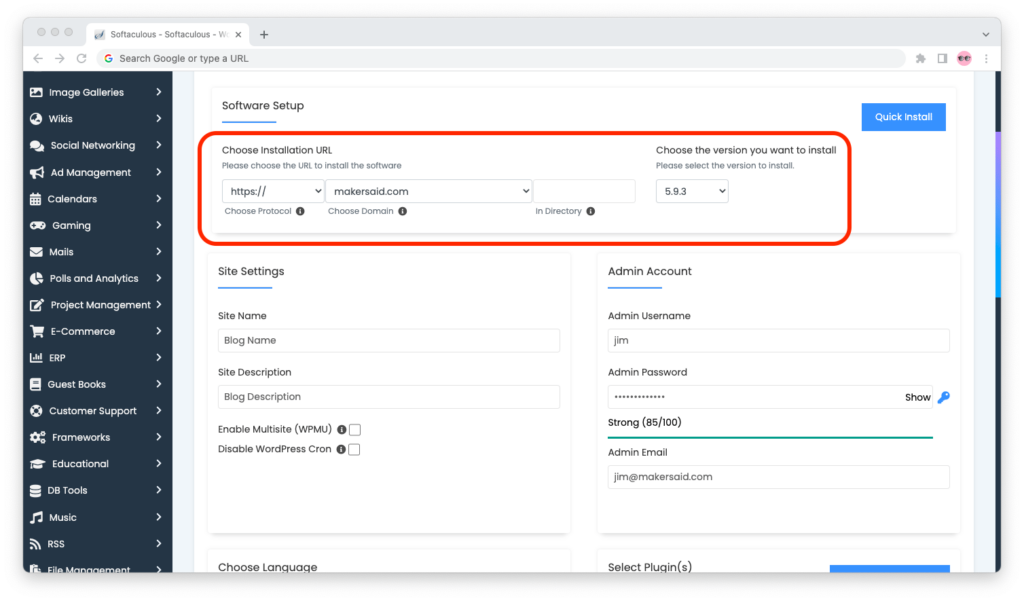
Make sure the domain name you want to install the blog on is selected under “Choose installation URL.”
Select the latest version of WordPress from the dropdown menu under “Choose the version you want to install.”
Step 5: Enter the name and description of your website. (Don’t worry, you can change them later and as many times as you want.)
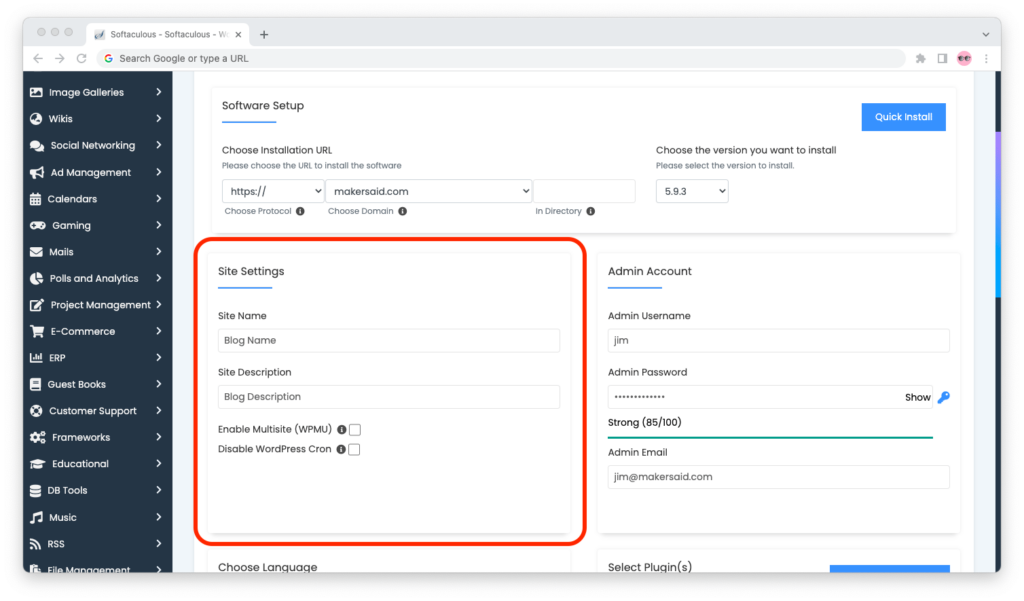
Leave “Enable Multisite (WPMU)” and “Disable WordPress Cron” unticked.
Step 6: Enter the username, password, and email address for your WordPress admin account.
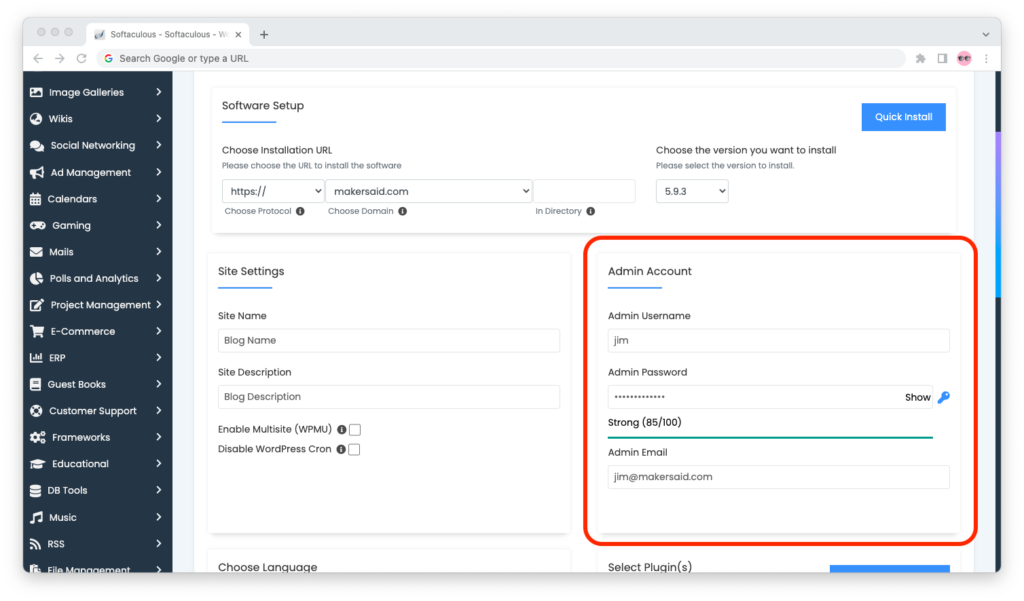
Use your real email address and set a username you can remember; you will use these credentials to log in to WordPress.
Consider using the Secure Password Generator for your password.
Step 7: Scroll down and you will see a bunch of additional options.
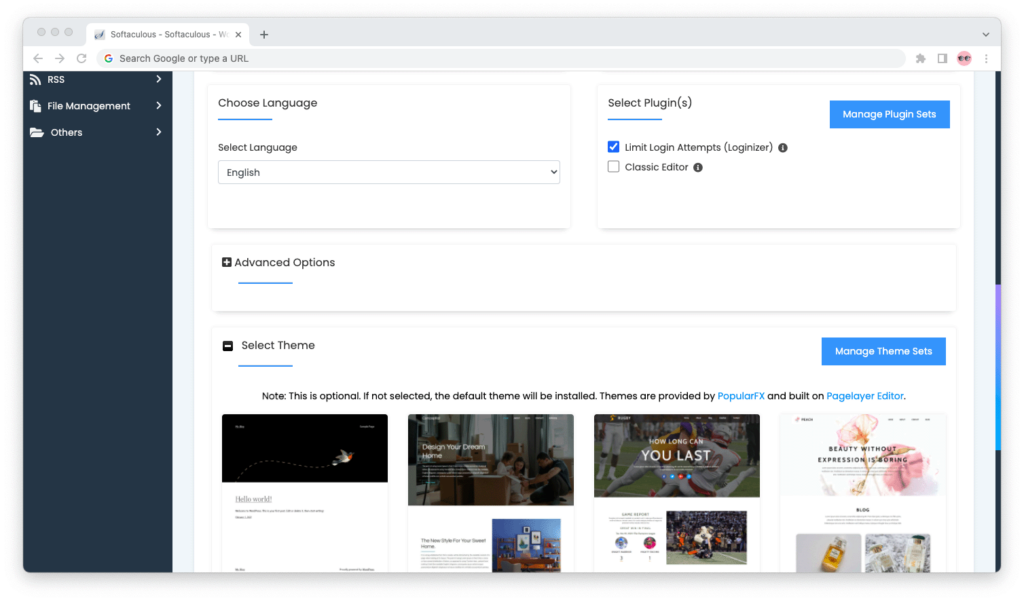
Select your blog’s language under “Choose language.”
Leave the “Limit Login Attempts (Loginizer)” plugin ticked and the “Classic Editor” plugin unticked under “Select plugin(s).”
There’s no need to select a theme now. Softalicious will install WordPress with the default theme—and you can switch to any theme you want later.
Step 8: Enter your email address so you get the installation details sent to you. Then click the “Install” button.
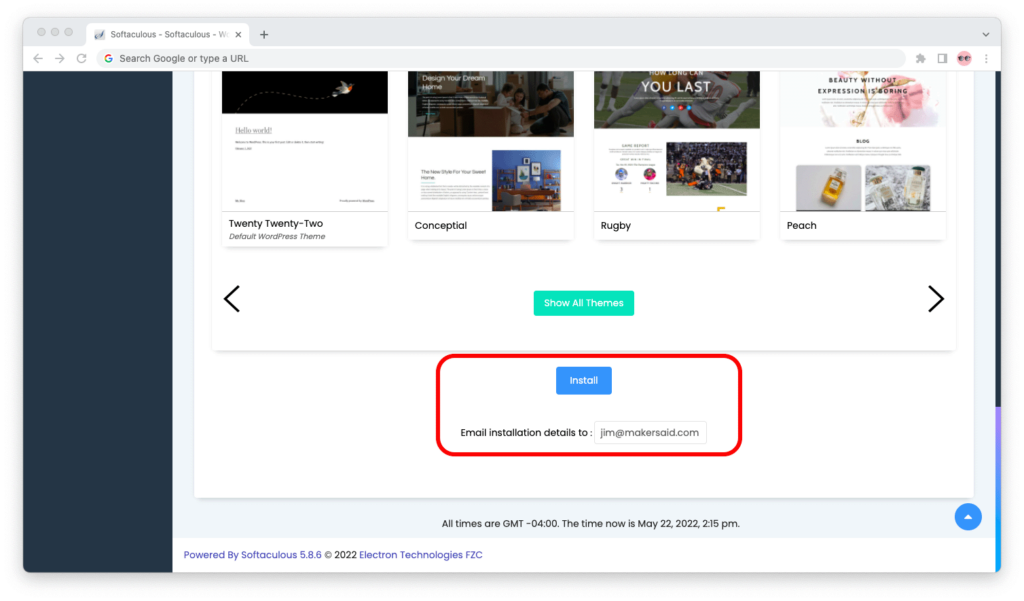
Step 9: Make note of your blog’s URL and its administrative URL.
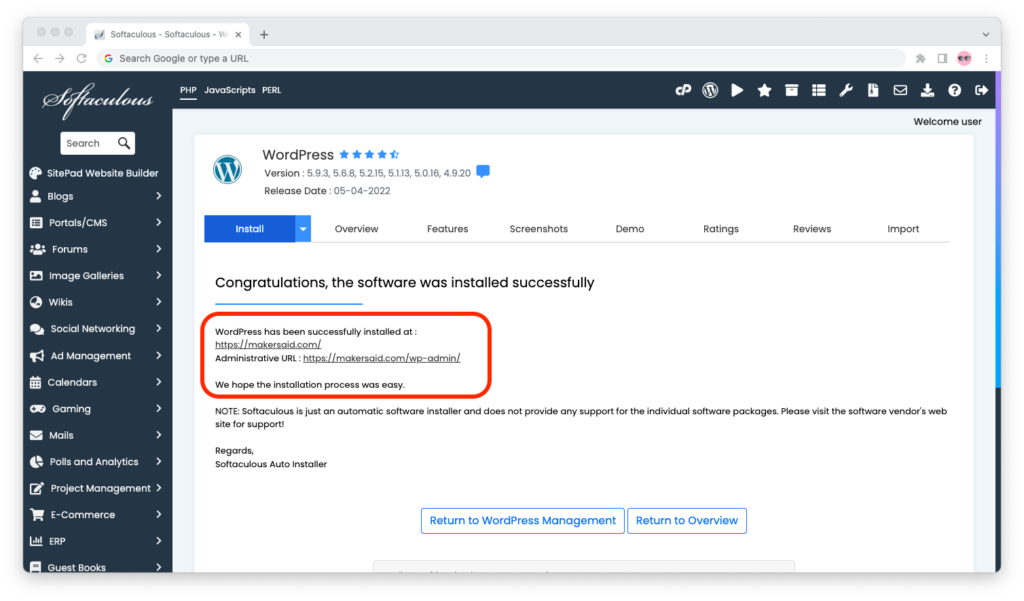
You’re all set!
When you visit the address where you just installed WordPress, you should now see your blog.
Related: How Long Does It Take to Build a WordPress Website?

