This tutorial will show you how to add Google Analytics to WordPress, with and without a third-party plugin.
Non-technical users will want to consider methods 1 and 2, using Google’s Site Kit plugin and WPBeginner’s Insert Headers and Footers plugin.
Technical users, on the other hand, will want to scroll down to methods 3 and 4, where we discuss adding Google Analytics by editing the theme’s functions.php file as well as creating a custom WordPress plugin for the task.
Method 1: With the Site Kit Plugin
Site Kit is Google’s official WordPress plugin. With it, you can add Google Analytics to your website, link it to Google Search Console, make money with Google AdSense, and much more.
If you don’t know how to code and you prefer to use Google’s official tool to add Google Analytics to your WordPress website, this is the option for you.
Step-by-step guide:
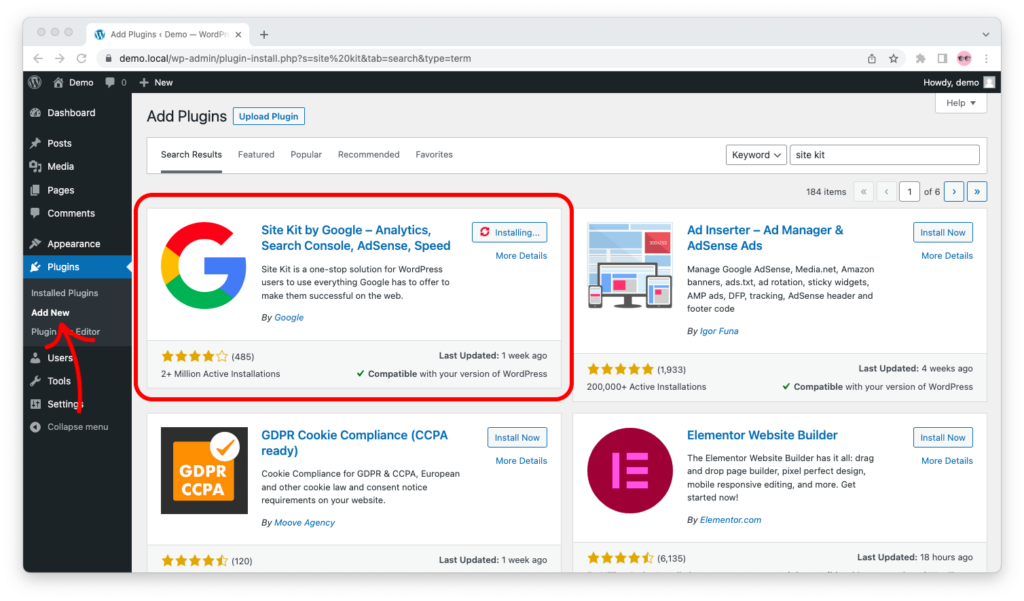
Step 1: In the WordPress admin dashboard, go to “Plugins” > “Add New.” Find, install, and activate “Site Kit by Google – Analytics, Search Console, AdSense, Speed.”
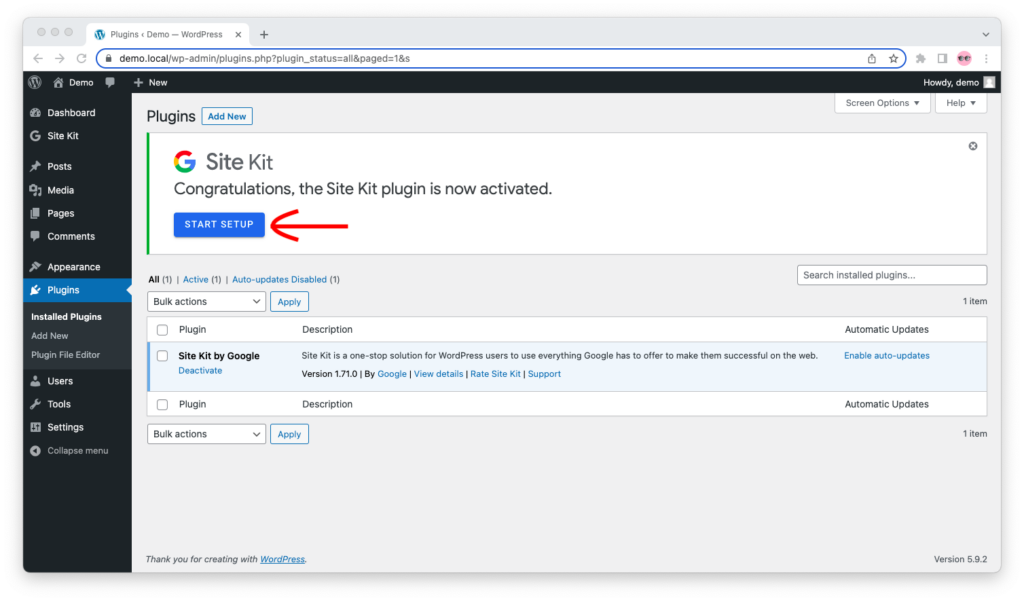
Step 2: As soon as the plugin is activated, it will prompt you to start the setup. Click on the blue “Start Setup” button to continue.
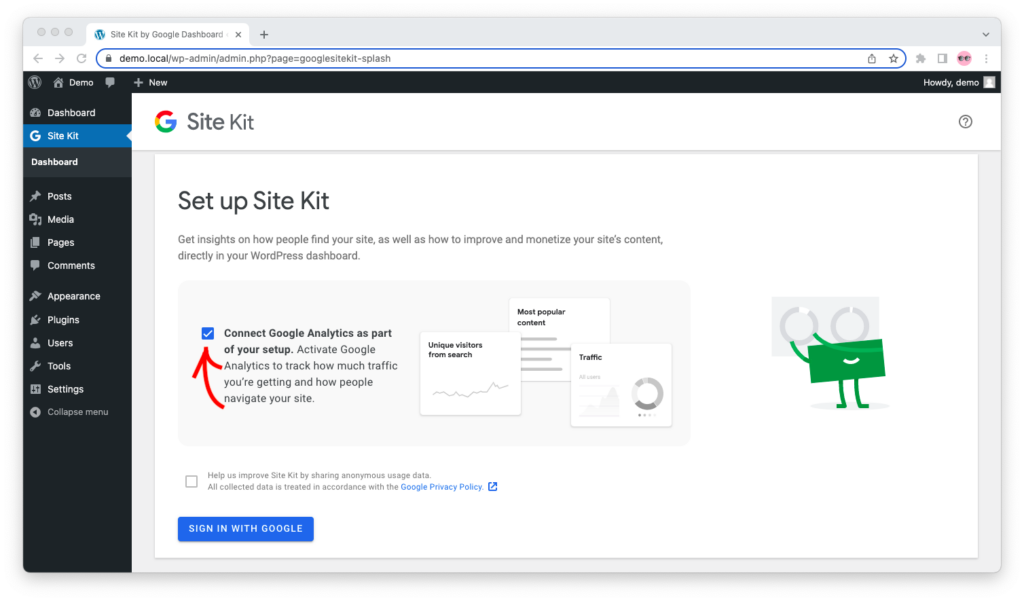
Step 3: The plugin will ask you if you want to “Connect Google Analytics as part of your setup.” Make sure this is checked, and then click on the blue “Sign In With Google” button at the bottom of the screen.
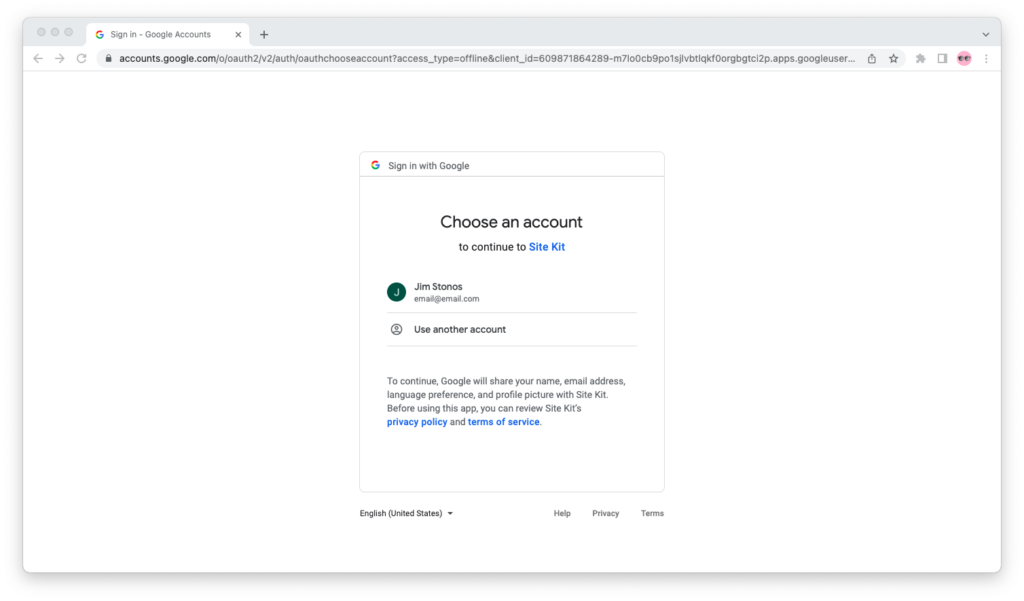
Step 4: You will be redirected to a screen asking you to choose a Google account. If you have more than one Google account, choose the account you want to use and sign in with it.
Step 5: You will be asked to give Site Kit additional permissions to your Google Analytics and Google Search Console data, as well as the list of sites you manage within your Google account. Tick the boxes and click on the “Continue” button below.
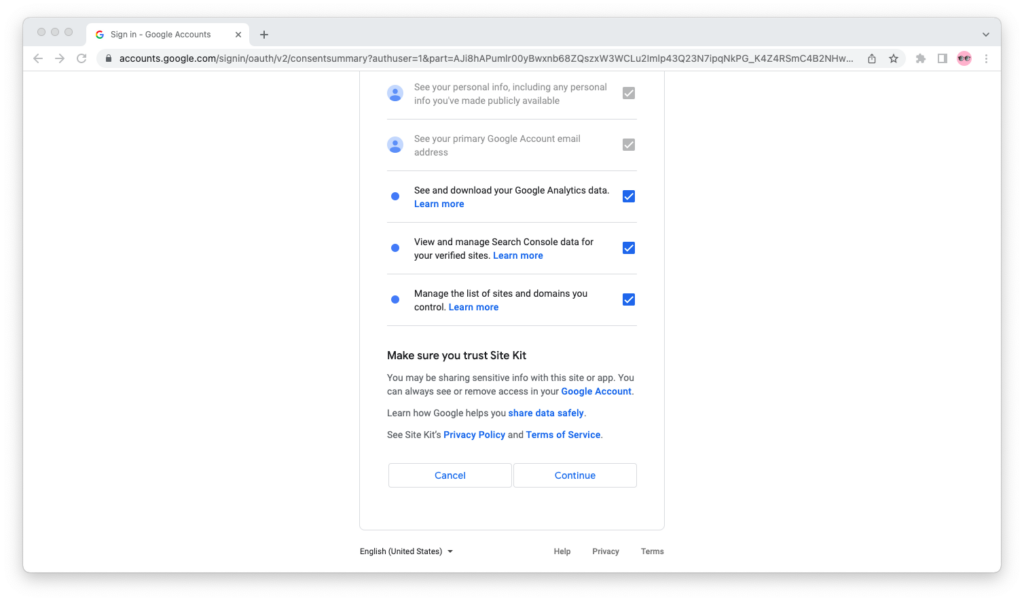
Step 6: Go through Google’s verification and setup wizard. Along the way, Site Kit will give you options to create or link your website to a Google Search Console and a Google Analytics property.
Step 9: When you’re done with the Site Kit plugin’s setup, click on “Go to my Dashboard.”

You’re done! If everything went well, you will start collecting data for your website in Google Analytics!
Method 2: With the Insert Headers and Footers Plugin
If you don’t know how to code and you want to add more than just Google Analytics to your website (for example, Bing Webmaster Tools or Facebook Ads meta tags), consider using a header and footer insertion plugin.
There’s more than one WordPress plugin for this task, and each of them has its pros and cons. I personally like the ease of use and frequency of updates of Insert Headers and Footers by WPBeginner.
Step-by-step guide:
Step 1: In the WordPress admin dashboard, go to “Plugins” > “Add New.” Find, install, and activate “Insert Headers and Footers by WPBeginner.”
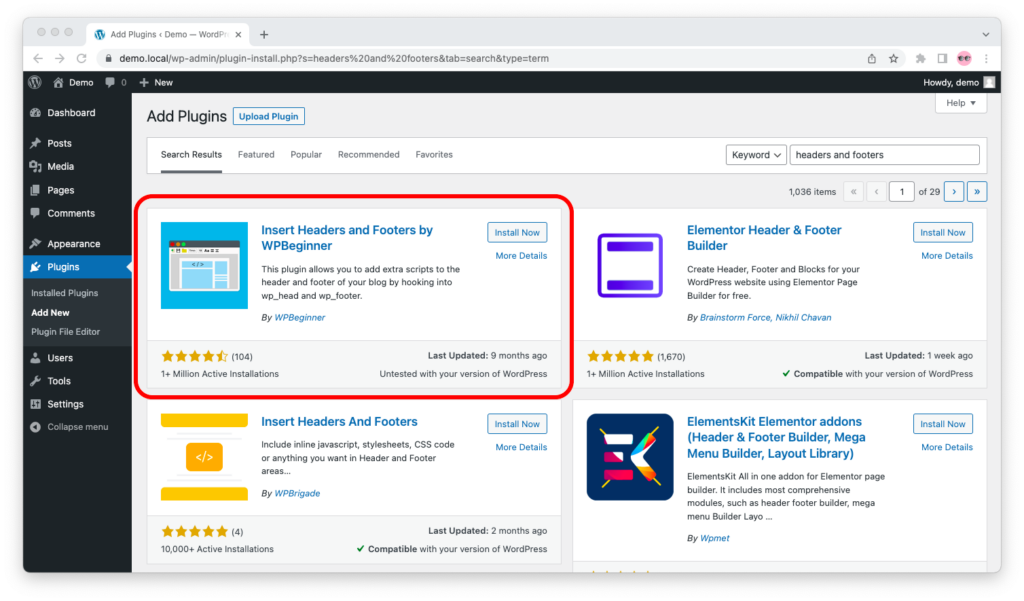
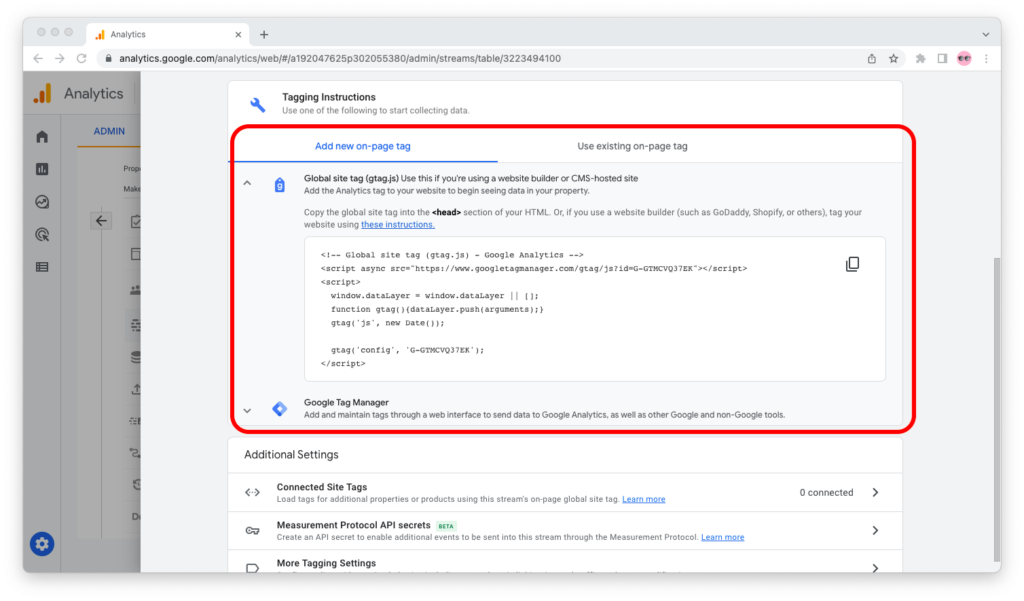
Step 2: Switch to Google Analytics.
If you don’t have a Google Analytics property, create one, copy the Global Site Tag (gtag.js) code snippet, and continue to the next step.
If you already have a Google Analytics property, go to “Admin” > “Property” > “Data Streams.” Click on the data stream for your website and copy the Global Site Tag (gtag.js) code snippet.
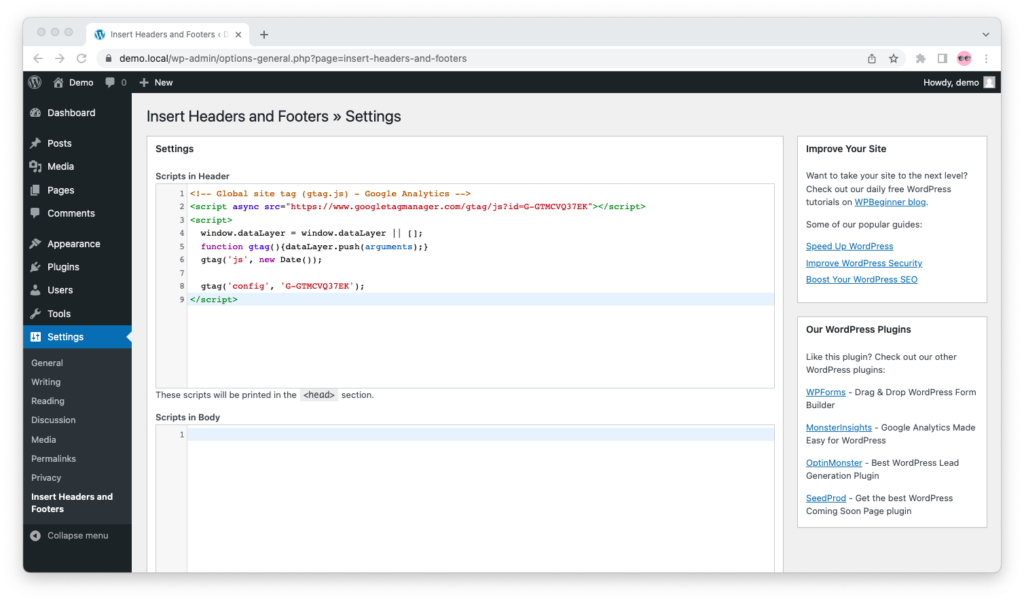
Step 3: Open the WordPress admin dashboard. Go to “Settings” > “Insert Headers and Footers.” Paste the code into “Scripts in Header,” then scroll to the bottom of the page and hit “Save.”
Step 4: If you have a WordPress caching plugin (for example, WP Super Cache or W3 Total Cache), make sure to clear the cache so that the new version of the pages and posts with the Google Analytics code snippet shows up.
This is it! You will now start to collect traffic data about your website in Google Analytics.
Method 3: By Editing Your Child Theme’s Functions.php
This method of adding Google Analytics to your WordPress website only works if you have a custom theme or a child theme of a parent theme. Otherwise, your changes will be overwritten and removed every time the parent theme is updated.
Step-by-step-guide:
Step 1: Copy the Global site tag (gtag.js) code snippet for your website from your Google Analytics property.
Step 2: Open the functions.php file of your theme via the theme editor in the WordPress admin dashboard or an FTP client.
Add the code below at the end of the file, above the closing tag, and then paste the code for your site’s global site tag (gtag.js) where it says inside it.
// Add Google Analytics to <head>
add_action('wp_head', 'add_ga4');
function add_ga4(){
?>
  // Paste Google Analytics gtag.js code here
<?php
};
Method #4: By Creating a Custom WordPress Plugin
If you don’t want to edit your theme’s functions.php file for one reason or another and you don’t want to use a third-party plugin for the task, your best bet is to create a custom plugin of your own.
Step 1: In your WordPress instance’s /wp-content/plugins/ folder, create a new folder named my-custom-ga-plugin.
Step 2: In that folder, create a PHP file named plugin.php and add the following code to it. Paste the code for your site’s global site tag (gtag.js) where it says inside it.
<?php
/**
 * Plugin Name: My Custom GA4 Plugin
 */

/* Add Google Analytics to <head> */
add_action('wp_head', 'add_ga4')
function add_ga4(){
?>
  <!-- Paste Google Analytics gtag.js code here -->
<?php
};
?>
Step 3. In the WordPress admin dashboard, go to “Plugins” > “Installed Plugins.” Activate your plugin and you should be done; the Google Analytics code will now be inserted into your theme’s header on every page and post.

