ClickFunnels 2.0, the latest and greatest version of everyone’s funnel-building tool, gives you a ton of Google Fonts to choose from when designing your site funnels.
Still, if you want to add some personality and pizzazz to your funnels, then you may want to upload custom fonts to your workspace. Not sure how? Fear not, my friend! In this tutorial, I’ll show you how to add custom fonts to ClickFunnels 2.0 and take your funnels to a new level, step by step and with screenshots so you can follow along.
Uploading Custom Fonts to ClickFunnels 2.0
Follow the steps in the guide below to upload a custom font to your ClickFunnels 2.0 workspace. (If you need to upload the font to more than one workspaces, repeat the steps for each.)
Step 1: Fire up your browser, go to myclickfunnels.com, and sign into your ClickFunnels 2.0 account.
Step 2: Go to your website’s workspace.
Step 3: Navigate to the “Settings” tab, the one in the sidebar on the left.

Step 4: Now navigate to “My Assets,” again in the left sidebar.
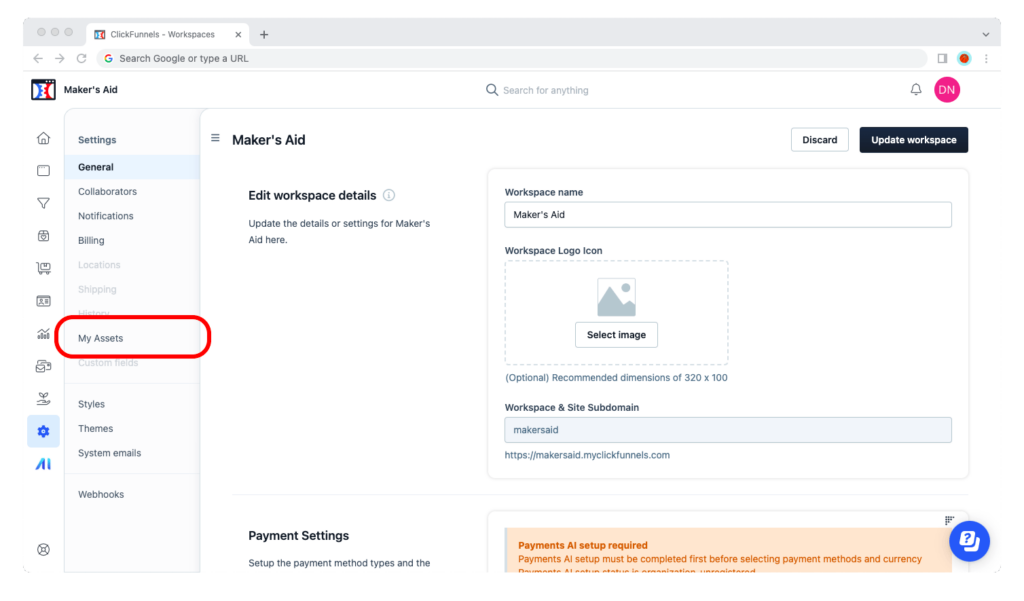
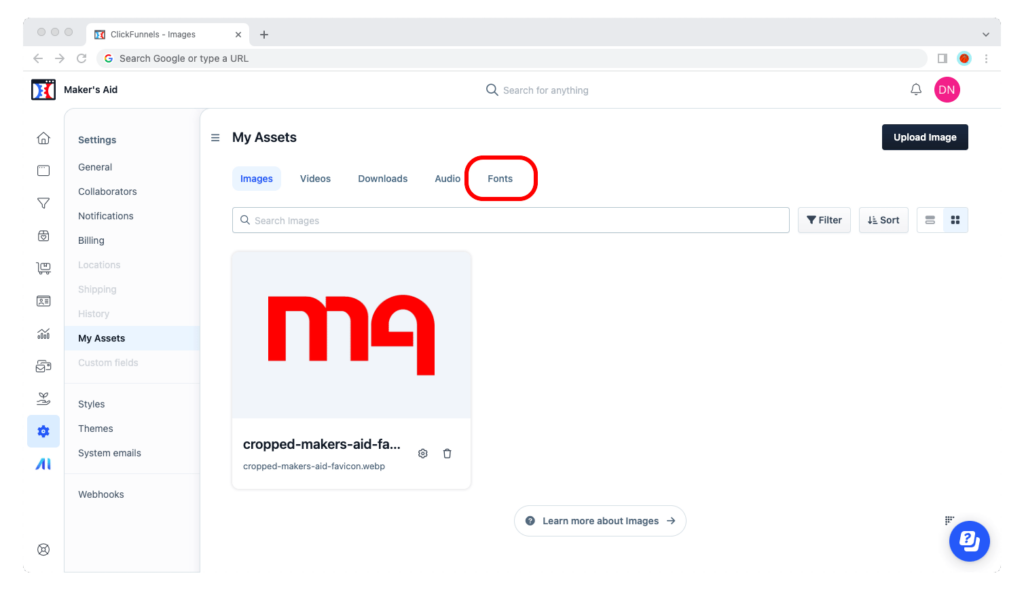
Step 5: From the navigation bar under “My Assets,” go to “Fonts.”
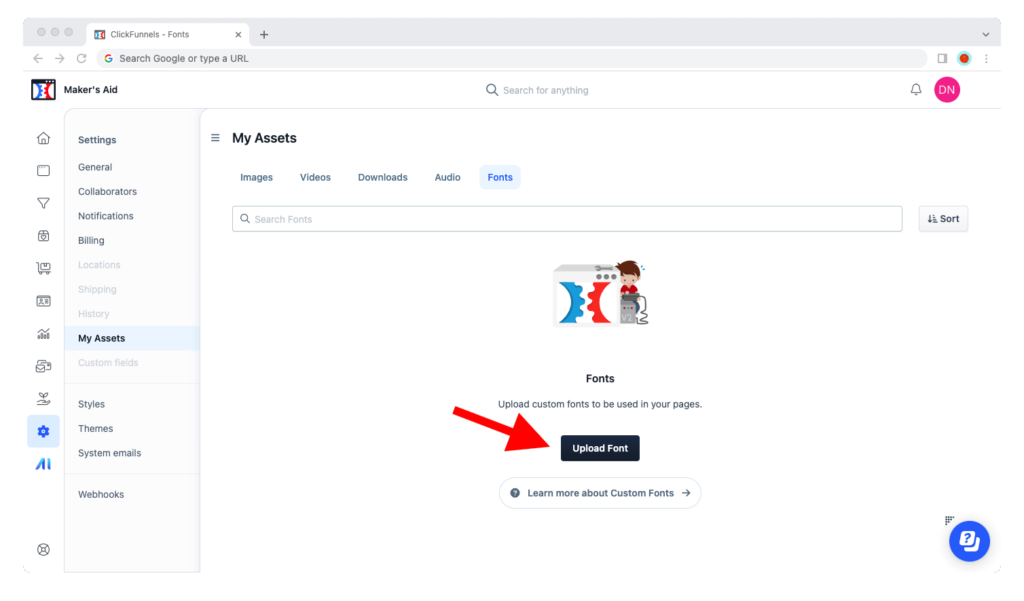
Step 6: Hit the “Upload Font” button.”
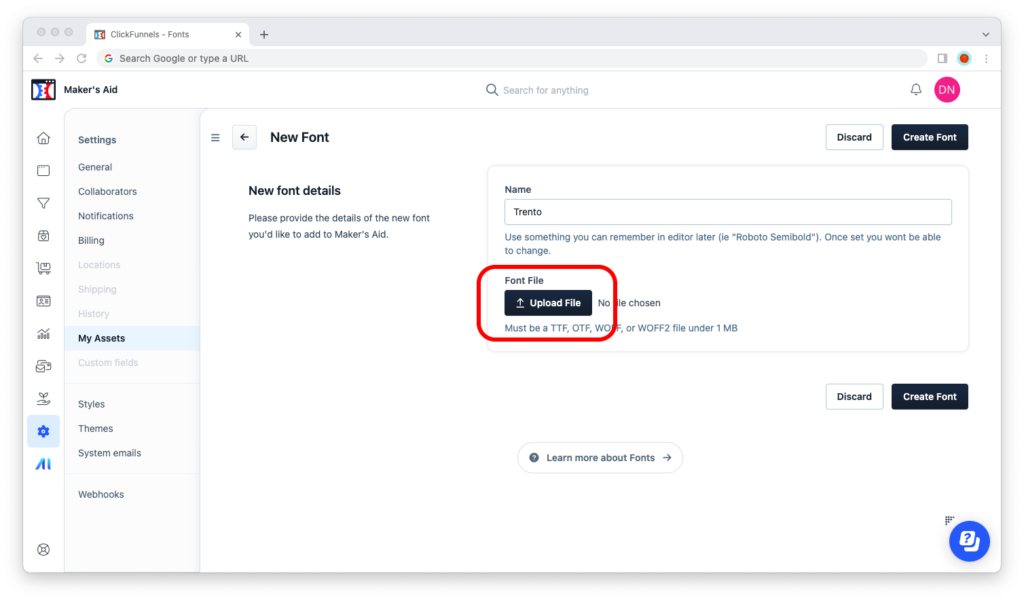
Step 7: Name your font. Keep it simple; this is the name that’ll show up when you want to pull up the font in ClickFunnels 2.0’s visual editor.
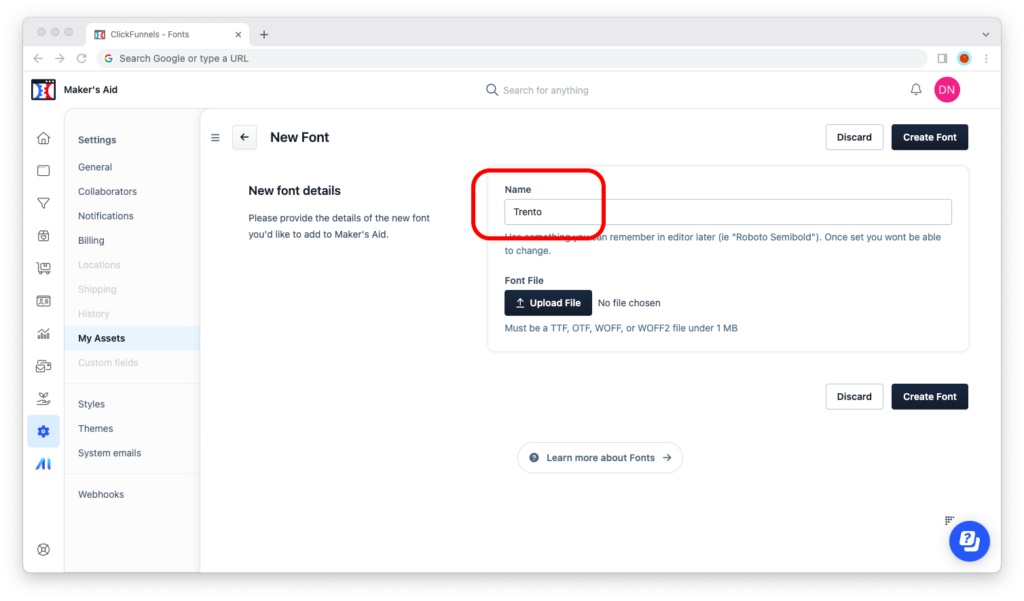
Step 8: Upload the font’s TTF, OTF, WOFF, or WOFF2 file by clicking the “Upload File” button. Make sure it’s no bigger than 1 MB.
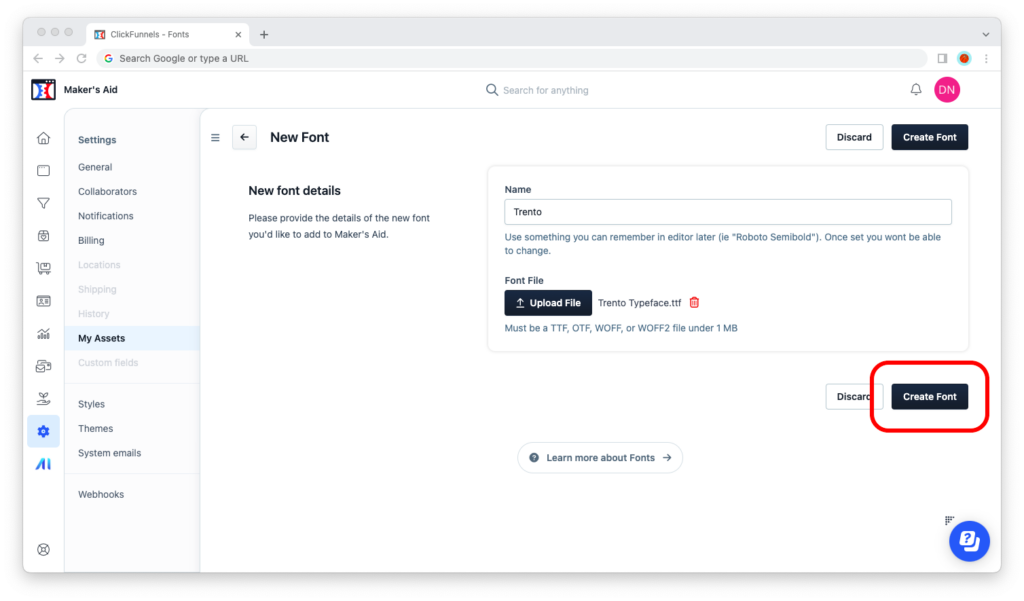
Step 9: Finally, click on the “Create Font” button.
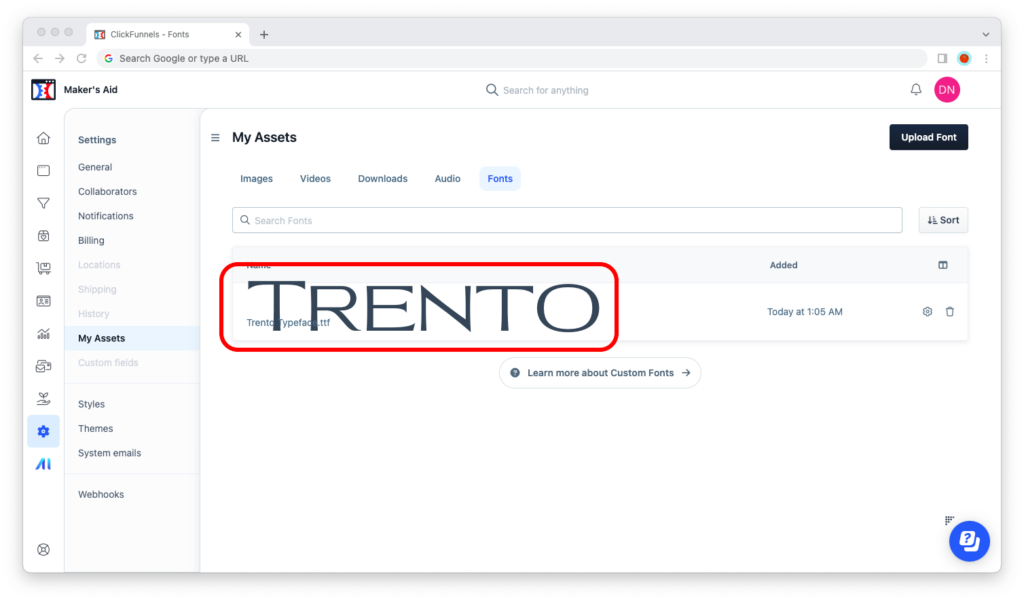
Step 10: And you’re done! You know you’ve successfully uploaded the font if ClickFunnels 2.0 redirects you back to the “My Assets” page and you can now see the font on the screen in front of you.
How to Use a Custom Font in ClickFunnels 2.0
Adding and using custom fonts in ClickFunnels Classic was a nightmare. You had to add custom CSS code and — especially if you’re not technical — pray that everything would work the first time you hit the save changes button.
Fortunately, the ClickFunnels team has made using your custom fonts in version 2.0 a breeze. When you’re editing a headline or text block, when you choose “Select font,” your custom font will show up conveniently above all of the Google Fonts, like so:
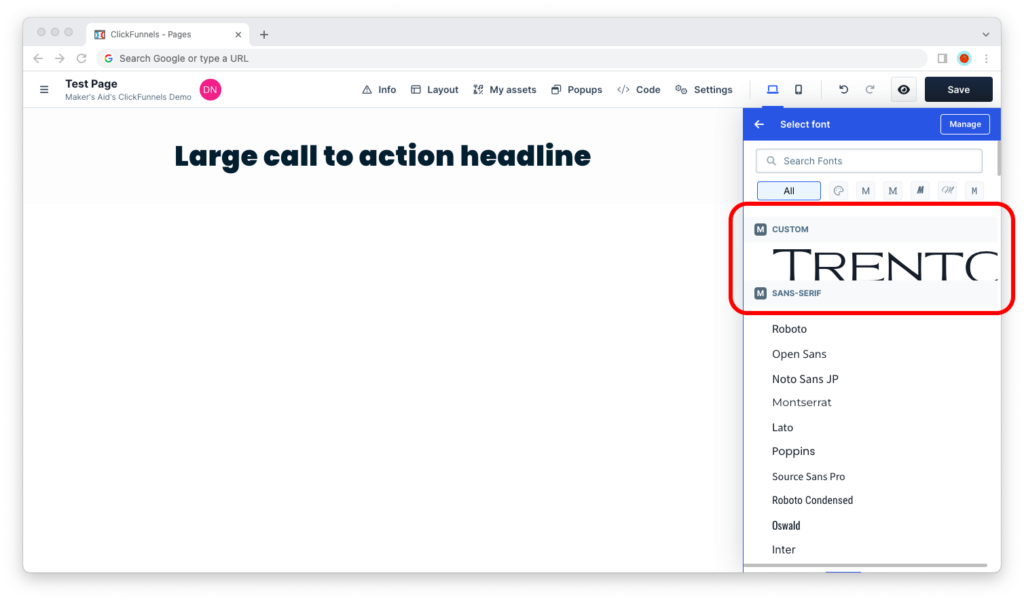
Simply click on your custom font’s name and you’re done!

