
One of the many reasons why I love Canva is the background remover, a handy tool that lets you remove the background of any image effortlessly and professionally with just one click.
The background removal in Canva is so good that lately I prefer it to Adobe Photoshop—especially for simple background removals where I don’t necessarily need to fine-tune the result.
(Longtime readers of Maker’s Aid know that I don’t say things like this lightly. I’ve been using Adobe Photoshop since 2004, when tutorials were hard to come by and the application’s installer was still distributed on CDs.)
In this post, I will show you how Canva’s background remover works and where to find it. So read on if that’s what you came here to find out.
How to Remove the Background of an Image in Canva
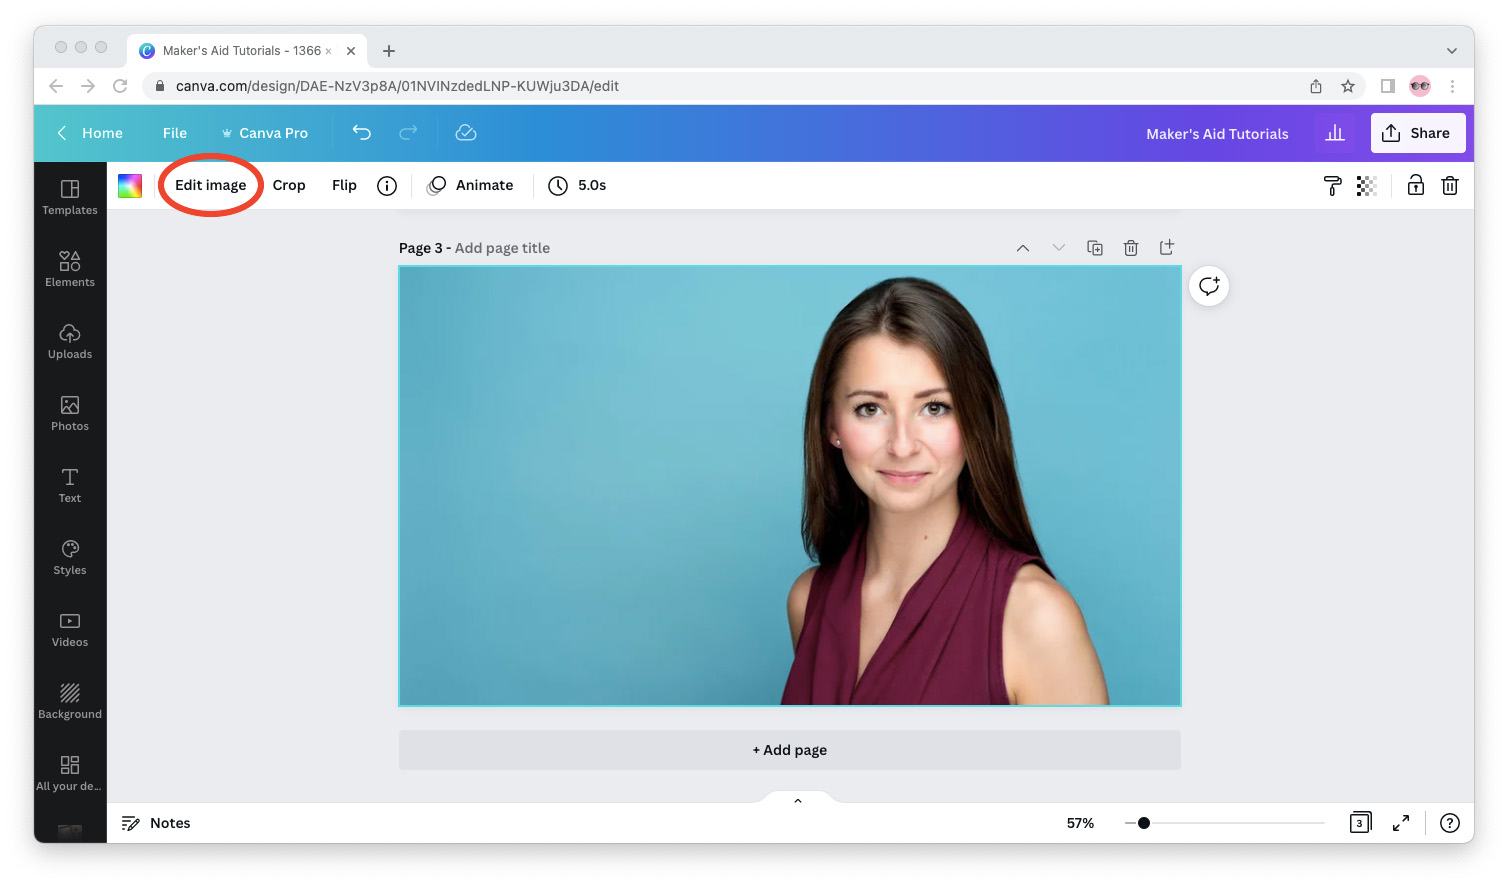
Step 1: In Canva’s editor, select the image or element whose background you want to remove, and then click “Edit Image” in the top bar.
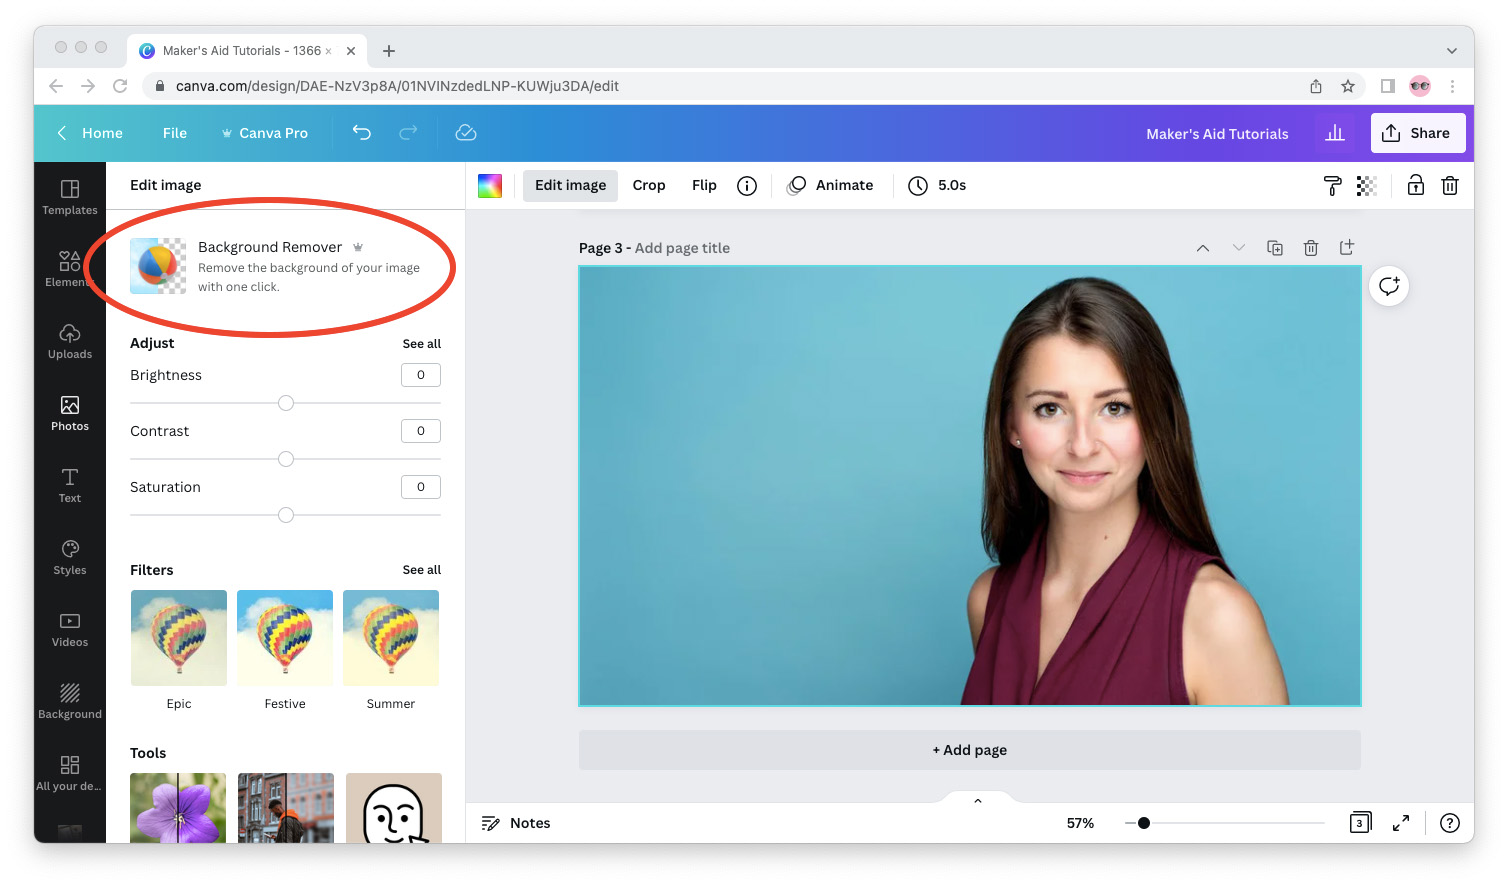
Step 2: Look for “Background Remover” in the sidebar that opens on the left and click it. This will darken the selected image or element and a progress bar will appear in it.
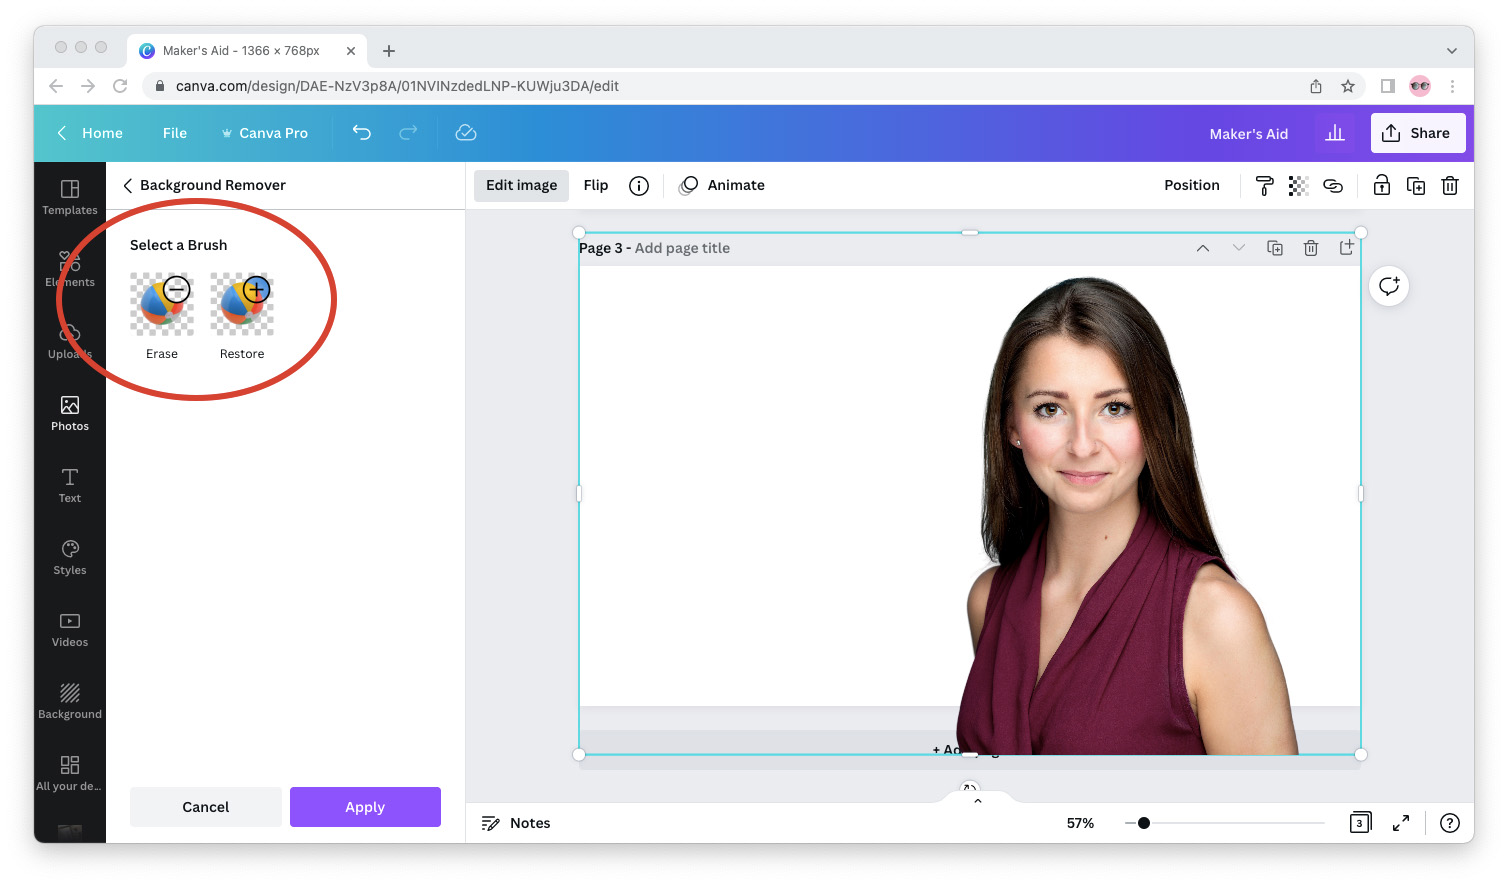
Step 3: You probably won’t need this step. But if you do, you can tweak Canva’s background removal with the two brushes that appear on the left.
The “Erase” brush is used to remove any of the remaining background that was left by Canva. Conversely, the “Restore” brush is used to restore parts of the image that the background removal tool accidentally ate up.
Step 4: When you’re done, hit the purple “Apply” button on the bottom of the left sidebar and you’re pretty much good to go. You can continue editing your image as usual!
What to Do Next
You will probably need to adjust the position of your photo or element in the canvas (by dragging and dropping).
If you want to place it above or below another element, right-click and choose the option that meets your needs:
- “Bring to Front” to place it at the top of the canvas, on top of all other elements, or “Bring Forward” to place it one layer up within the canvas;
- “Bring to Back” to place it at the bottom of the canvas, below all other elements, or “Bring Backward” to place it one layer down within the canvas.
Last but not least, if you need to download your design with a transparent background, this tutorial will show you how.
It’s educative, very profound