WordPress, like any other blog platform, lets you organize your posts into taxonomies. A “taxonomy” is any grouping of posts that makes sense to you and your readers.
The default taxonomies in WordPress are categories and tags. Categories are hierarchical, meaning a category can have many subcategories, while tags are non-hierarchical, meaning all tags have the same level and no tag can have subtags.
I created my first blog in 2007, and for as long as I can remember, I have always used categories more than tags. (So much so that most of my blogs have no tags whatsoever.)
One thing I’ve always found strange about WordPress is that you don’t really have many options when it comes to customizing the look and feel of taxonomies like categories and tags.
If that’s what you came here to figure out, let’s waste no more time and dig deep into what you can and cannot do—and what that means for the way you’re setting up and running your blog.
Adding, Editing, and Deleting Categories in WordPress
In general, you can do three things with the categories in your WordPress blog: you can create them, edit them, and delete them.
Managing categories:
In WordPress Admin, go to “Posts” > “Categories:”

The “Categories” screen shows up.
In the fields on the left, you can create a new category. In the table on the right, you can edit or delete existing categories, one by one or in bulk.
Creating and deleting categories is pretty much self-explanatory, although it’s a good idea to think about the topics in your blog before creating new categories and make those categories really easy for your users to understand so that you don’t have to delete some of them in the future.
Editing a category:
To edit a single category, click on that category’s name:
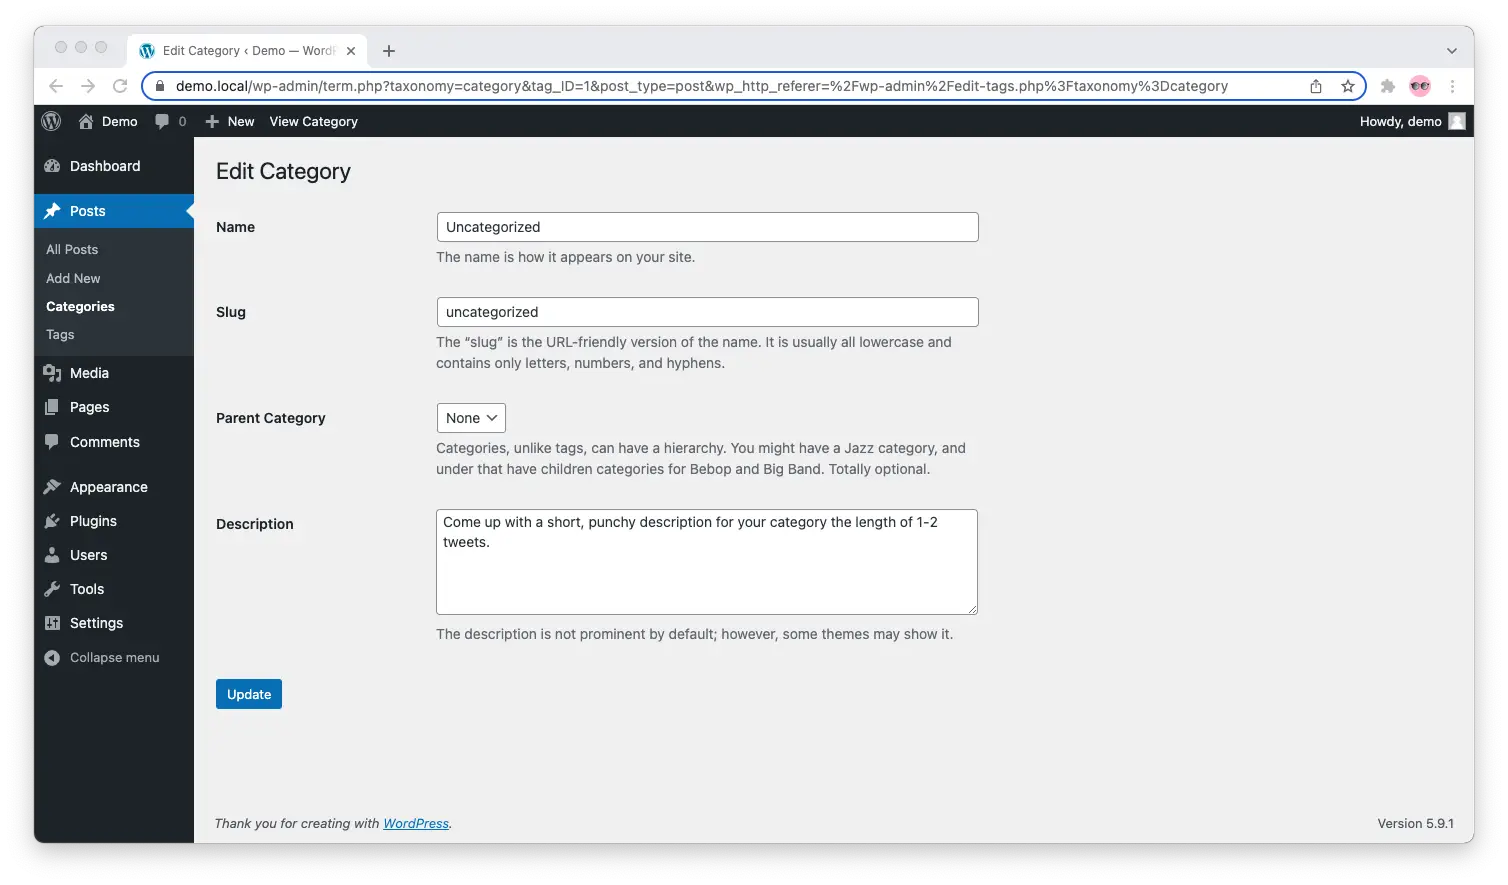
When it comes to editing categories, WordPress gives you very few options out of the box:
You can change the category’s name, its URL slug (the “slug” is what shows in the browser’s address bar), and the description. You can also assign a parent category to the category that you’re editing.
Name. The name should be short and easy to understand. For example, if your blog is about biking, and the category is about road bikes, “Road Bikes” is a good name for that category.
Slug. The slug, as we already established, is the text that shows in the address bar of your visitors’ browsers when they open the category page in it. Make it lowercase and hyphenated. In our example, I’d use “road-bikes” for the slug.
Parent category. Whether you assign a parent category or not depends on how you’re grouping your posts. For example, if your blog is about outdoor sports in general, and not just biking, you will want to have a parent category for all things related to biking, like “Biking,” then have subcategories for road bikes, mountain bikes, etc.
As a general rule of thumb, don’t create complicated structures in your WordPress categories unless you need to. (And, nine times out of ten, you don’t need to.)
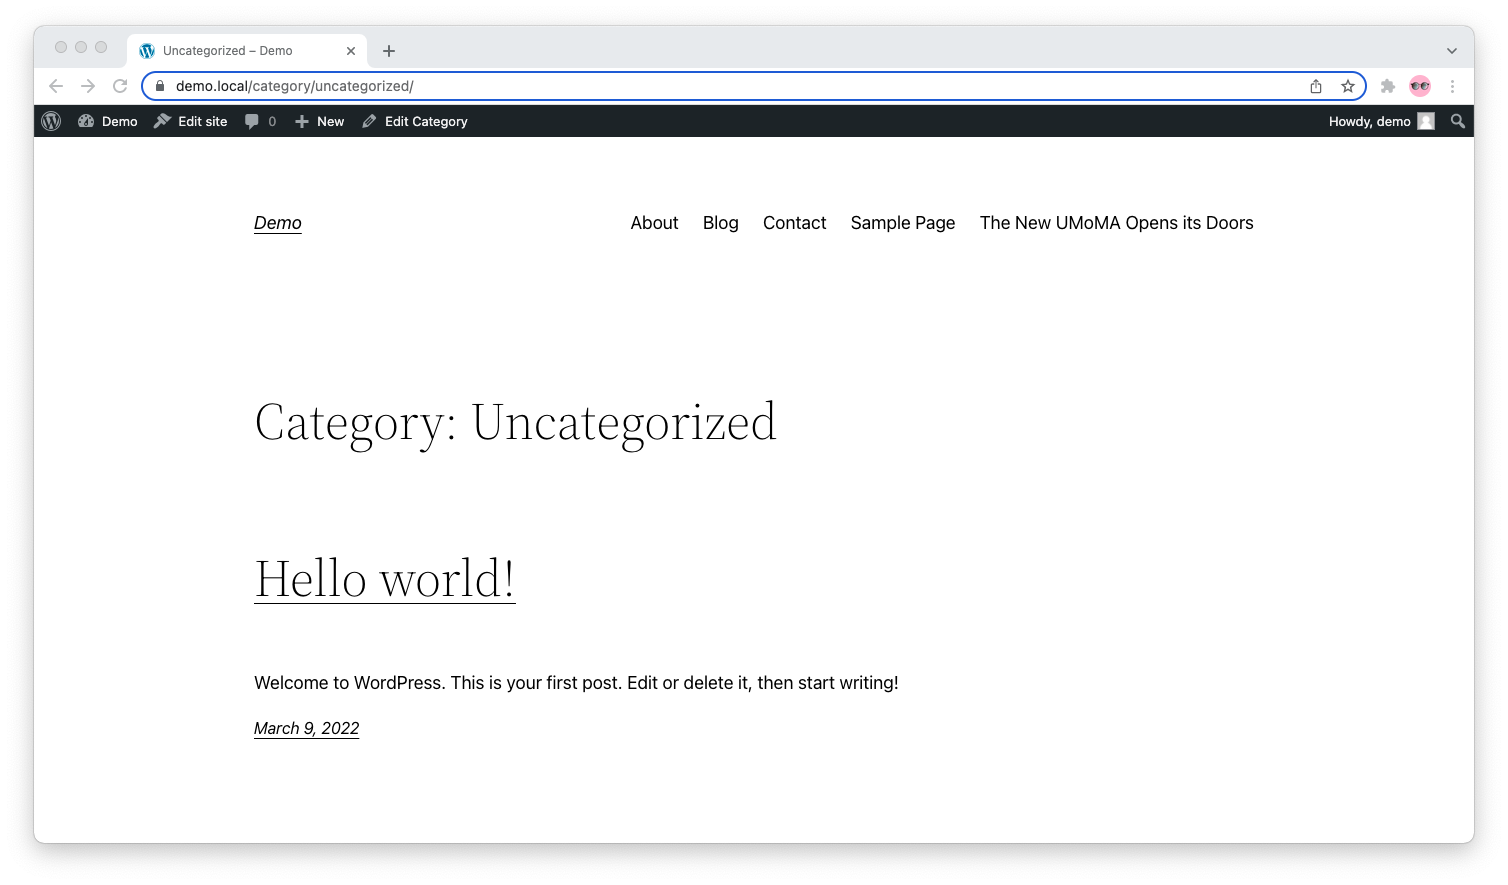
Description. Some themes show a description under a category’s name, and others don’t. Twenty Twenty-Two, for example, the default WordPress theme when I’m writing this article, doesn’t:
If your theme displays category descriptions, add a short, punchy description the length of 1-2 tweets to every category. This makes your blog friendlier for users and search engines alike. Don’t bother otherwise; it won’t make any difference and your time is better spent on something else.
The Alternative: Create a Page and Redirect the Category to It
The thing about WordPress categories is that, on most themes, you can’t change the way they look or feel. You’re basically stuck with a list of posts in chronological order whose appearance or contents you can’t control.
One alternative is to create a page and redirect the category to it. That way, when visitors and search engine bots try to open the category, they will be redirected to the page. And pages in WordPress, as most of you probably know by now, are something you have complete control over.
Creating a page for your category:
In WordPress Admin, go to “Pages” > “Add New:”
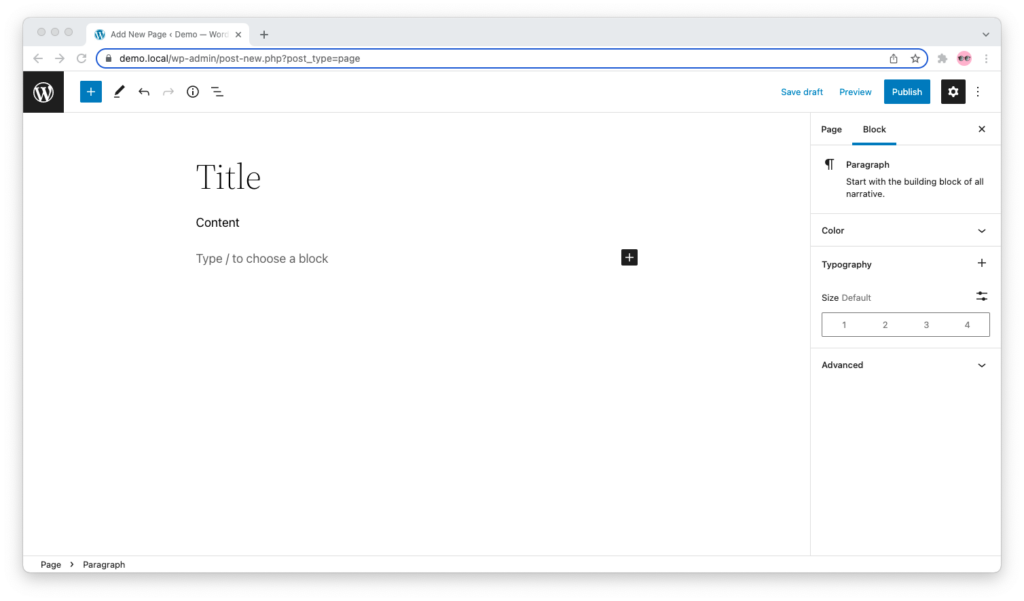
Name and slug the page as you would the category. With blocks in WordPress’ Gutenberg editor, you can do pretty much anything you like with your “category page,” from adding Headings, Paragraphs, and Images to adding a Query Loop to automatically list all the posts in that category.
To build on our example with a category about road bikes:

It goes without saying that this technique is very powerful.
It only took me a few minutes to create the above page, which features an introductory section, a “Reader favorites” section with three featured posts in a Column block, and a “Latest posts” section using a Query Loop block.
Yes, it takes a while to learn the ropes if you’ve never done this. But once you become a power user of the Gutenberg editor in WordPress, you will be able to create category pages that look good, keep readers engaged, and make search engines happy in a jiffy; the investment of time is more than worth it.
Redirecting the category to the page:
Next, you want to redirect the category to the page.
For example, if your category’s at “site.com/category/road-bikes/” and your page is at “site.com/road-bikes/”, you want to set up a 301 redirect, using a plugin or by editing your WordPress .htaccess file, from the former to the latter.
I do this with the Redirection plugin. It’s free, easy to use, gets updated often, and has more than 2 million active installations, so it ticks all the right boxes.
Of course, there are other plugins out there, and which one you choose is entirely up to you—at the end of the day, a 301 redirect is a 301 redirect, no matter how you set it up.
In WordPress Admin, go to “Plugins” > “Add Plugins.” Enter “Redirection” in the search box in the upper right corner and install the plugin developed by John Godley.

Once the plugin is installed, click on the blue “Activate” button to switch it on, then go through the plugin’s setup process.
When you get to the “Basic Setup” screen, I recommend that you tick the “Monitor permalink changes in WordPress posts and pages:”
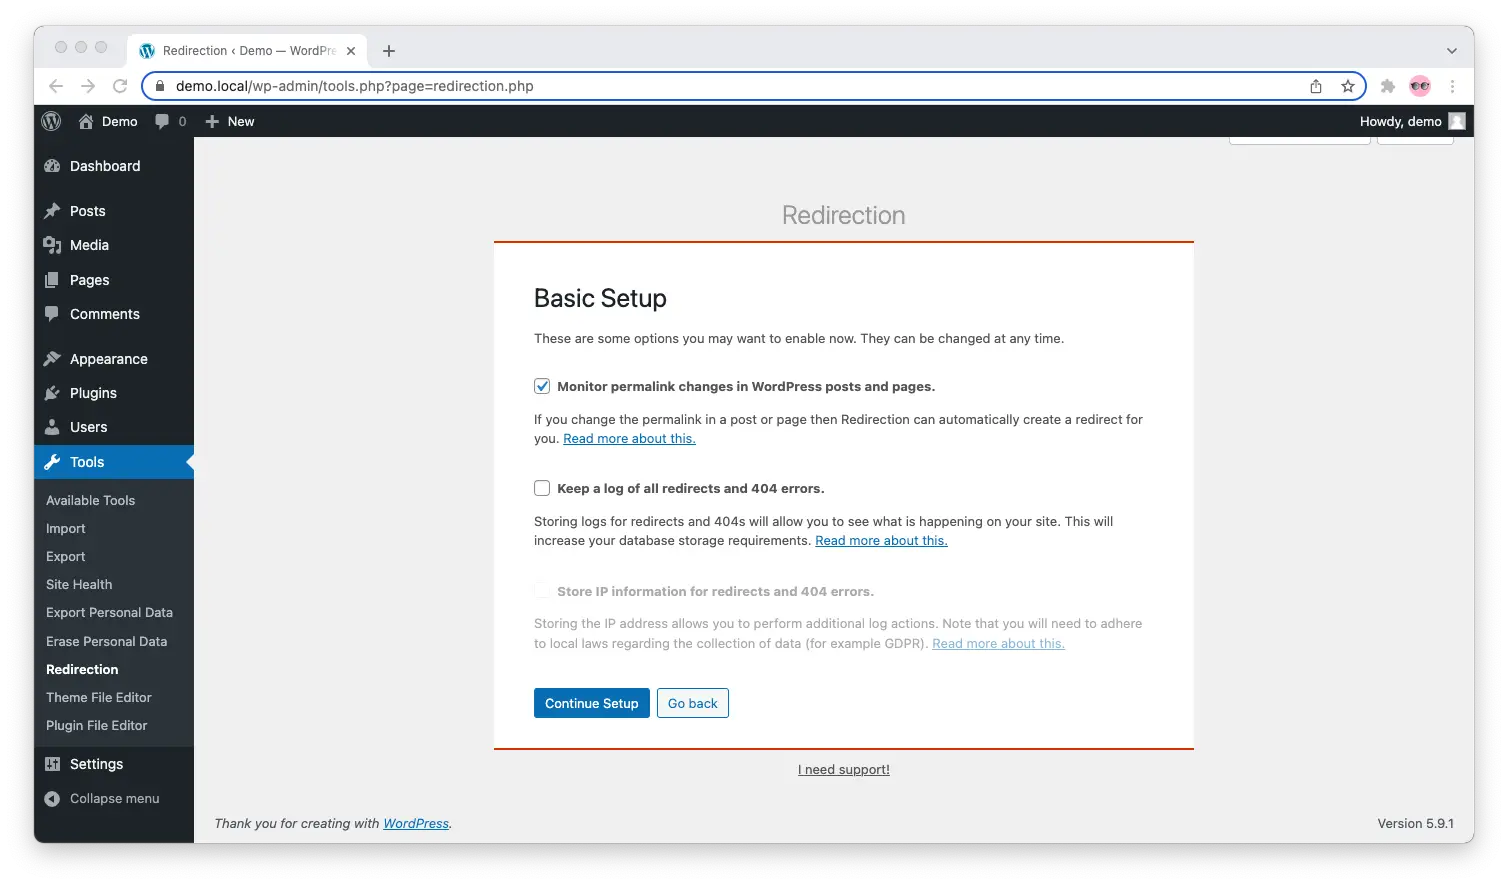
In the grand scheme of things, this feature is a real time-saver. If you ever change the slug of a post or page, it will create a 301 redirect for you automatically.
As you continue the setup, the plugin will test the availability of the WordPress REST API:
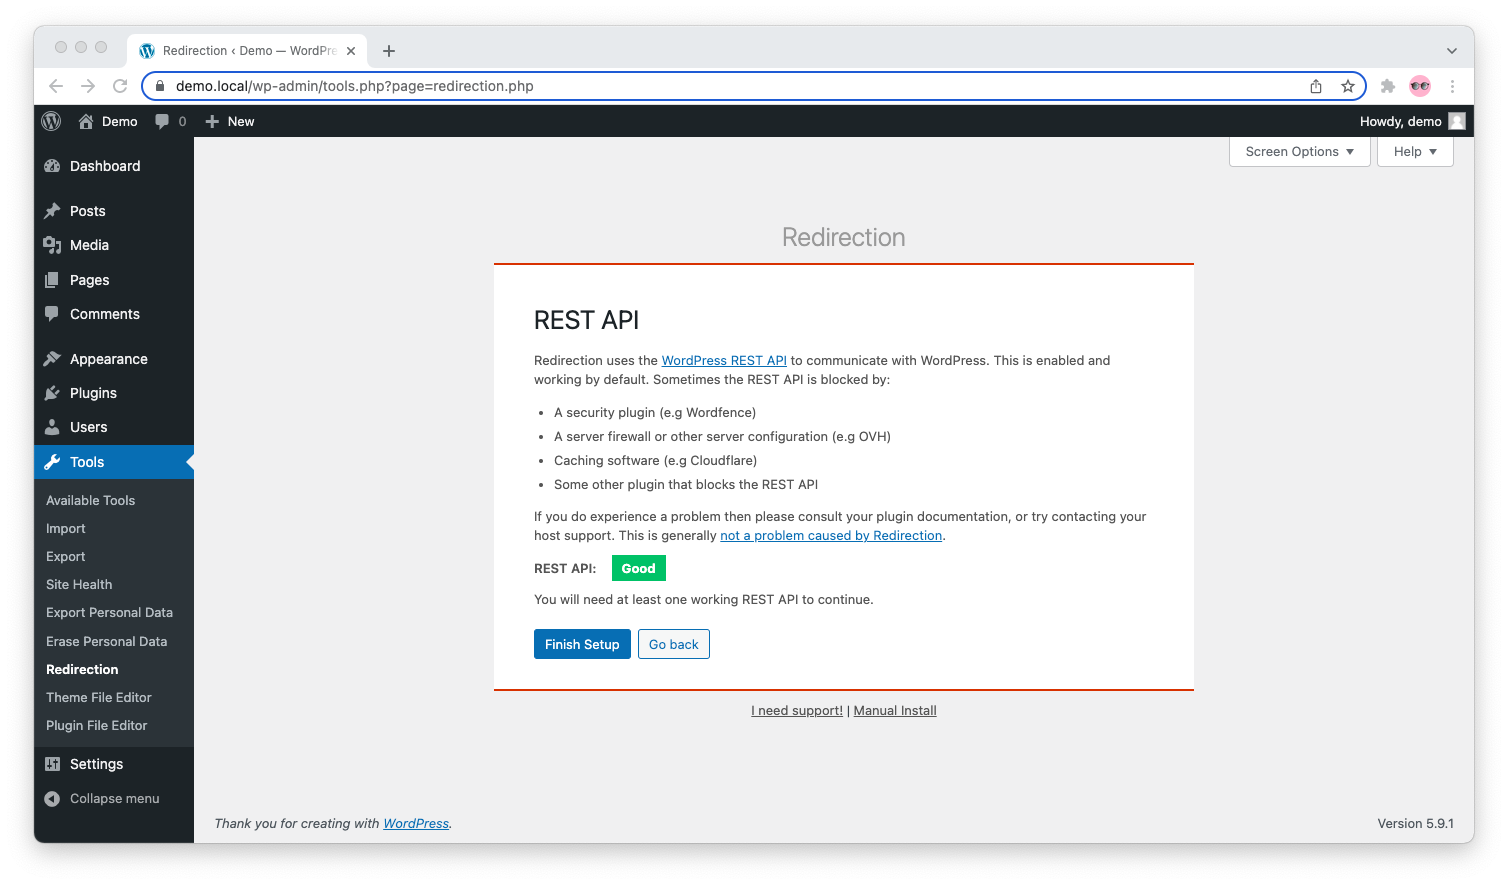
The REST API is a dependency for the plugin to work. Unless it’s disabled by a security plugin or gated behind a server firewall, you shouldn’t really encounter any issues with it.
Click on “Finish Setup” and, in a minute or so, the Redirection plugin will be ready for you to use.
It’s time to add a new redirect.
Paste the URL of your category in “Source URL” followed by .* and select “Regex” from the “URL options / Regex” dropdown menu:
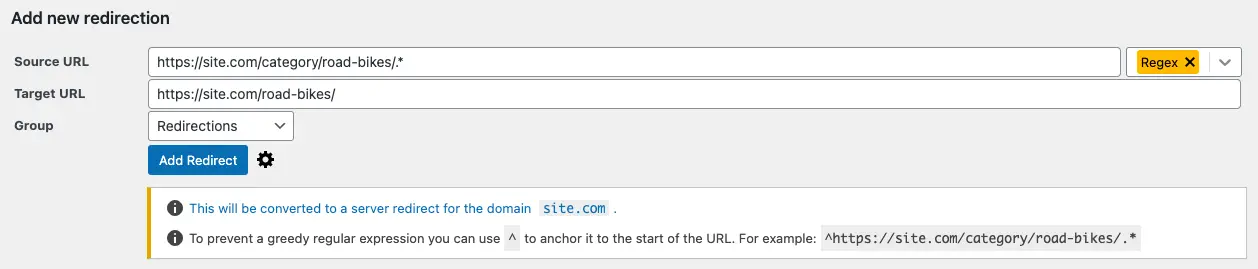
By doing so, you are telling the plugin to redirect the category (site.com/category/road-bikes/) and any pages from the category’s pagination (site.com/category/road-bikes/page/2/ and so on) to the target page in the “Target URL” field below (site.com/road-bikes).
Then paste the URL of your page in “Target URL,” without adding anything to it or changing anything else.
Click on the blue “Add Redirect” button to add the redirect.
Once this is done, the redirect will show up in the “Redirects” table and will look something like this (of course, “site.com” will be your site’s domain name and the rest of the URL will be based on your category’s URL; the below is just an example):

Provided all worked well, your category will redirect to your page, giving you total control over the content, design, and structure.
If you want to do this for all of your categories, you will have to go through these steps for each.