
Evernote is the O.G. note-taking app! And, for millions of users, the best one still around.
But what if you decide, for one reason or another, that you just don’t want to use Evernote anymore?
If you no longer want to use Evernote, you have two options: Deactivate your account and give yourself the option to come back, or delete it irrevocably and permanently.
When you deactivate your Evernote account, you really put it on pause. You temporarily suspend your access to your notes, files, etc. But Evernote won’t delete them unless you reactivate your account and you decide to do so yourself.
When you delete your account…
Well, let’s just say you get what you ask for! All your notes, files, and such will be deleted forever, and you won’t be able to log in with your email and password again.
If you’re not sure which option to go for, this guide will help you decide—and explain, in plain English, exactly how to do it.
Should I Delete or Deactivate My Evernote Account?
Deactivating your Evernote account means giving yourself the option to go back to using the app for note-taking again in the future—with all the information you’ve captured intact and right where you left it.
Deleting your account, as you can probably guess, means that all of your notes, scribbles, clippings, files, and such will be wiped from Evernote’s servers forever!
If you’re worried about your personal information, don’t be.
Your personal data is safe when you deactivate your Evernote account. You just won’t be able to access your notes, recordings, pictures, and other content on any devices you previously used to.
However, since the information is still there, you can still access it in Evernote after reactivation. Simply put, this means that everything you created will still be there after you reactivate your account.
The picture’s different if you delete your account.
Once you confirm to Evernote that you do want to delete your account, after a period of 4 weeks everything will be lost forever.
After that point, everything is gone.
Gone!
This gives you a grace period, if you wish, to decide whether or not you’re truly done with Evernote.
You might well find that you want to come back to use Evernote’s services after a period of time. So, luckily, account deletion isn’t instant.
However, if you’re absolutely sure that you’re done with Evernote, then deleting your account entirely will make sure that all of your work and personal information is gone from their servers. If you ever create a new account, you’ll be starting from scratch.
Deleting An Evernote Account Permanently
Step 1: Open Evernote.com and sign in to your Evernote account. (If you have multiple Evernote accounts, make sure you’re logged into the correct one.)
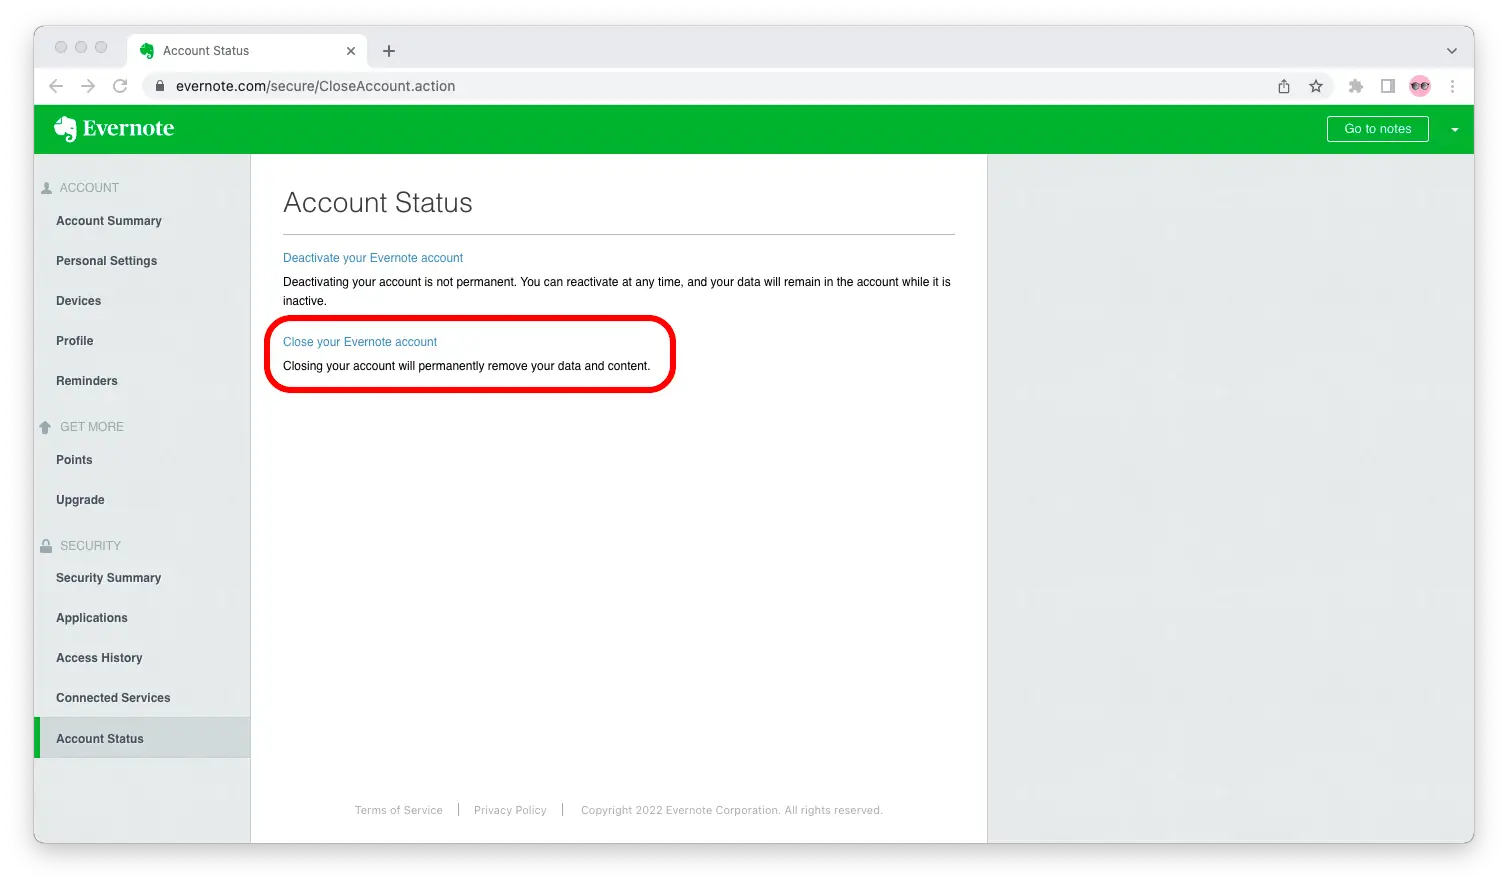
Step 2: Go to your account’s settings, then select “Account Status” and click on the “Close your Evernote account” link.
Step 4: Select “Yes, close my account” and click the green “Continue” button. Go through the steps that follow, then click on the red “Close account” button.

After 4 weeks, your account and everything you had stored in it will be deleted forever.
What Happens to Your Subscription?
To delete your account, you have to cancel your subscription and downgrade to Evernote Free first.
To cancel your Evernote subscription, open Evernote.com, log in to your account, go to account settings, and select “Billing.”
On the “Billing” page, look for the link that says “Cancel your Evernote subscription.” Click on “Downgrade for free,” enter a reason why you want to leave Evernote, then click on “Cancel subscription.”
Things To Know Before Deleting Account

It will take 4 weeks from the time you submitted the request to permanently close this account for all of the data to be wiped from Evernote’s servers.
After this time, anything you’ve made using Evernote will be gone forever.
This includes notebooks, notes, files, clippings, recordings, tags, as well as any personal information related to your accounts, such as your email address, the telephone number used for two-factor authentication, and any linked accounts (if applicable).
If you think you might want to use Evernote again at some point in the future—or you haven’t backed up your data—consider deactivating your account instead.
People who delete their Evernote accounts usually do so because they want to switch to another alternative. They don’t want to use Evernote anymore, so they delete their account.
However, if you’re just trying a different service out, it might be worth holding off on completely deleting your account just yet, in case you find you want to come back to Evernote.
How To Uninstall Evernote?
If you have Evernote installed on your computer and need to remove it, read on to find out how!
How to Uninstall Evernote on macOS
Let’s go through the process of deleting the Evernote from your Mac or MacBook.
Step 1: Open Finder.
Step 2: From the menu bar, click on Go > Applications.
Step 3: Find the Evernote app. Pick it up with your trackpad or Magic Mouse and move it to the Bin.
Step 4: Right-click on the Bin and select “Empty Bin.”
That’s it!
You’ve just uninstalled Evernote from your macOS computer.
How to Uninstall Evernote on Windows
Step 1: Open the Start menu.
Step 2: Look for Evernote and right-click on the app.
Step 3: Select “Uninstall” and take the necessary steps in the Evernote uninstaller.
Step 4: Wait for the confirmation that Evernote’s been uninstalled from your Windows PC.
That’s it!
You’ve just uninstalled Evernote from your Windows PC.
Conclusion
Evernote is an extremely useful service, but if you’re finding that you don’t need it, then you might be considering deleting your account.
Well, hopefully, this guide has shown you how to do it with ease!
Make sure you’ve backed everything up, follow the steps in this article, and you’ll have successfully deleted your Evernote account in no time!