
This tutorial will show you how to create a custom email inbox with Namecheap.
We chose Namecheap because (a) their services are reliable, (b) they are reasonably priced, and (c) they are regularly sold at a discount, but also because we at Maker’s Aid use them for our website’s domain name and our editorial team’s email inboxes.
There are many other providers you can use for your custom email inbox, and most websites out there have listed them. What they haven’t done, however, is show you how to use any of those providers step-by-step and with screenshots.
So we set out to do exactly that.
Part 1: Register a Domain Name
First things first: To create a custom email address on a domain name of your own, you must first register that domain name.
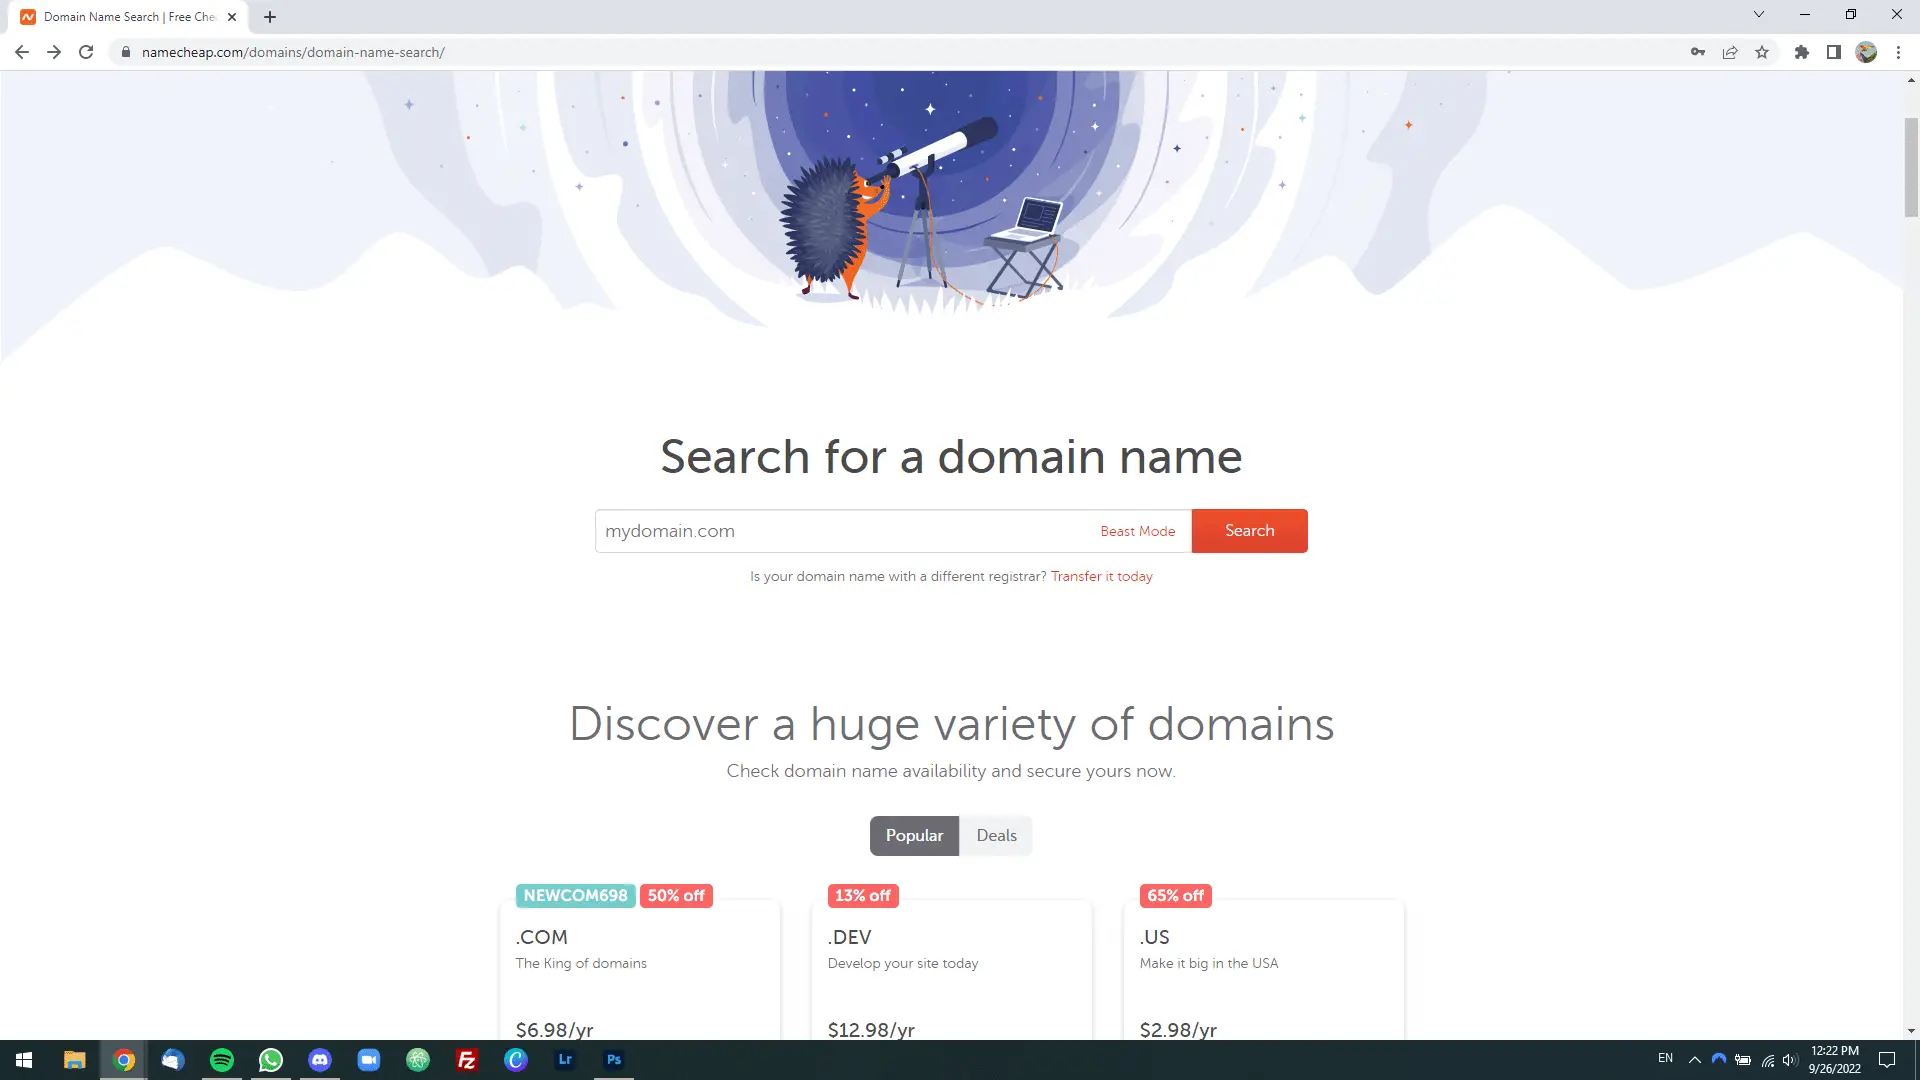
Step 1: Fire up your favorite web browser and go to Namecheap’s domain name search engine.
Step 2: Type your desired domain name with the extension in the search box, then click on the orange “Search” button (or just press the Enter key on your computer’s keyboard).
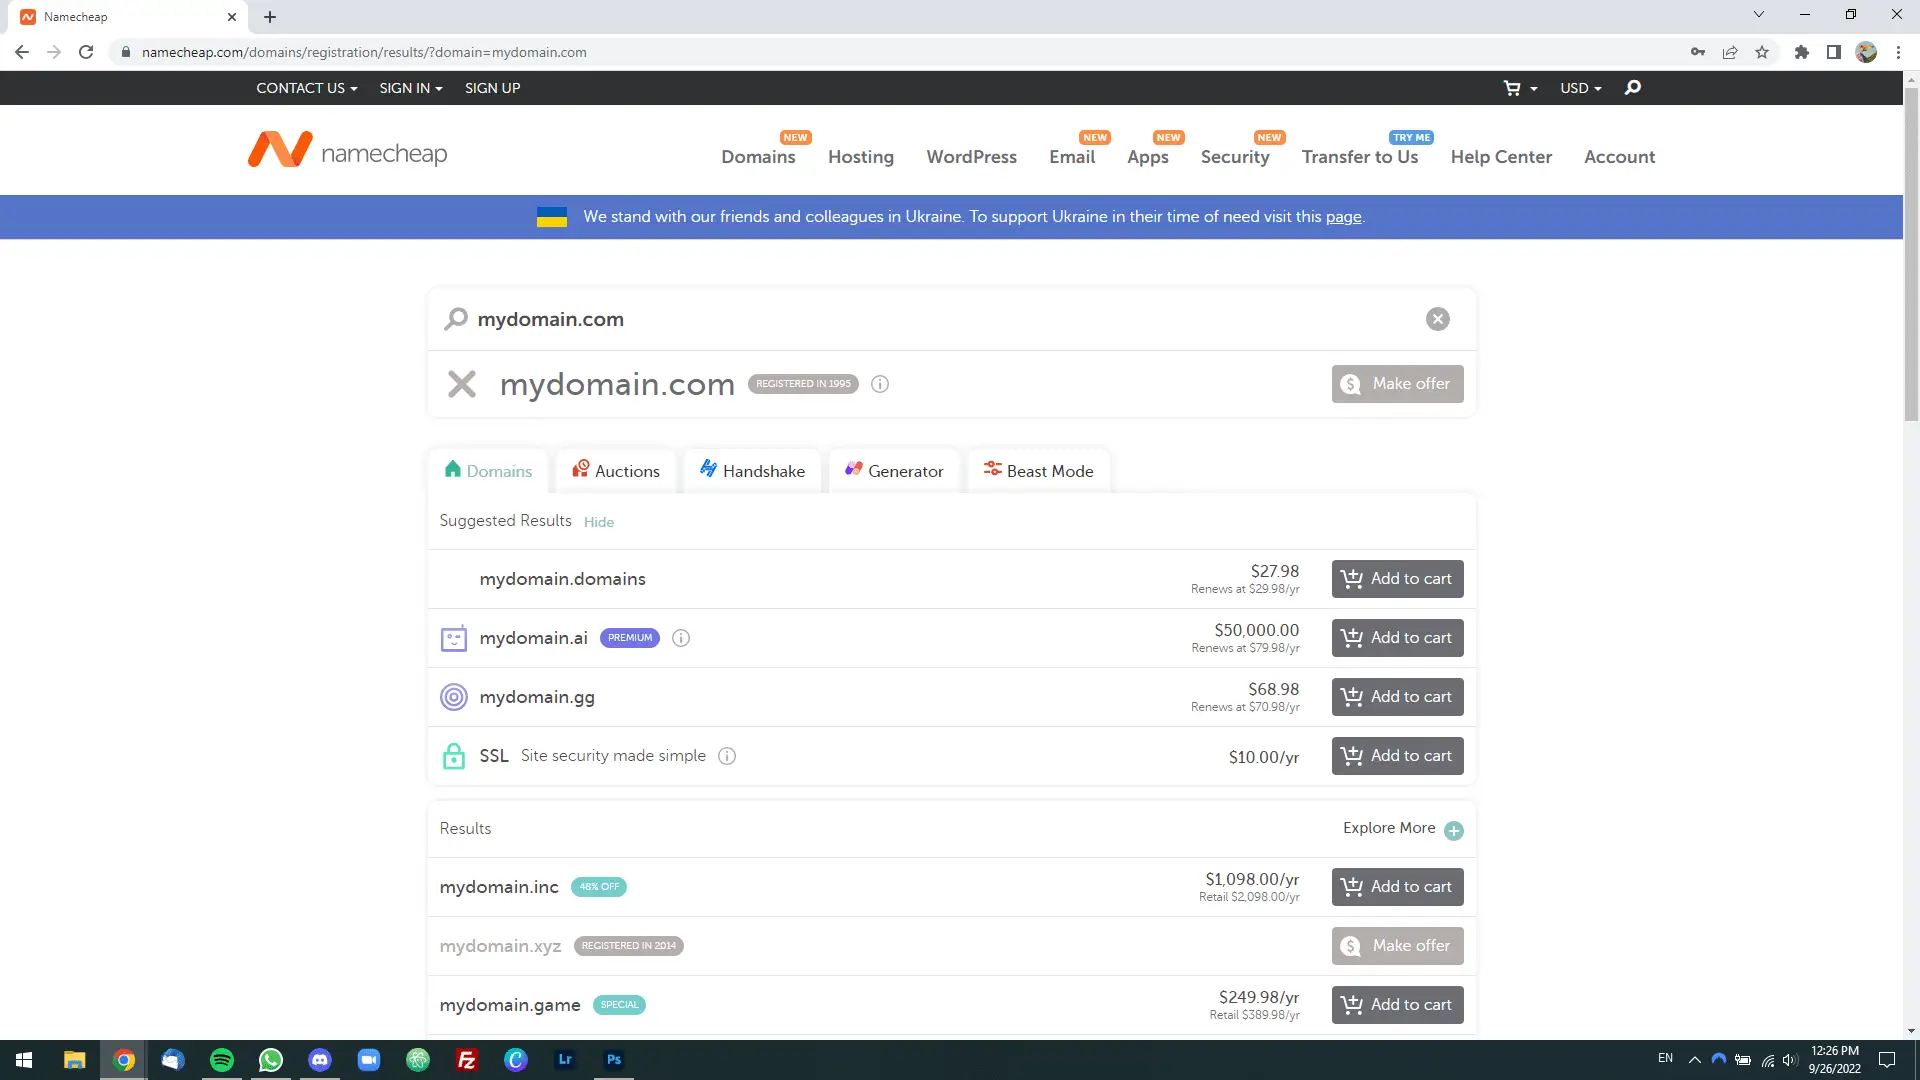
Step 3: The search engine will return results and tell you whether the domain name in question is available for you to register or has already been registered by somebody else.
Step 4: If the domain name is available, scroll down a bit and continue to the next step. Now, if this isn’t the case, you need to keep trying other ideas for a domain name until you find one that’s good enough and not taken.
Pro tip: It’s very rare to find a free domain name right off the bat.
Usually, you have to do a few to a few dozen searches before you find a domain name you like and that’s available for you to register.
As you can see from the screenshot above, the domain name I was looking for, mydomain.com, was already taken by somebody else. In fact, it was registered in 1995!
A few things to try in case you’re out of ideas:
- Try adding hyphens between the words
- Try appending numbers to the end of the domain name
- Try an AI-powered name generator like Namelix
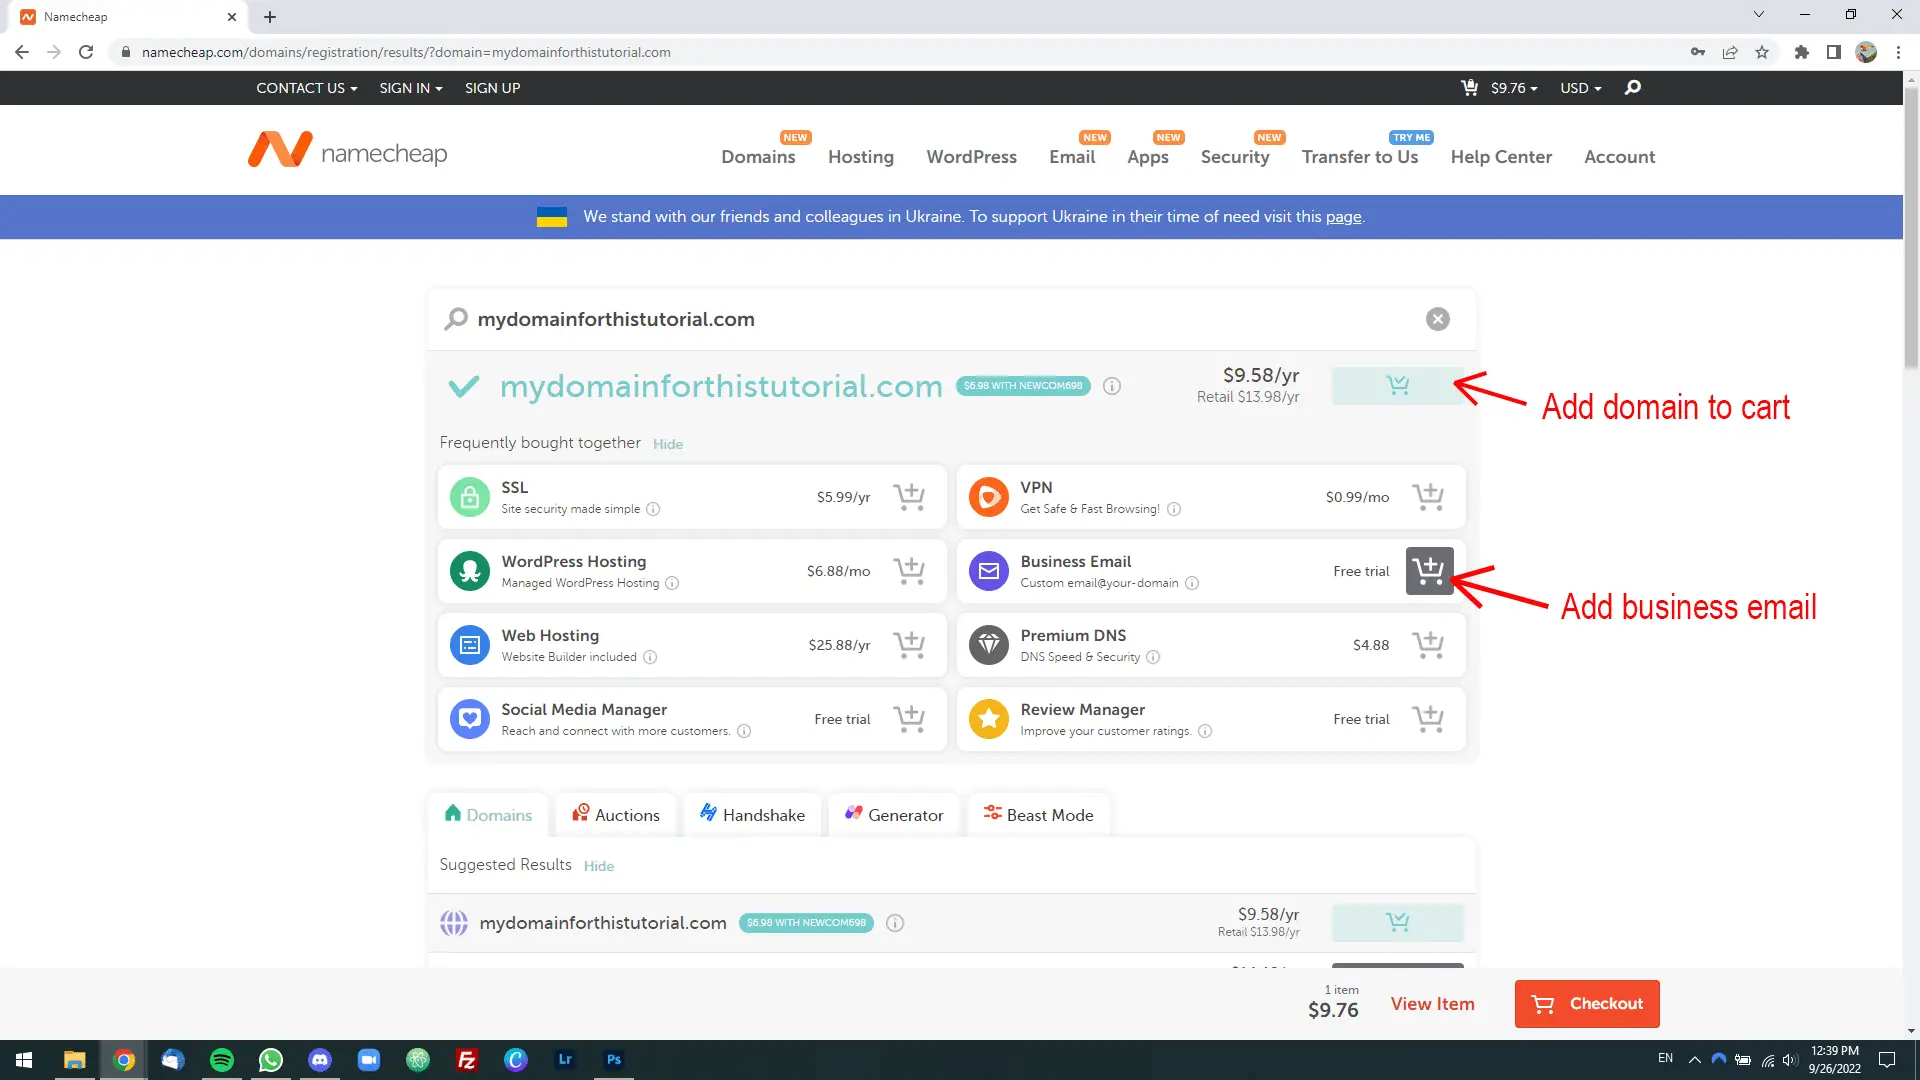
Step 5: Add the domain name to your shopping cart. Once you do, a list of products and services titled “Frequently bought together” will pop up. Add “Business Email” to your cart.
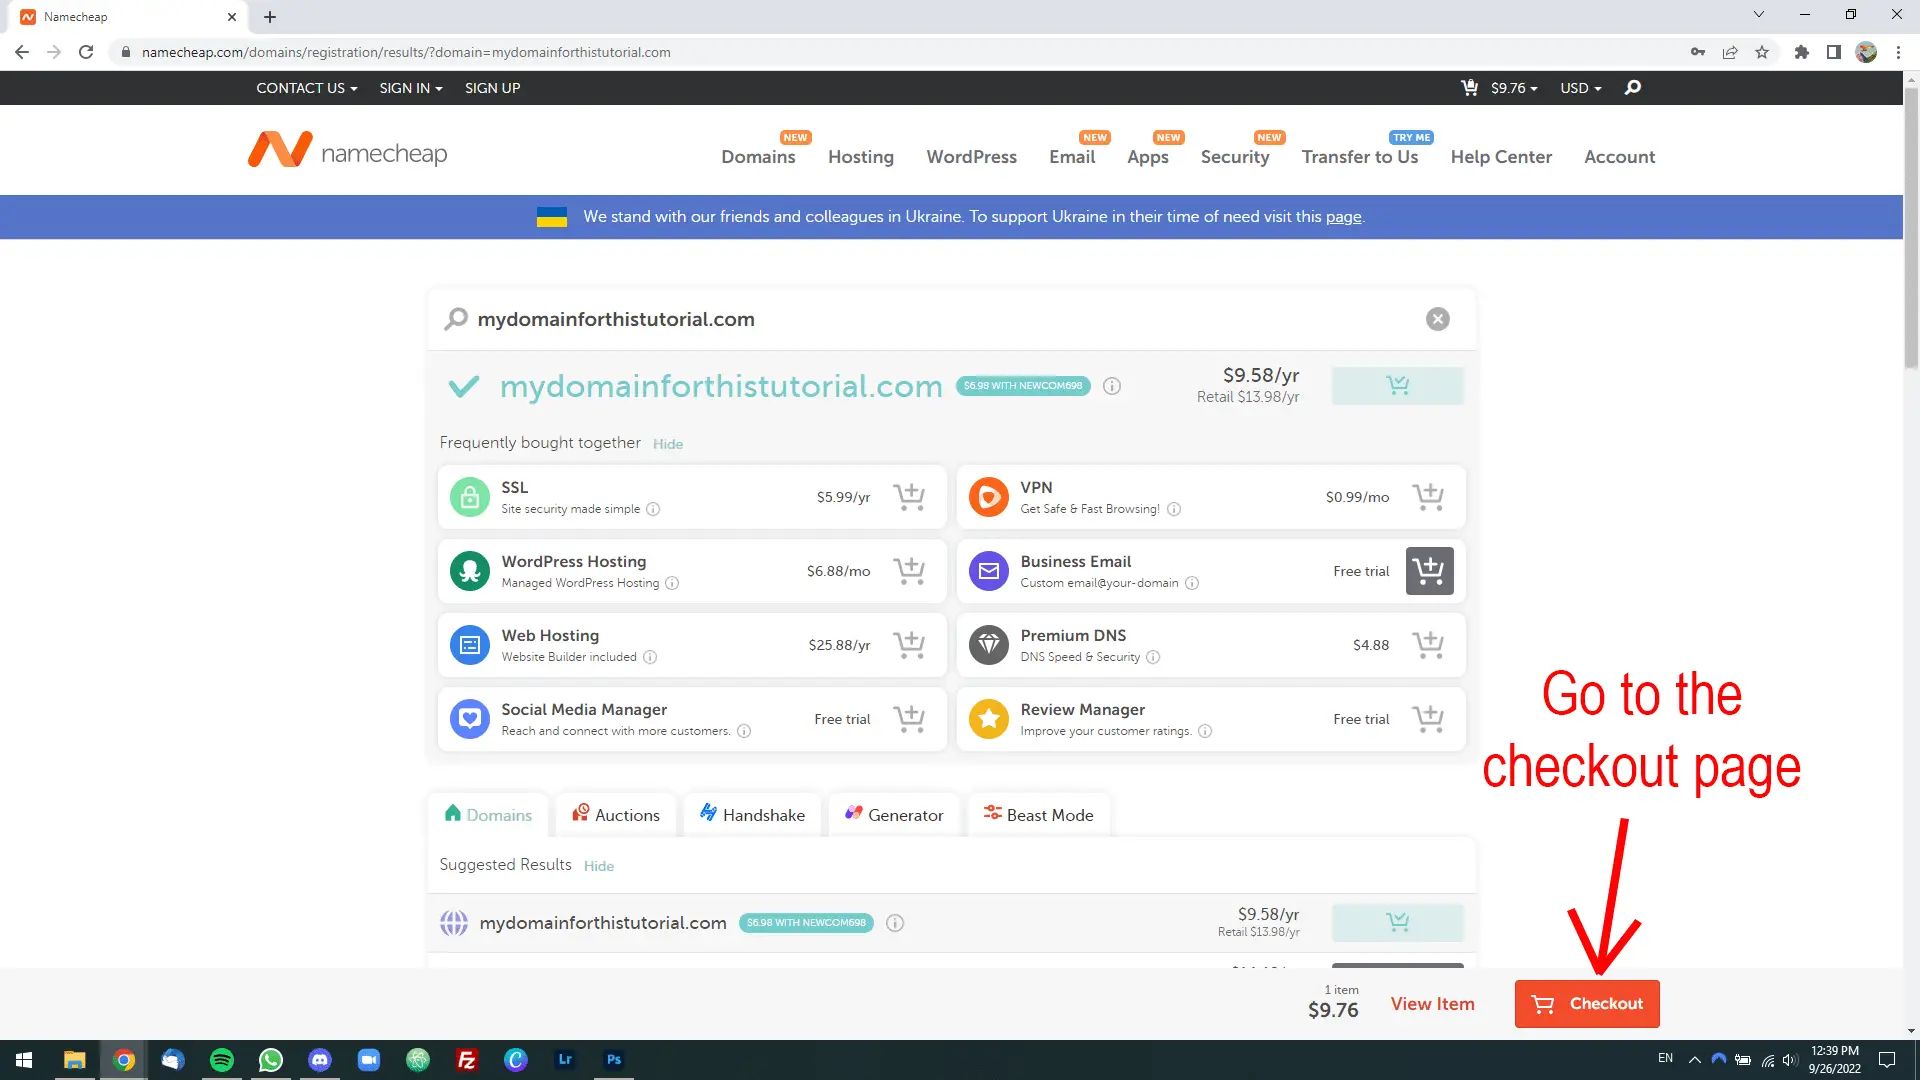
Step 6: You’re almost done! Now you need to go to the payment page. To do this, click on the orange “Checkout” button at the bottom of the screen.
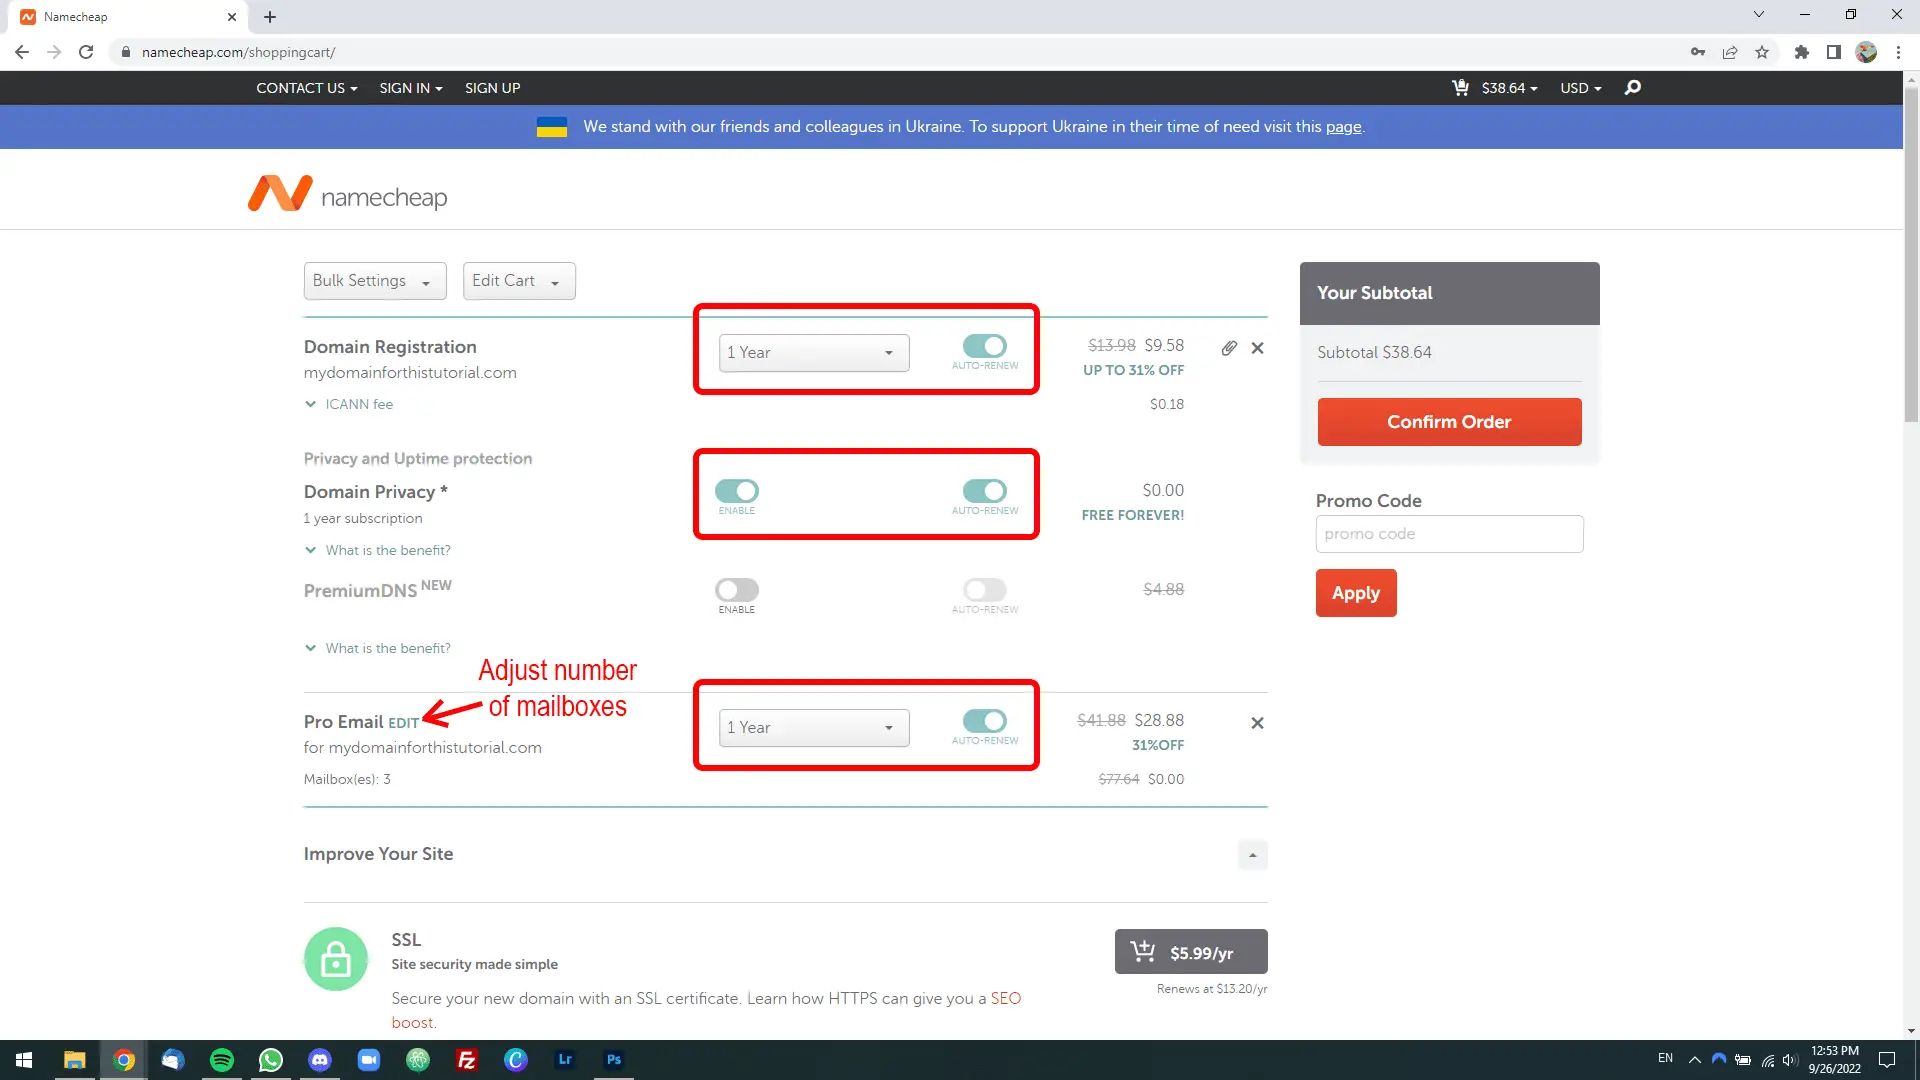
Step 7: On the checkout page, make sure that:
- “Domain Registration” is set to 1 year, with auto-renew on
- “Domain Privacy” is set to Enable, with auto-renew on
- “Pro Email” is set to 1 year, with auto-renew on
Before proceeding to the next step, think about how many mailboxes (that is, email addresses) you will need.
By default, Namecheap adds 3 mailboxes to your cart. However, if you want to buy fewer or more mailboxes than that, simply click the “Edit” link next to “Pro Email,” then enter the number of mailboxes you want to buy and continue.
Step 8: Click on “Confirm Order.” Enter your details to create a customer account with Namecheap and complete the checkout process.
Pro tip: Before confirming your order, look for a promo code. You can save 10%, 20%, 30%, and sometimes more when you buy a domain name and business email plan when they’re on sale.
Namecheap regularly runs promotions and gives coupon codes with discounts for your domain names and business email plans.
To check out the latest promo codes at Namecheap, click here.
Part 2: Create Your Custom Email Inbox
Now that you’ve bought a domain name and subscribed to a business email plan, follow the steps below to create your custom email inboxes.
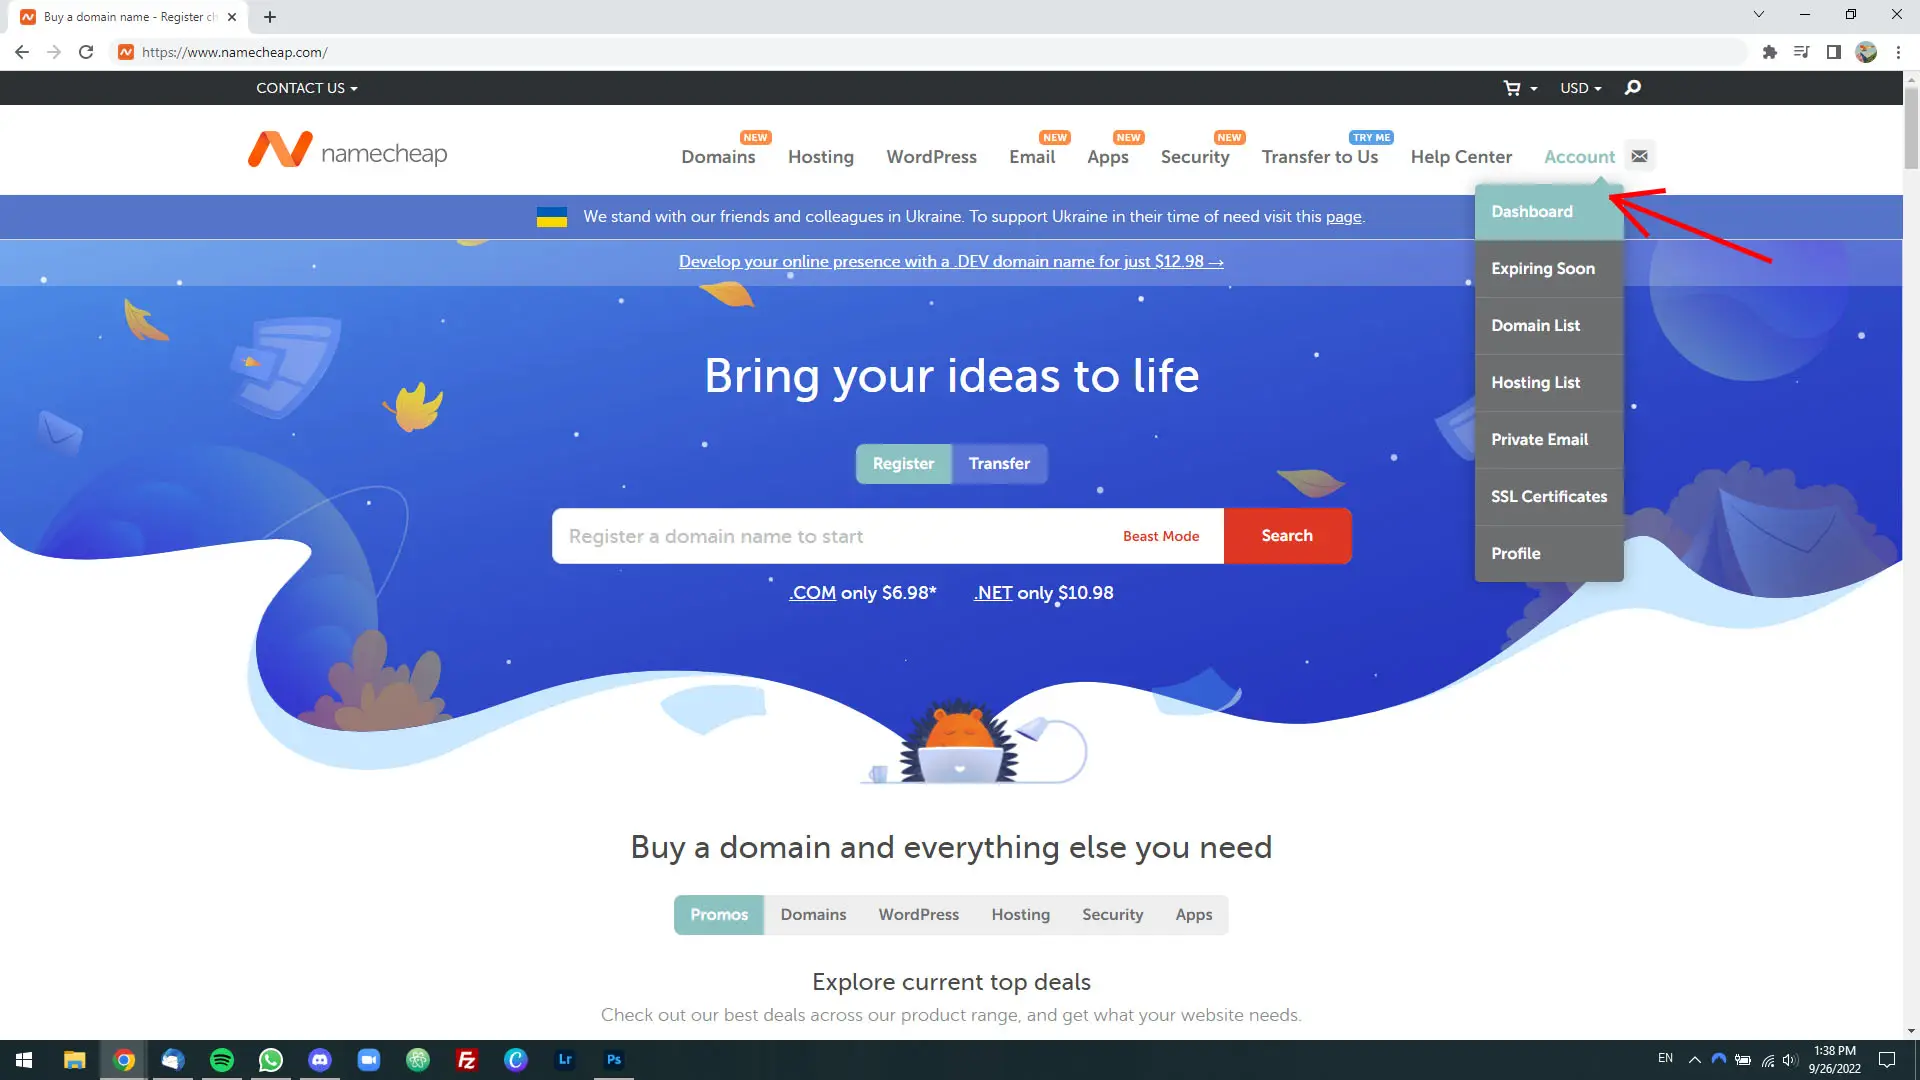
Step 1: Go to Namecheap, log into your customer account, then click on Account > Dashboard in the upper-right corner of the screen.
Step 2: From the sidebar to the left, go to “Private Email.” The “Private Email Subscriptions” page will load. Once it does, click on the gray “Manage” button next to your brand new domain name.

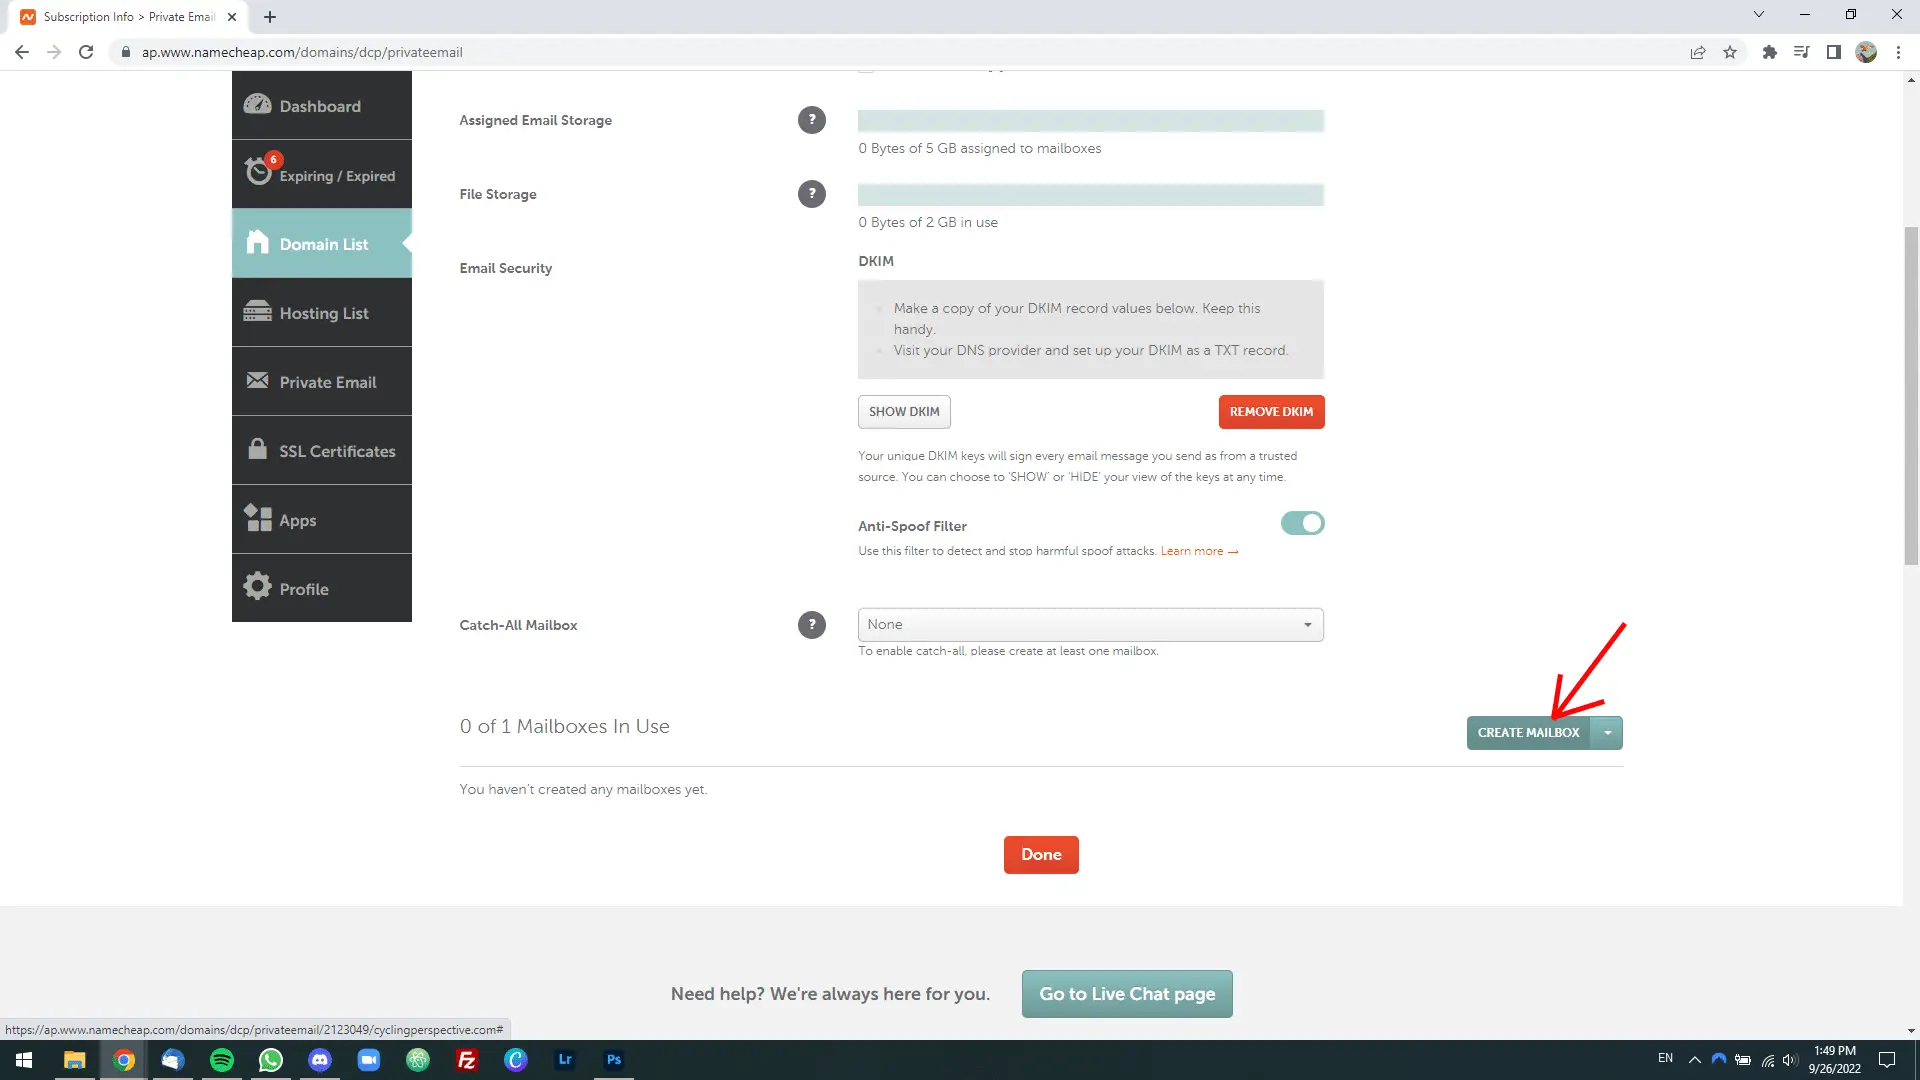
Step 3: Your browser will take you to the control panel for your domain name’s private email subscription. Scroll down to give or take half of the page, find the “Create Mailbox” button, and click it.
Step 4: Enter the name, password, and storage space for your mailbox, then hit the “Save changes” button.
Distribute storage evenly among your mailboxes unless you have a reason not to. For example, if you have 5 GB of storage for all your mailboxes and you have 5 inboxes to create, allocate 1 GB of storage to each.
Pro tip: Always give your email inboxes the most secure passwords you can. That way, they won’t be easy for anyone trying to hack your emails to guess.
When in doubt, use the free LastPass Password Generator to create them for you.
Step 5: To access your email inbox for the first time, click on the downward arrow next to the “Edit Storage” button, and then on “Open Webmail.”
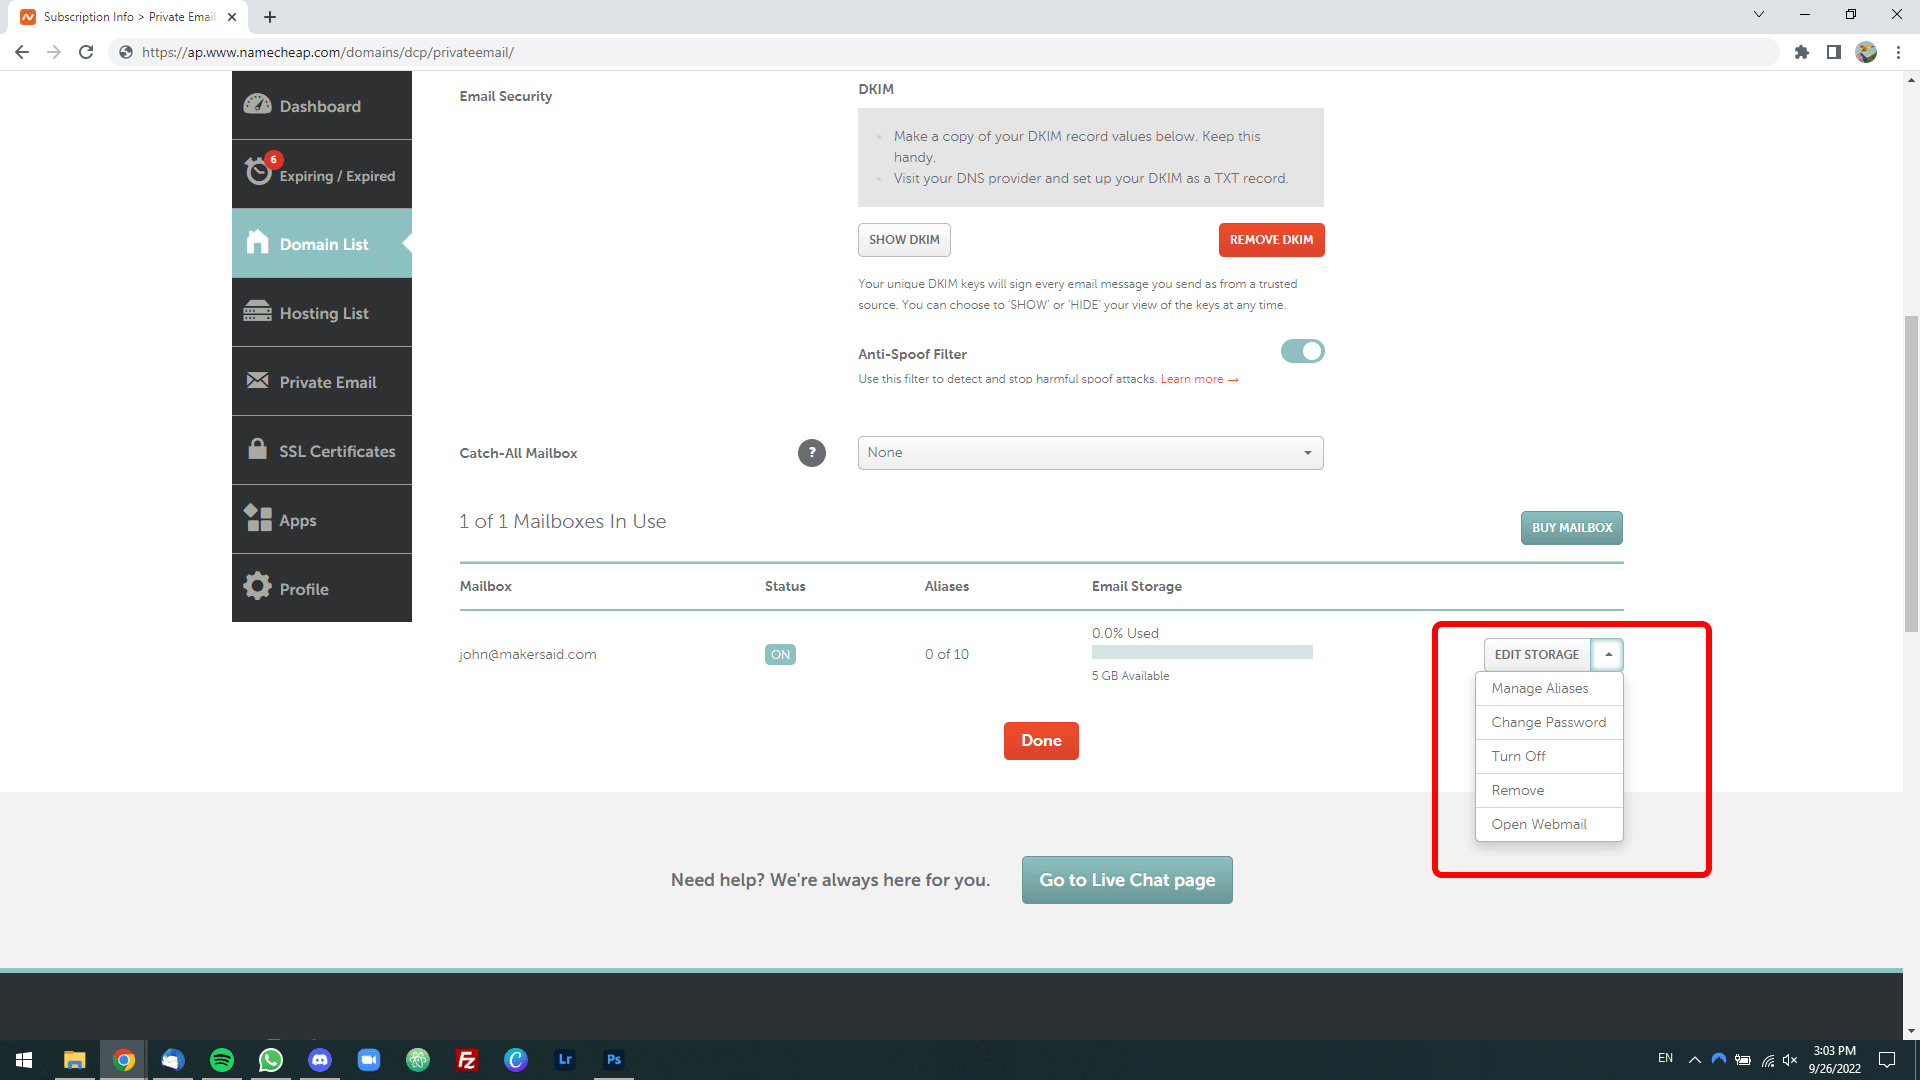
You’re all set!
Repeat the steps in Part 2 of this tutorial for as many mailboxes as you need to.
To use any of your email inboxes for the web, fire up your web browser on your computer, tablet, or phone, and then go to privateemail.com. (Think of this website as your new Gmail.)