
Not everyone knows that Canva can also be used to create and edit videos.
But you’re here reading this, which means you do! You also know that Canva, everyone’s favorite graphics editor, has a good selection of filters for images. And you’re wondering if the same is true when you’re editing videos.
It’s good that you’ve stopped by here, because this is exactly what we’re going to dive into in a moment. But before that, I’ll try to make a long story short:
No, Canva doesn’t have videos for filters, at least not in the way that it does for images. However, there are two ways to apply effects to your videos in Canva: One is to adjust the video’s settings, and the other is to create an adjustment layer of your own.
Now that we’ve gotten the basics out of the way, let’s look more closely at each of your two options for adding filters to videos in Canva.
Adjust the Video’s Settings
Canva lets you adjust the white balance, light, color, and texture of your video footage. If you mess around with these settings long enough, chances are you can make your footage much better than the original.
To do this, right-click on the video footage in the Canva editor so that the additional options for it appear in the top bar. Now click “Edit Video” and switch to the “Adjust” tab.
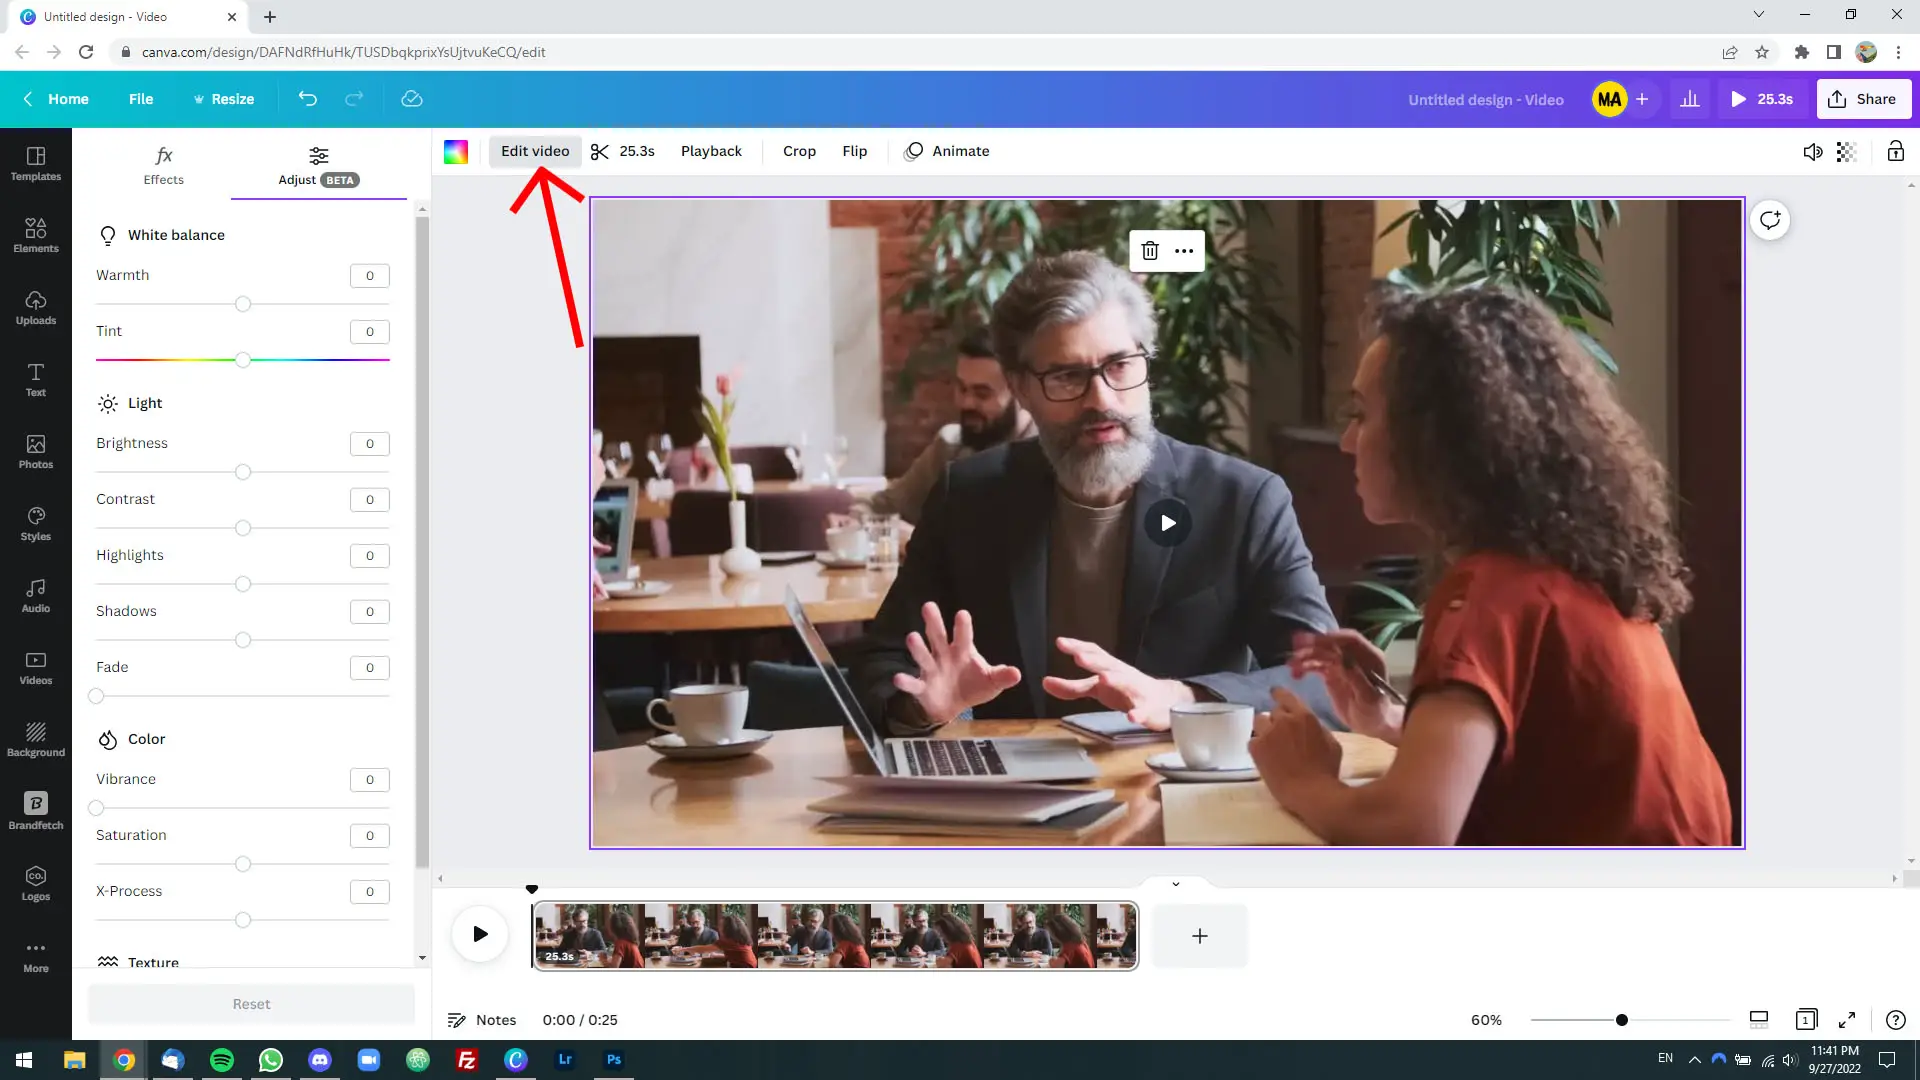
It’s from here that you can adjust the light, color, and texture of your video. This includes its warmth and tint; brightness, contrast, highlights, shadows, and fade; its vibrance, saturation, X-process, and texture.
Create an Adjustment Layer
An adjustment layer… Sounds fancy and sophisticated, I know! But believe me, creating one is much simpler than it sounds.
Essentially, an “adjustment layer” is a shape that sits on top of your video and takes up the full height and width. It has a certain color and transparency, so it overlays your video to give it an Instagram-like filter effect.
How to create an adjustment layer for your video in Canva:
Step 1: Fire up your favorite web browser and go to Canva.com.
Step 2: Open the video you want to add a filter to or create a new one.
Step 3: Go to the “Elements” tab, type “square” into the search box, and hit the Enter key on your computer’s keyboard.

Step 4: Left-click on the topmost left design element, then drag it and drop it into your video. Now resize it so that it occupies 100% of the height and width.

Step 5: Keeping the square selected, give it any color and set its transparency to any value from 25% to 75%.
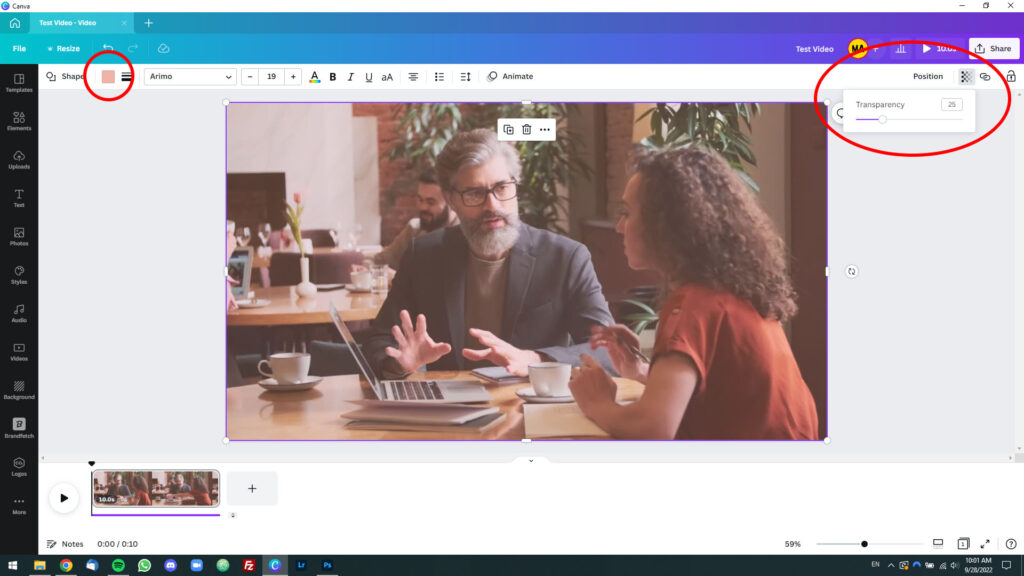
Step 6: Fool around with the color and transparency until you come to the setting you like the most.
You’re all set!
You’ve just created an adjustment layer and applied a filter to your image. For best results, combine this technique with changes to the colors and lighting of the video in the “Adjustment” tab as shown above.